- Insert a SIM card into the Greenflux controller, power up the charge point and connect your laptop to the ethernet port.
Please note: To activate the port, unplug the ethernet cable, wait several seconds then re-insert the cable. -
Ensure the ethernet network on your laptop is configured correctly. Follow the instructions below:
Open Network and Internet Settings>Ethernet>Edit IPv4>IPv4 On>Set laptop IP to 10.1.0.111
For further information on this process please refer to the document linked below:
- Open a web browser such as Mozilla Firefox or Google Chrome and enter the following IP address into the search bar: 10.1.0.110.
- Enter the unique password as supplied by the client or manufacturer to login and select Configuration from the menu.

-
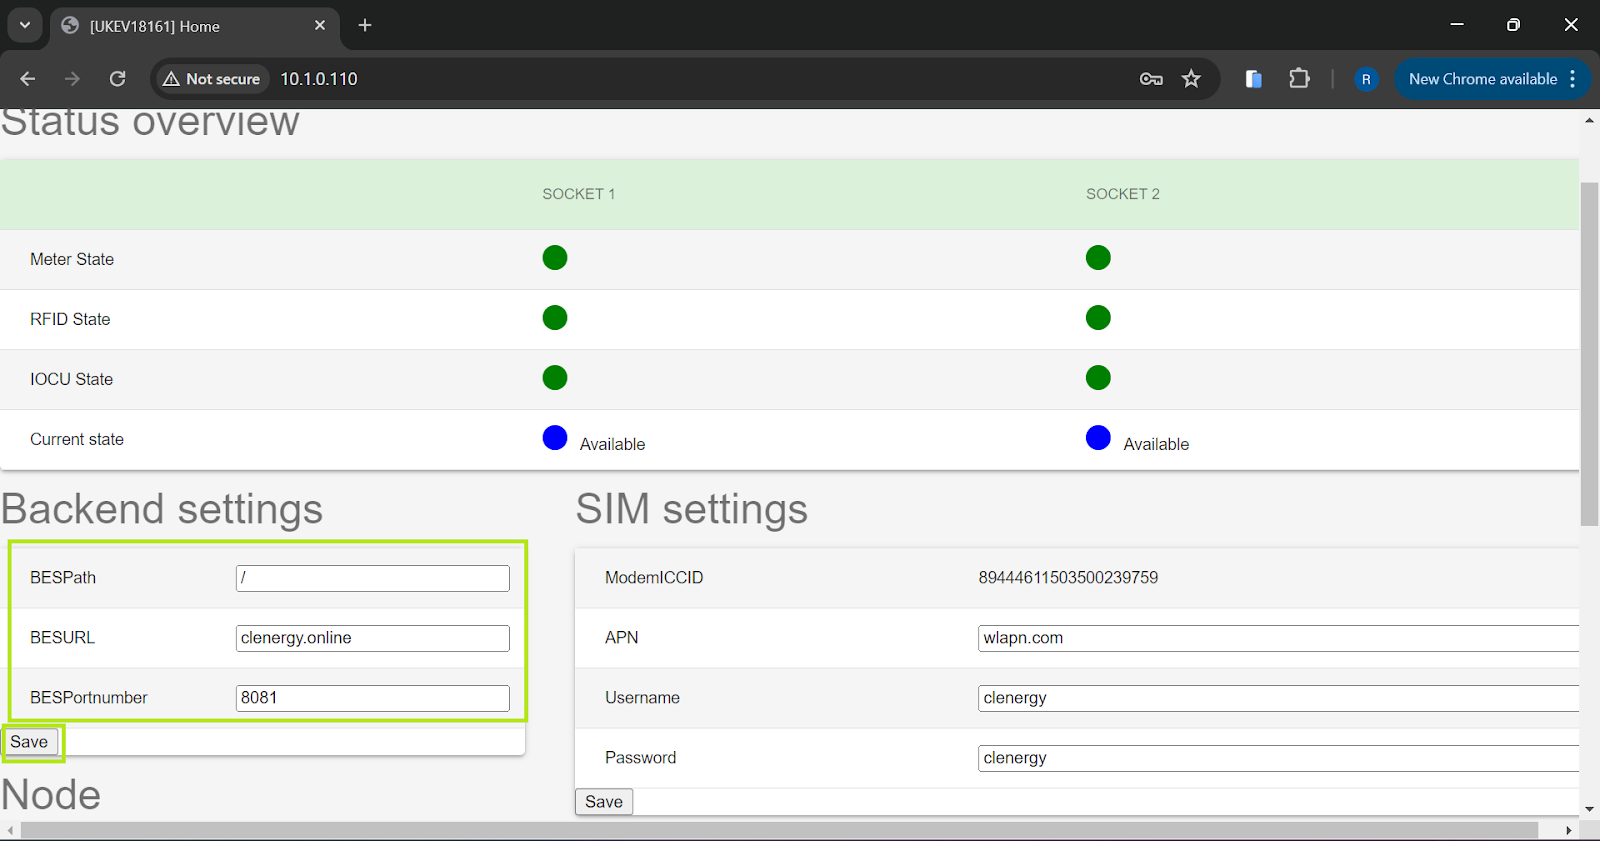
In the Backend settings menu, enter the following information into the relevant fields then select Save.
BESPath: /
BESURL: clenergy.online
BESPortnumber: 8081
-
If using a Clenergy EV-supplied SIM card, in the SIM settings menu enter the information below into the relevant fields then select Save.
APN: eapn1.net (Conexa SIM card) or wlapn.com (KPN SIM card)
Username: clenergy
Password: clenergy
In the event a 3rd party SIM card is being used, please refer to the supplier or manufacturer for the correct details.
- Select Reboot at the top of the screen to complete a power cycle and complete the onboarding process. Please allow the charge point up to 5 minutes to connect to the Clenergy EV platform.
English