📱 To download a mobile friendly version of this charger's onboarding guide, please click here.
- Before powering up the charger, photograph or take note of the WIFI and portal login details on the white label inside the charger or as provided with the charger.
- Power up the charger and wait for the LED to turn from White to Blue. At this point the charger's WIFI hotspot should become available and will display as the following format: eo-############
- Select the security key option to enter the password. Enter the WIFI hotspot password as described on the charger label. Please note: This process will vary from device to device.
- Navigate to the EO charger portal by entering 10.10.10.1 into the navigation bar of the web browser on your device.
- Once the portal has loaded, login using the details provided on the charger label.
- On the home screen, open the drop-down menu and Select Network.
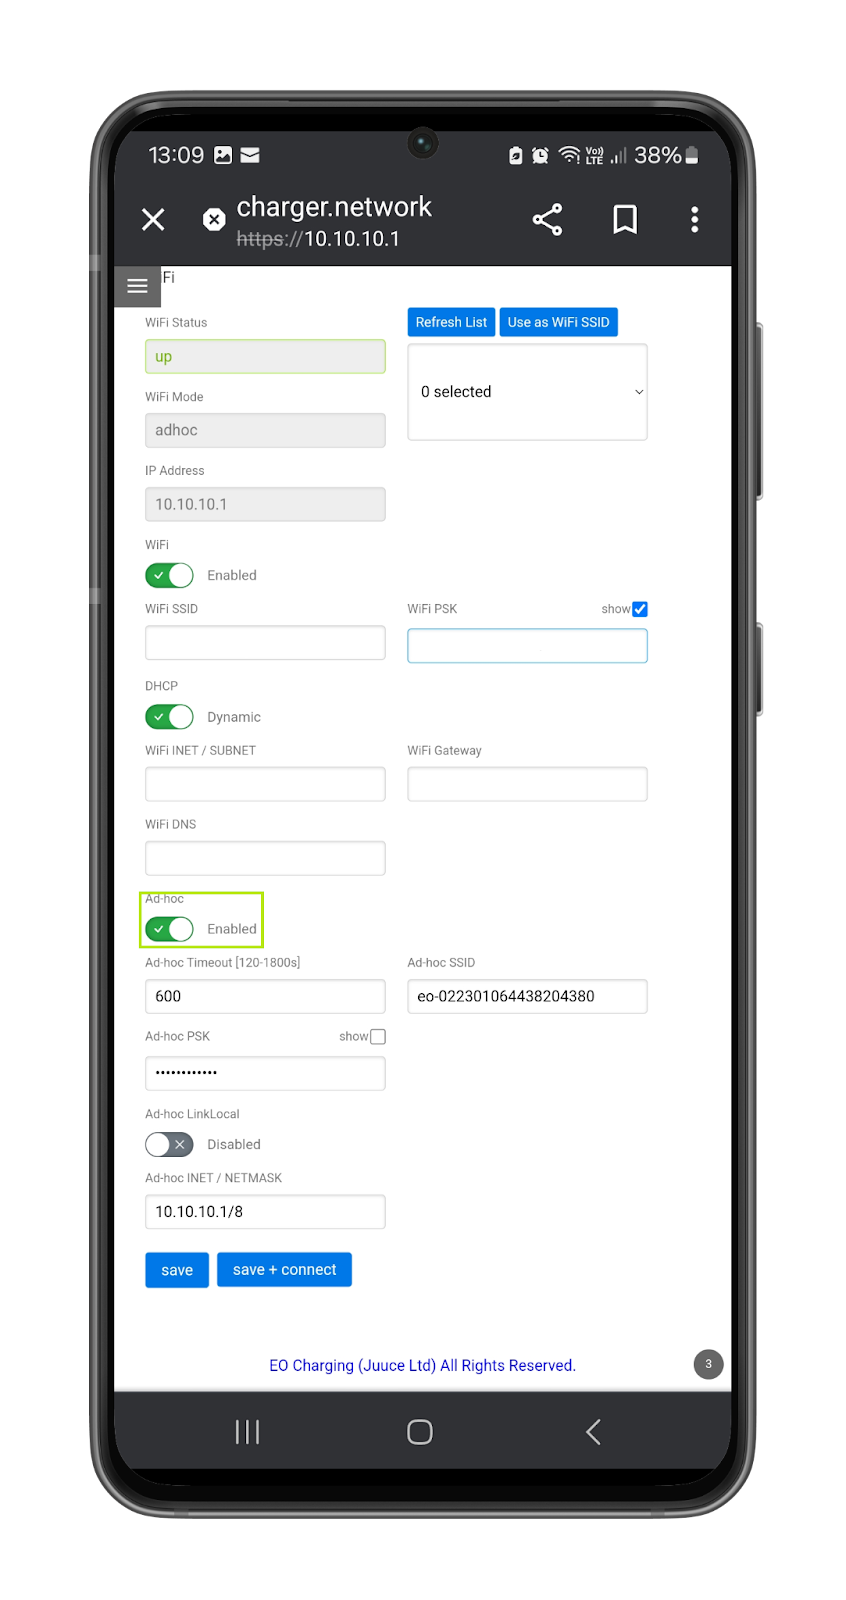
- Configure the network settings as required for your installation using the relevant credentials. Please note: It is recommended to ensure that the Ad Hoc Wifi remains enabled (as highlighted below) in order to access the charger easily if required. Select Save. If connecting via 4G/SIM please use the following credentials, referring to the specific SIM manufacturer:
CONEXA SIM APN: eapn1.net
KPN SIM APN: wlapn.com
Password/Username (for both suppliers): clenergy
In the event a 3rd party SIM is being used please refer to the supplier or manufacturer for the correct details.
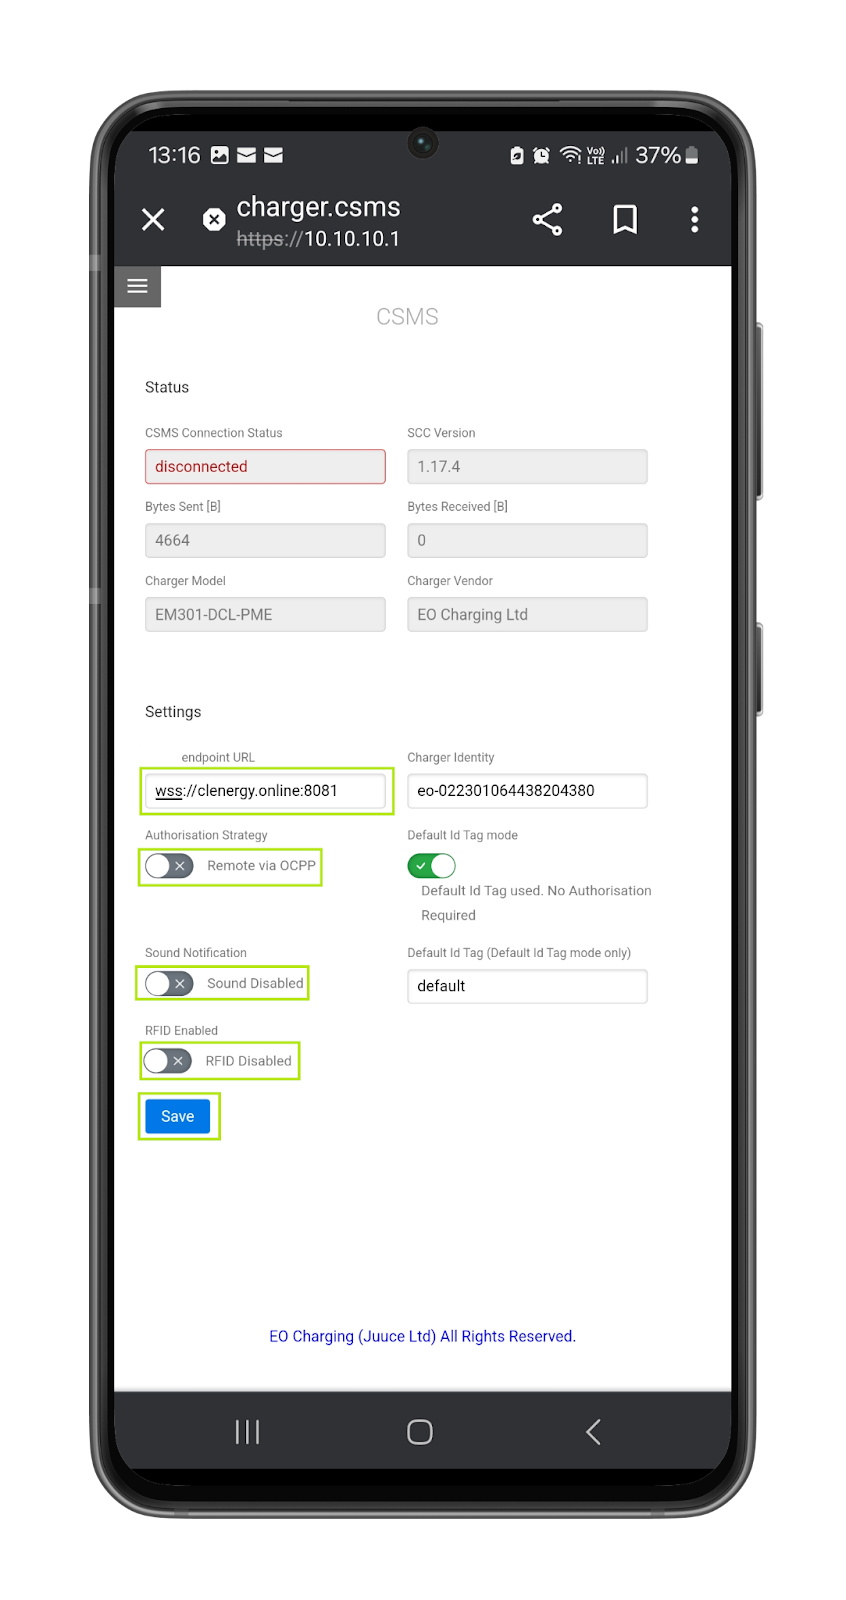
Please note: If onboarding using the Clenergy EV Engineer app, set the Ad Hoc Timeout to 120 seconds to avoid issues when rebooting the charge point. - Navigate to the CSMS screen using the side menu and enter the following URL into the CSMS Server Address field wss://clenergy.online:8081. Set all other options as displayed below and select Save.
- Use the side menu to access the relevant sections to update firmware if necessary and configure the date/time and electrical settings as required. Power cycle the charger to complete the process.