📱 To download a mobile friendly version of this charger's onboarding guide in a PDF format, please click here.
- Download the Easee Installer app for your Android/Apple device from the relevant app store.
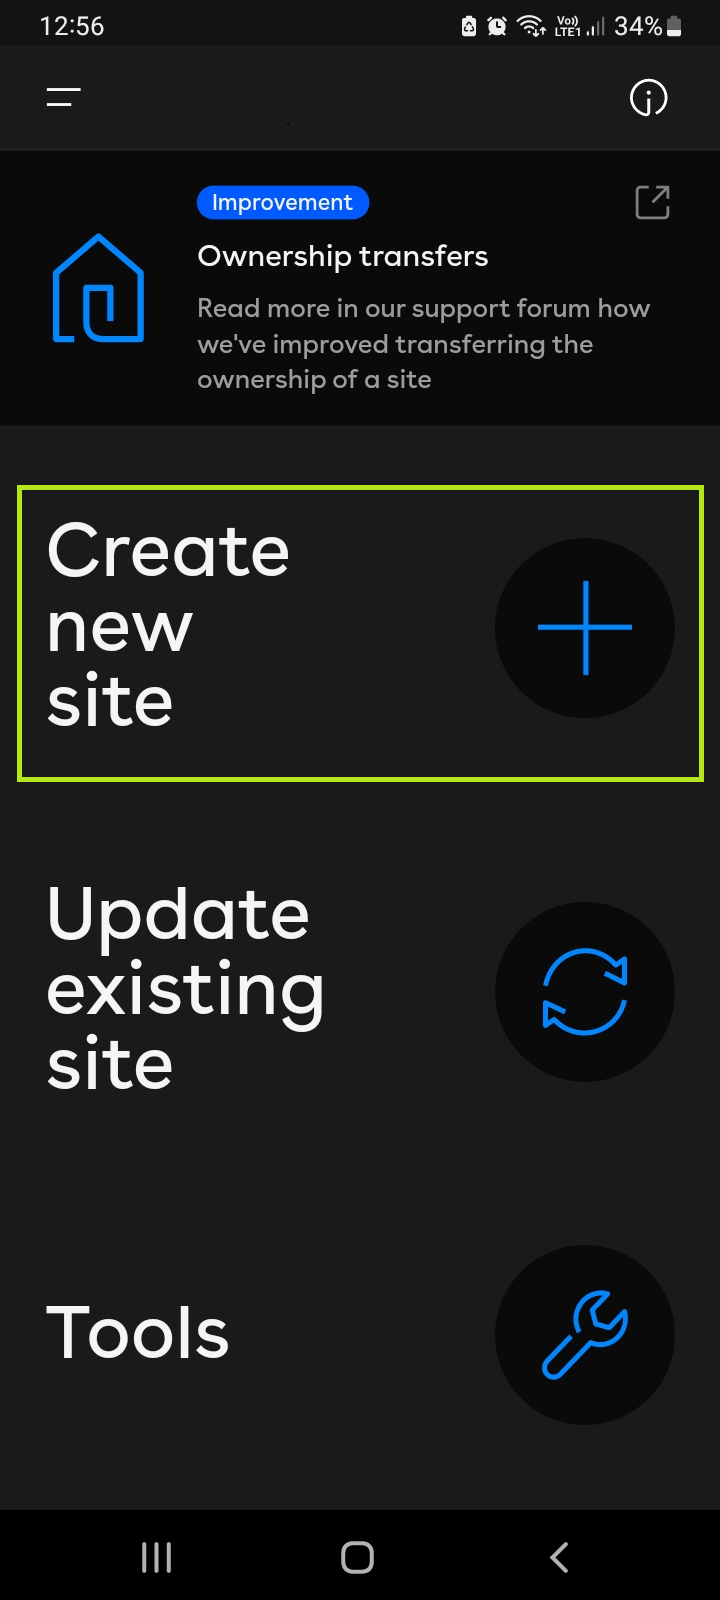
- Install and open the app on your device. Register as an installer. Select Create new site to proceed.
- Select the relevant type of installation - Domestic or Commercial.
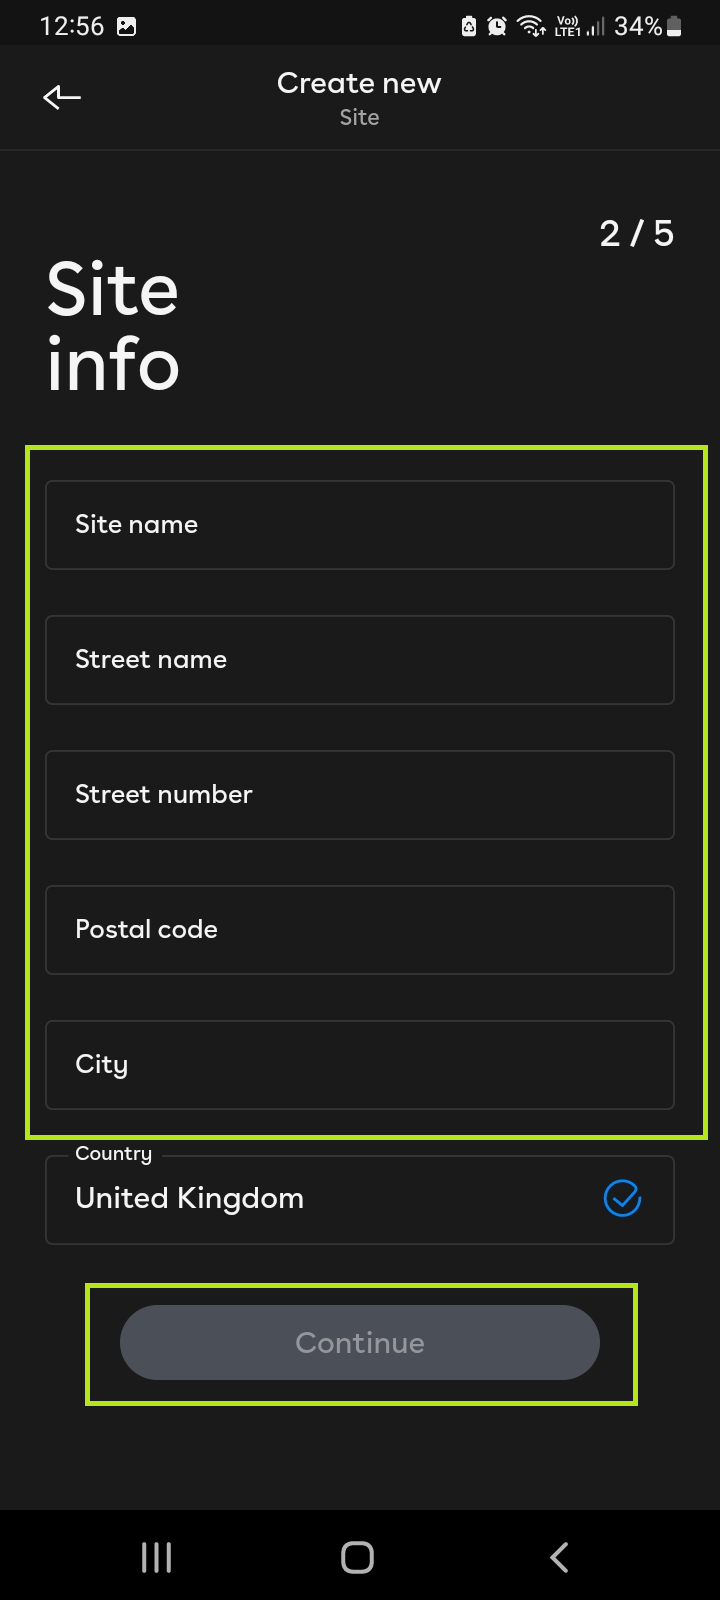
- Enter the required information in the relevant fields and select Continue. (Please note: The menu displayed below is for commercial sites; the domestic menu will only require site name, reference and country)
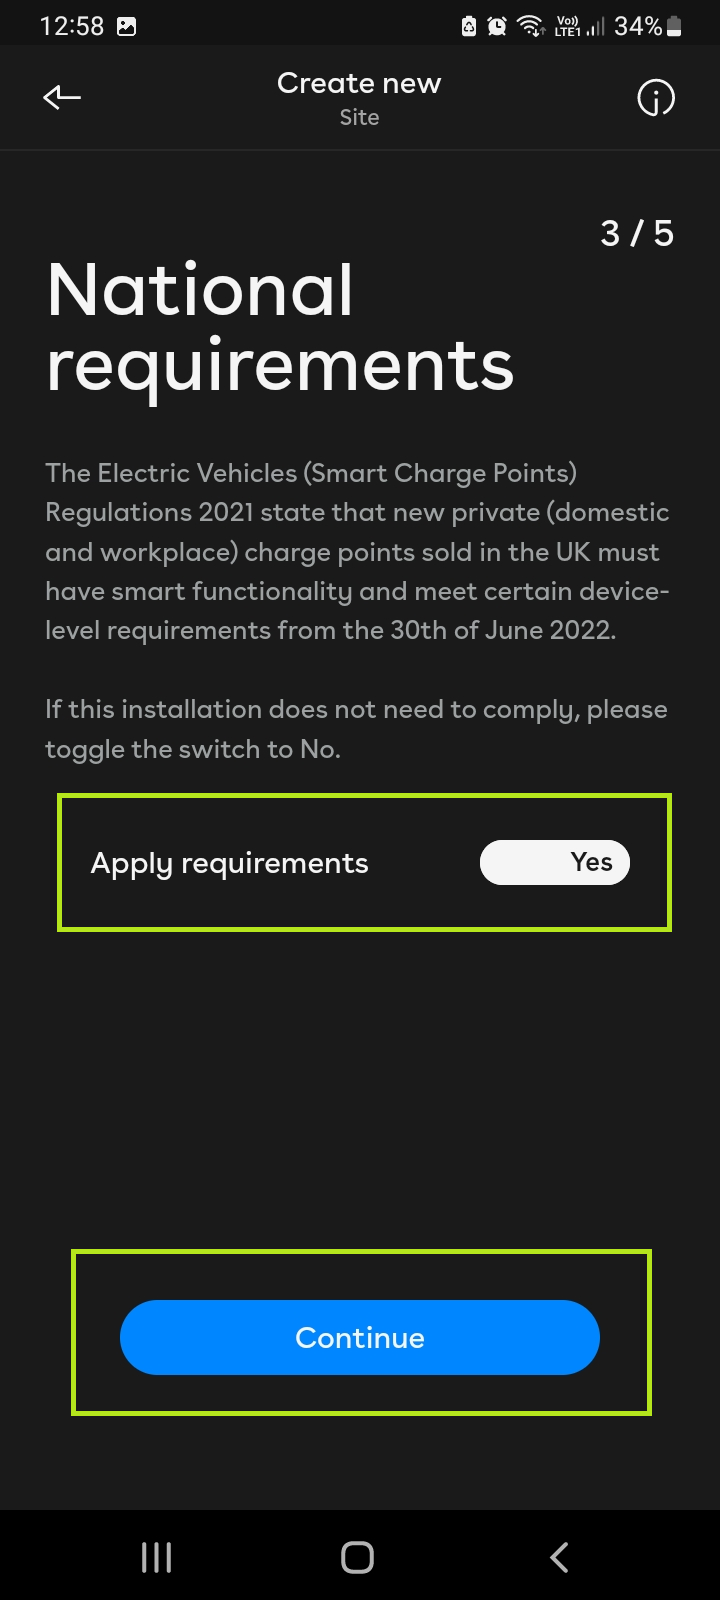
- Toggle the Apply Requirements option to the Yes position and select Continue.
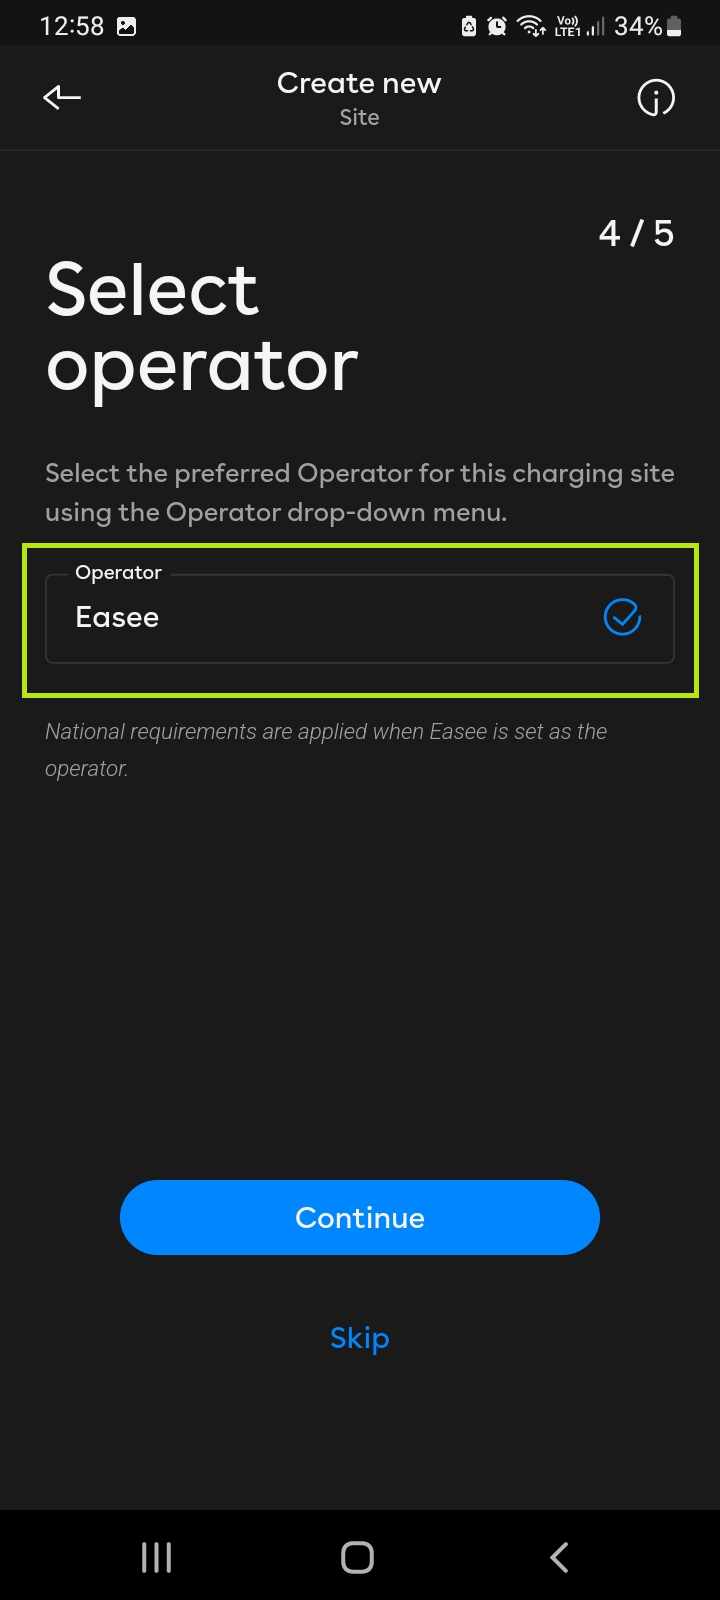
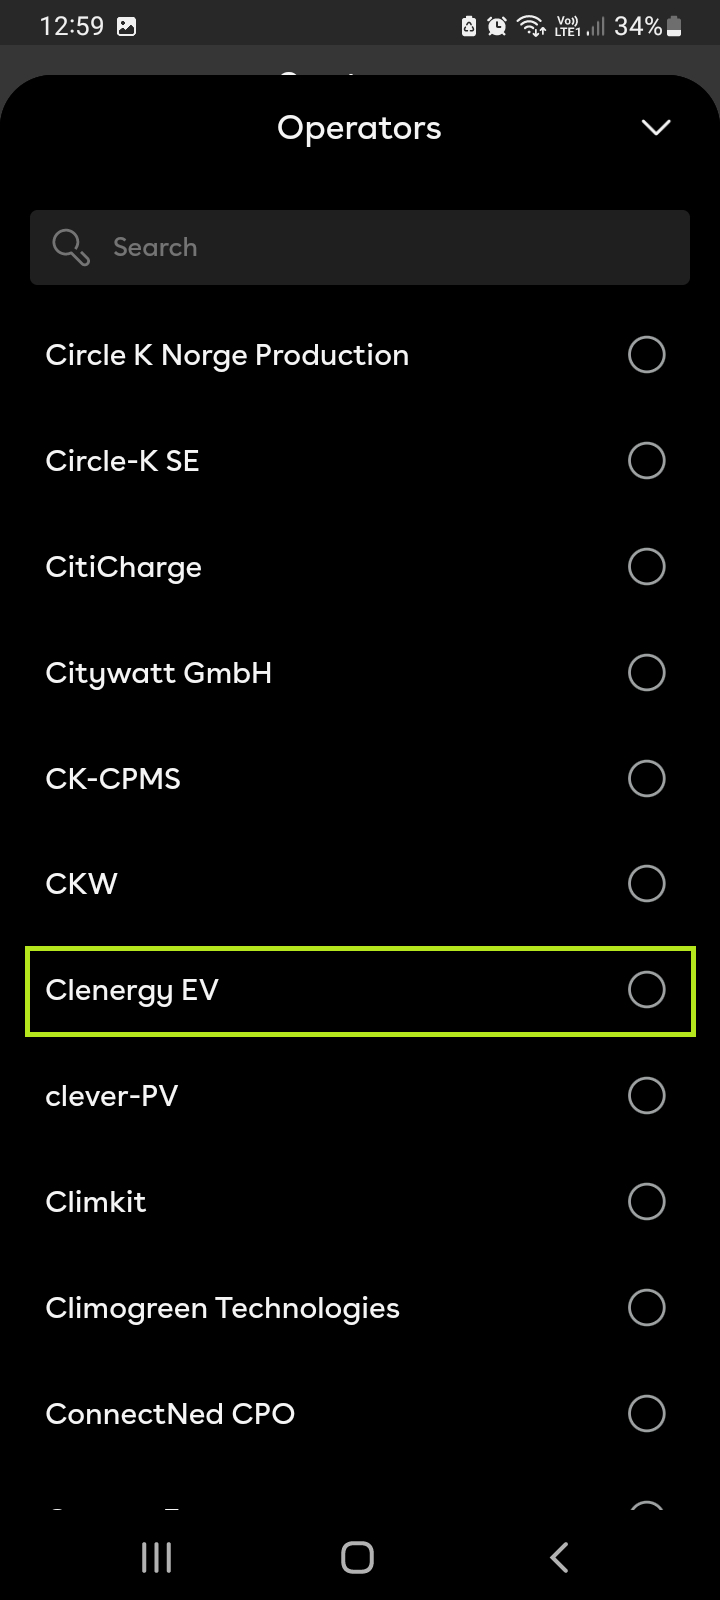
- Select the drop down menu where Easee is currently displayed by default.
- Search for Clenergy EV in the search bar or scroll down and select Clenergy EV from the drop down menu.
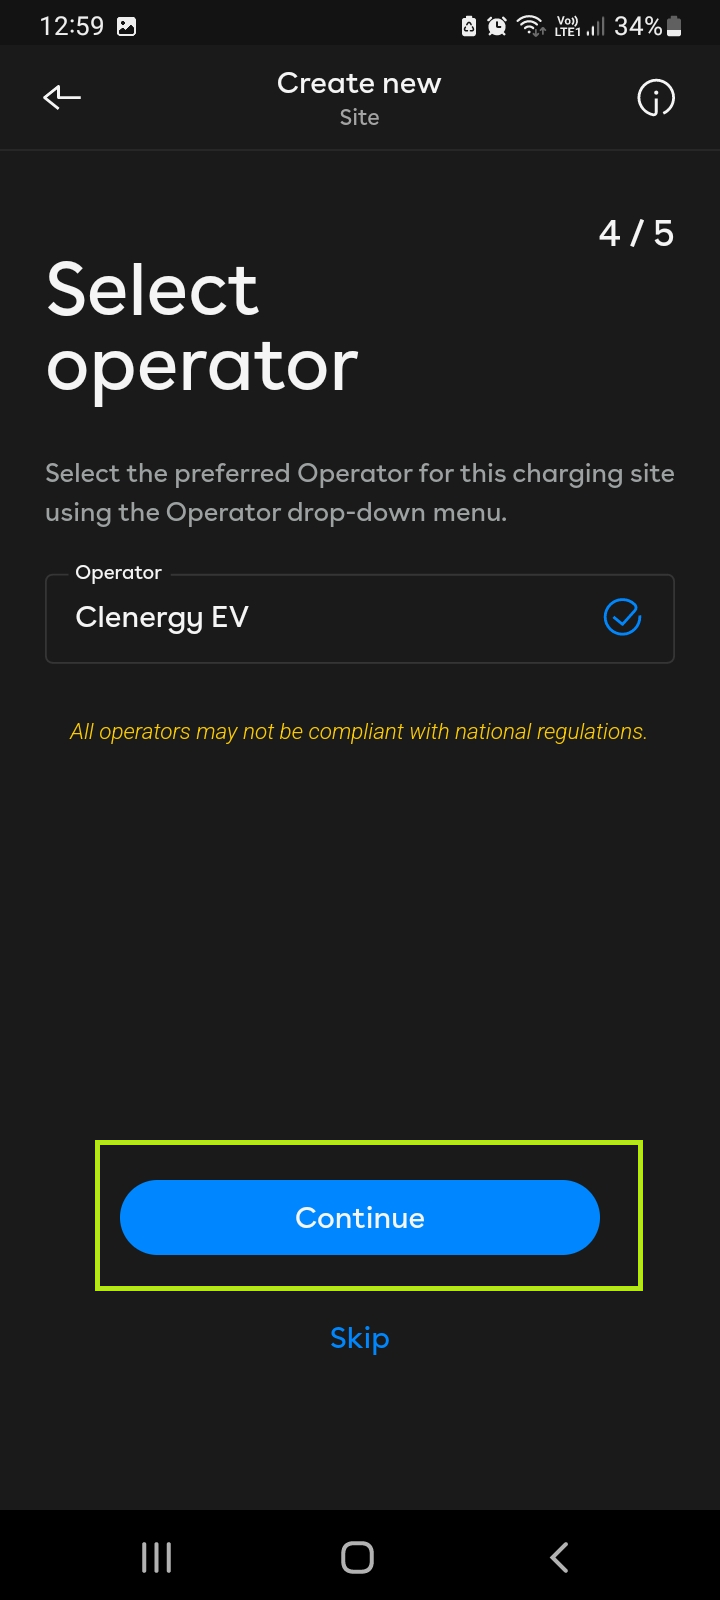
- Ensure Clenergy EV is now displayed in the Operator field then select Continue to Proceed.
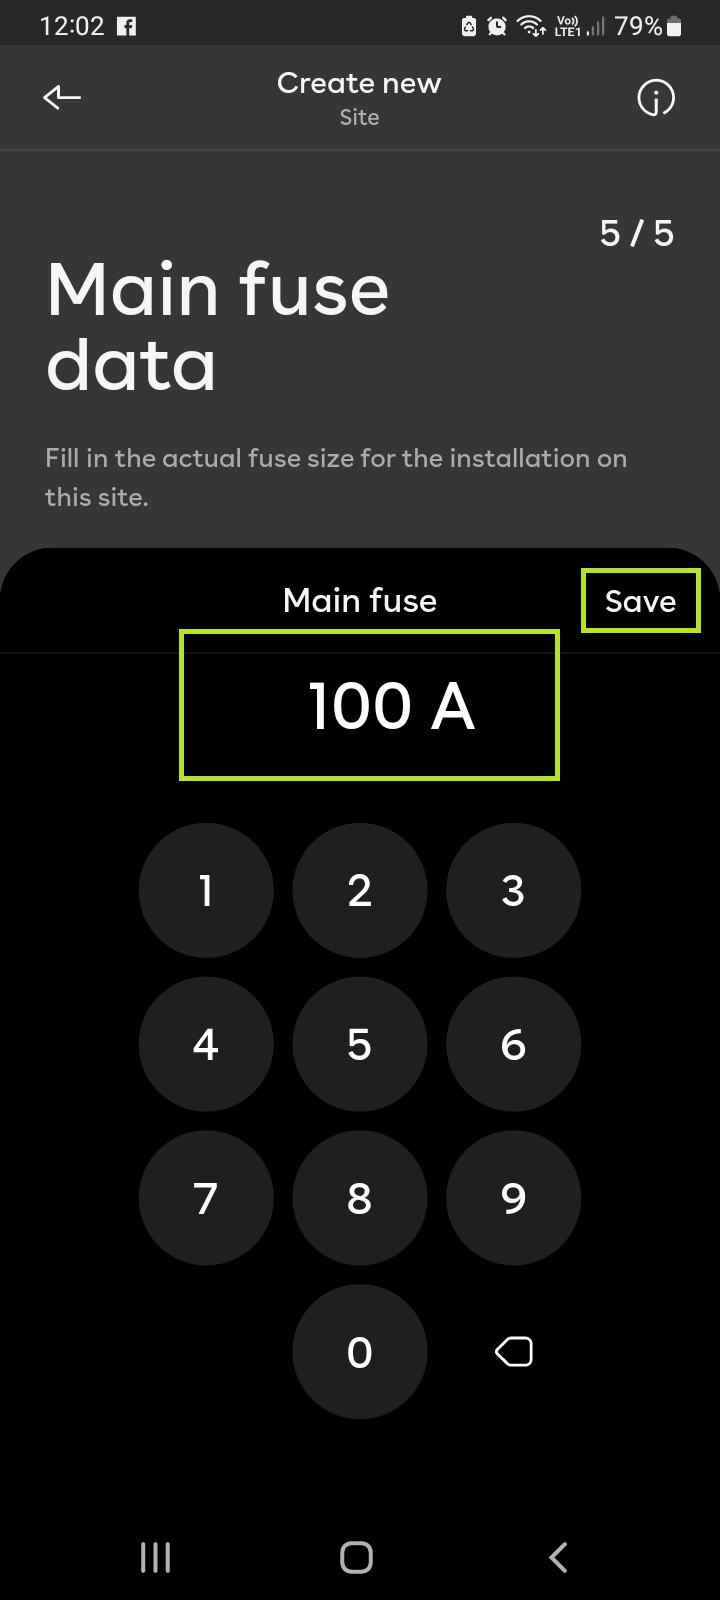
- Enter the relevant Main fuse size for the installation then select Save to proceed.
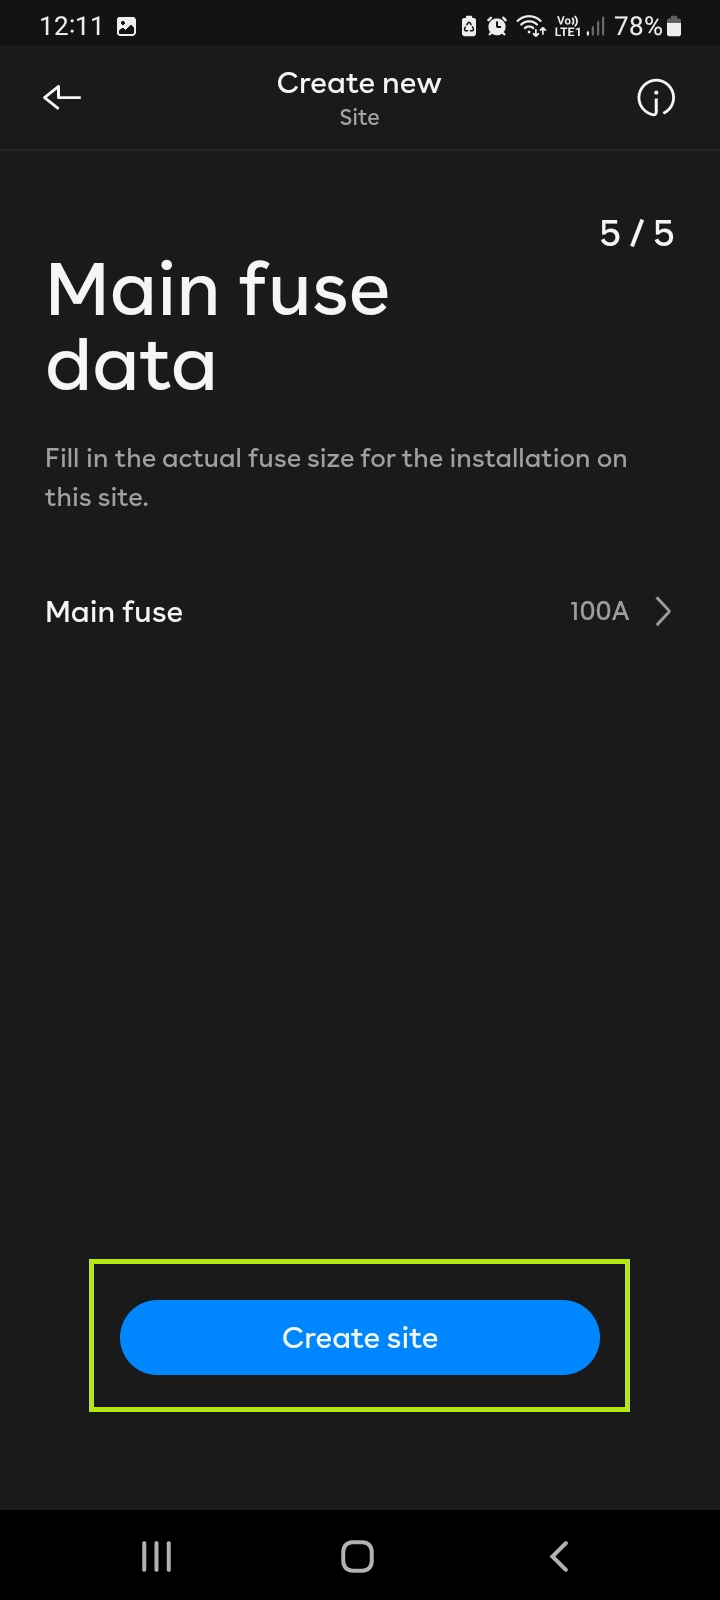
- Check that the Main fuse size is correct and select Create site to proceed.
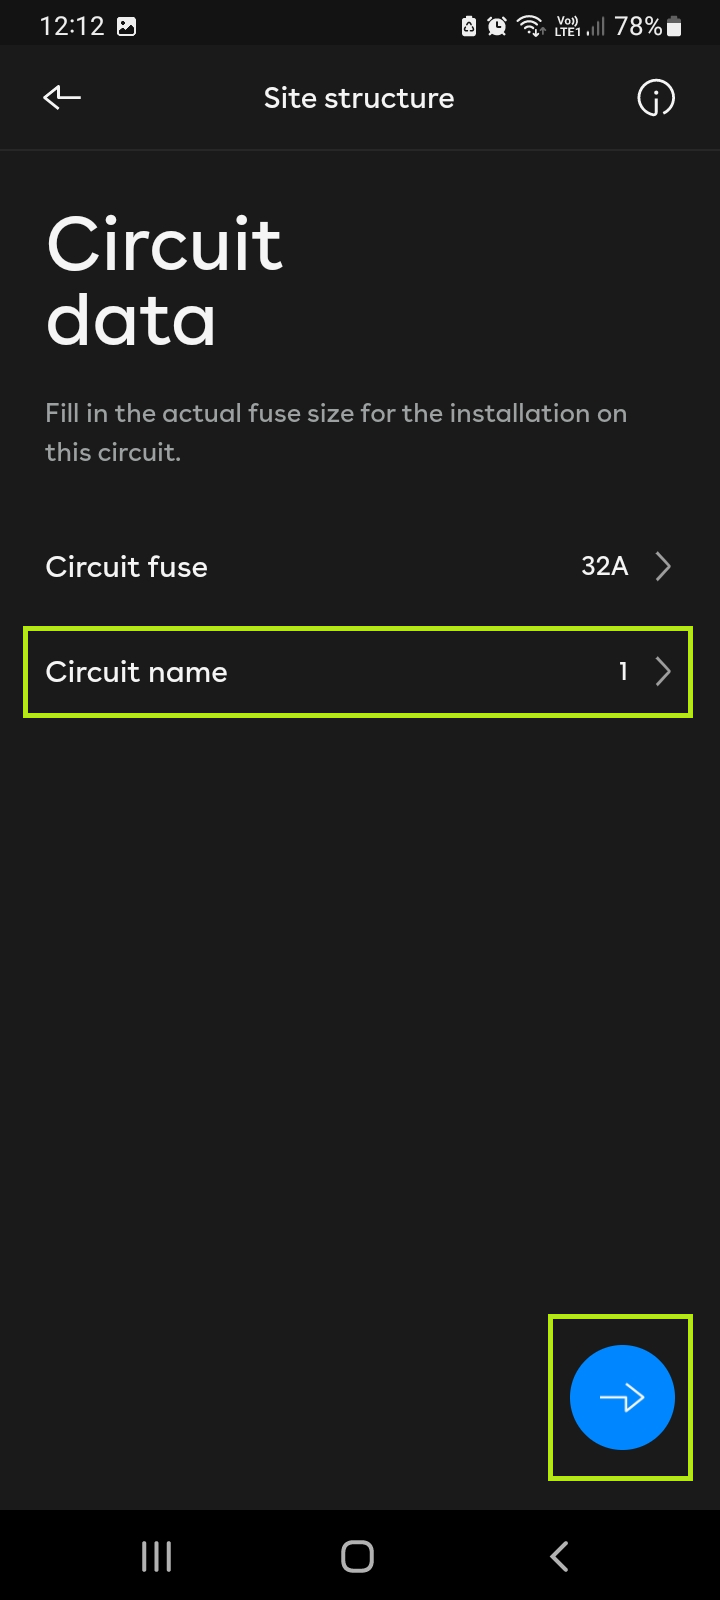
- Enter the Circuit fuse rating.
- If required, select Circuit name to rename the circuit then select the blue arrow to proceed.
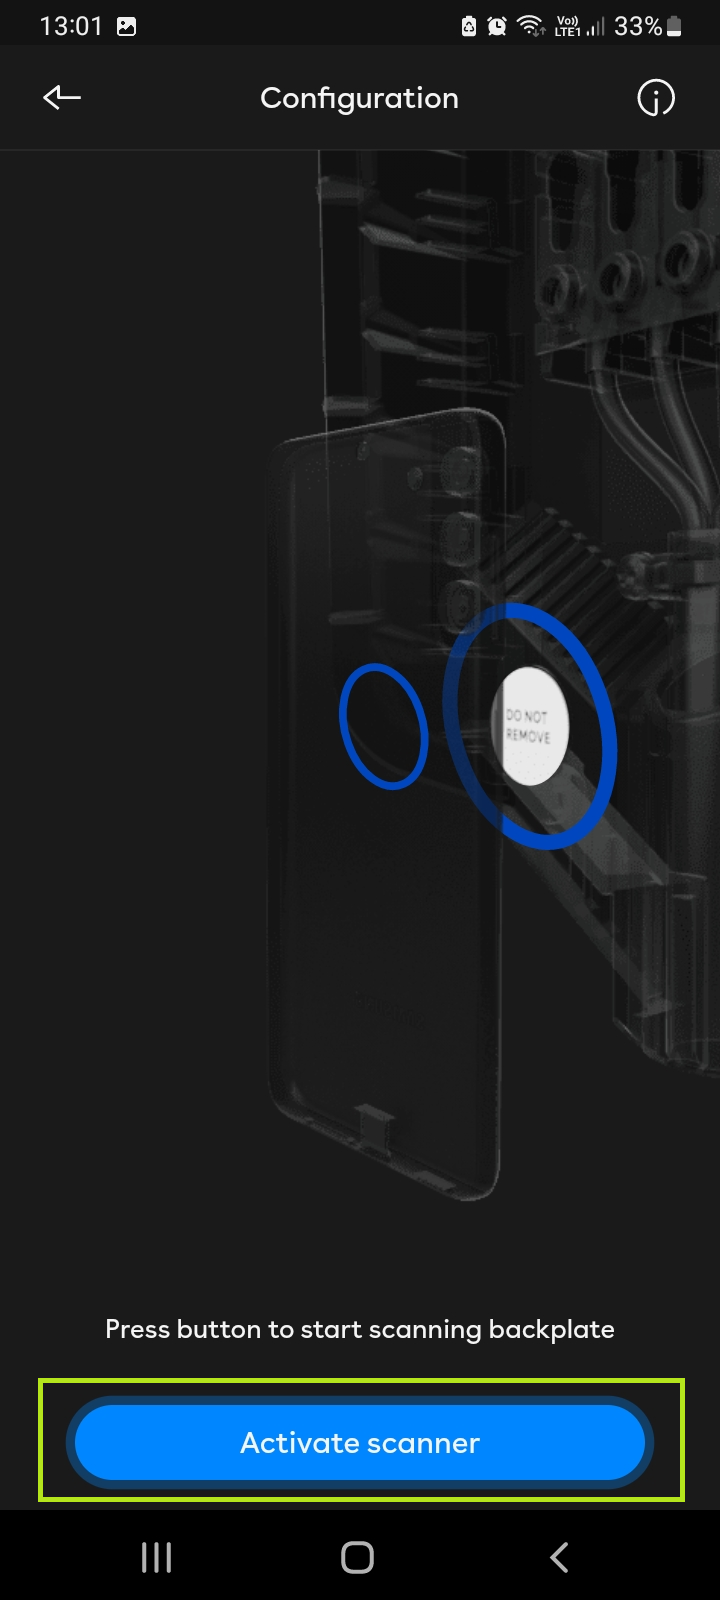
- Select Activate scanner to scan the NFC label on the backplate.
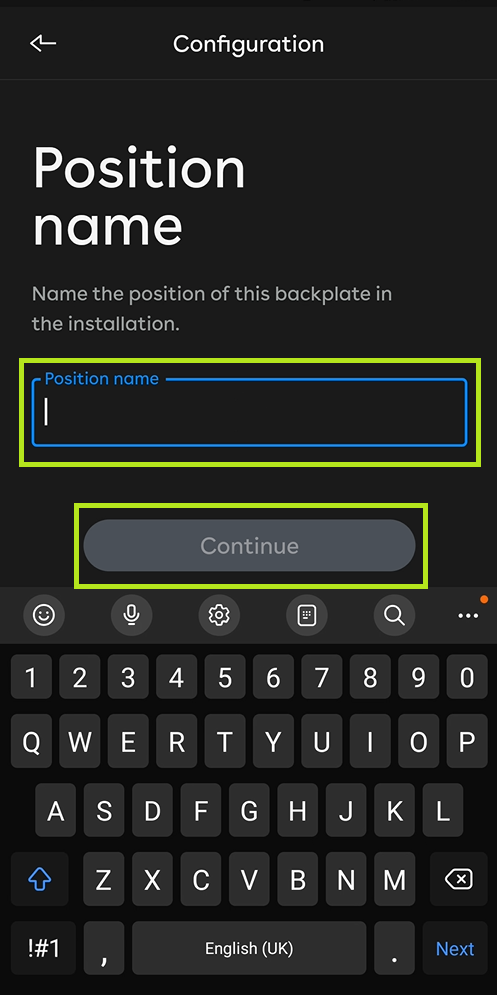
- Enter the Position Name and select Continue to proceed.
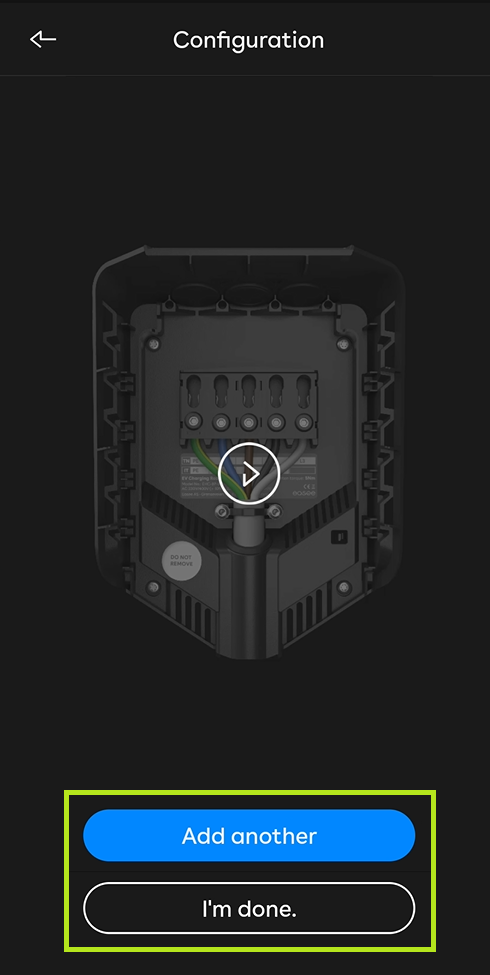
- Add further backplates or select I’m done if all relevant backplates to your circuit have been added.
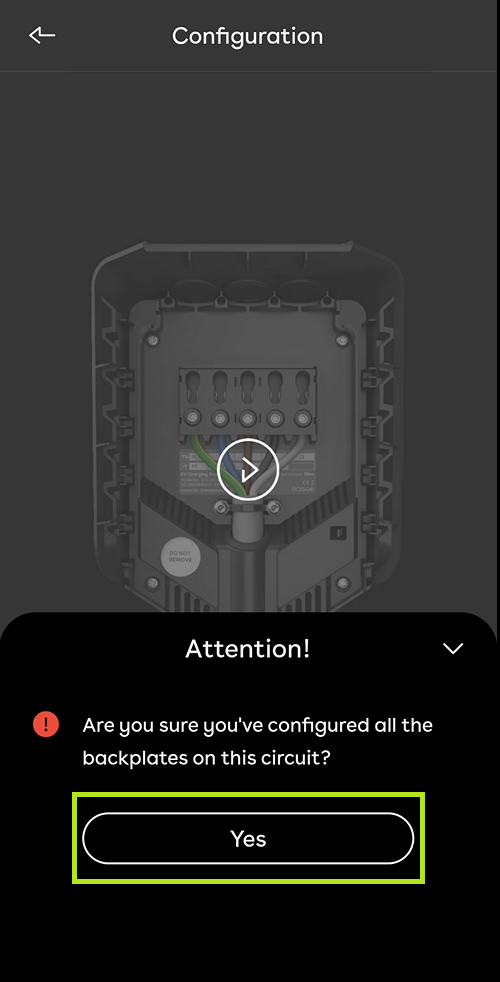
- Once all the relevant backplates have been added to the circuit select Yes to confirm and proceed.
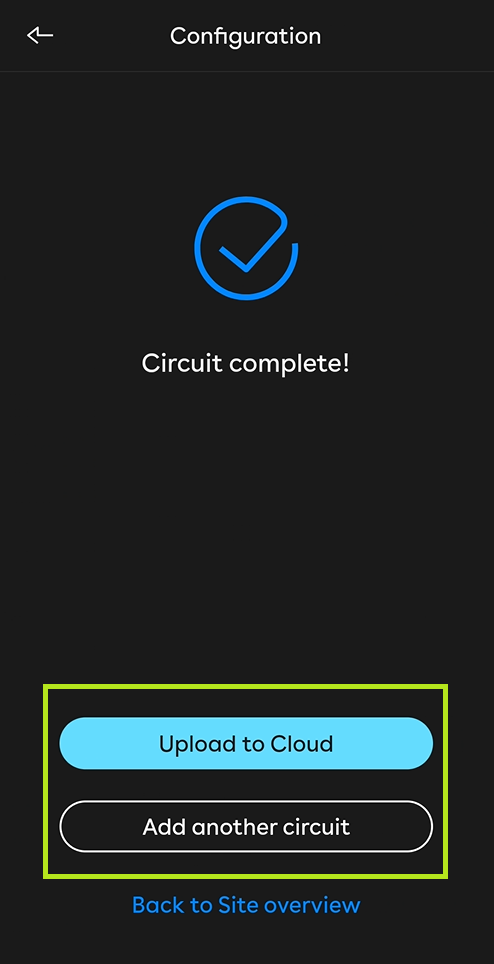
- Select Upload to Cloud if all circuits have been added or select Add another circuit if required.
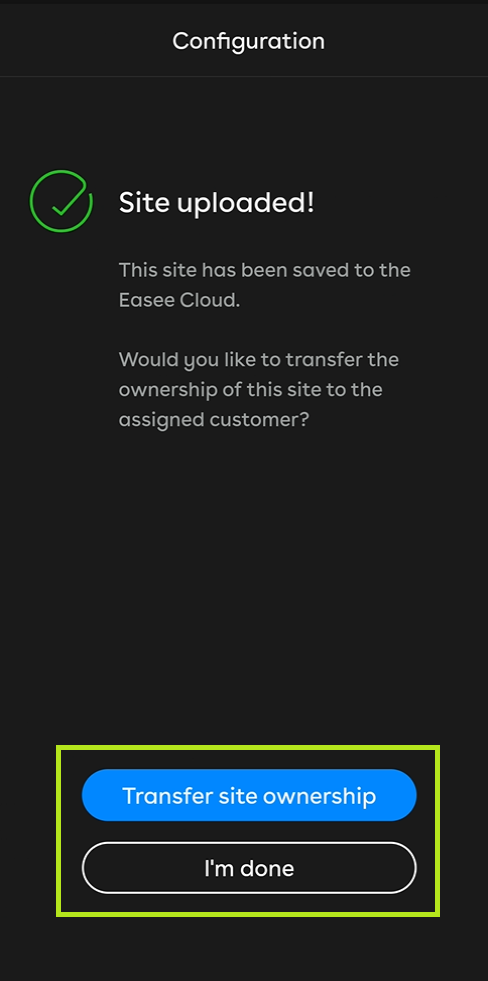
- Select Transfer site ownership if required or I’m done if this is not relevant.