📱 To download a mobile friendly version of this charger's onboarding guide in a PDF format, please click here.
-
Download the Autel Config app for your device from the relevant app store. Please note: Ensure you are registered as an installer and have received login details prior to attempting the onboarding process.
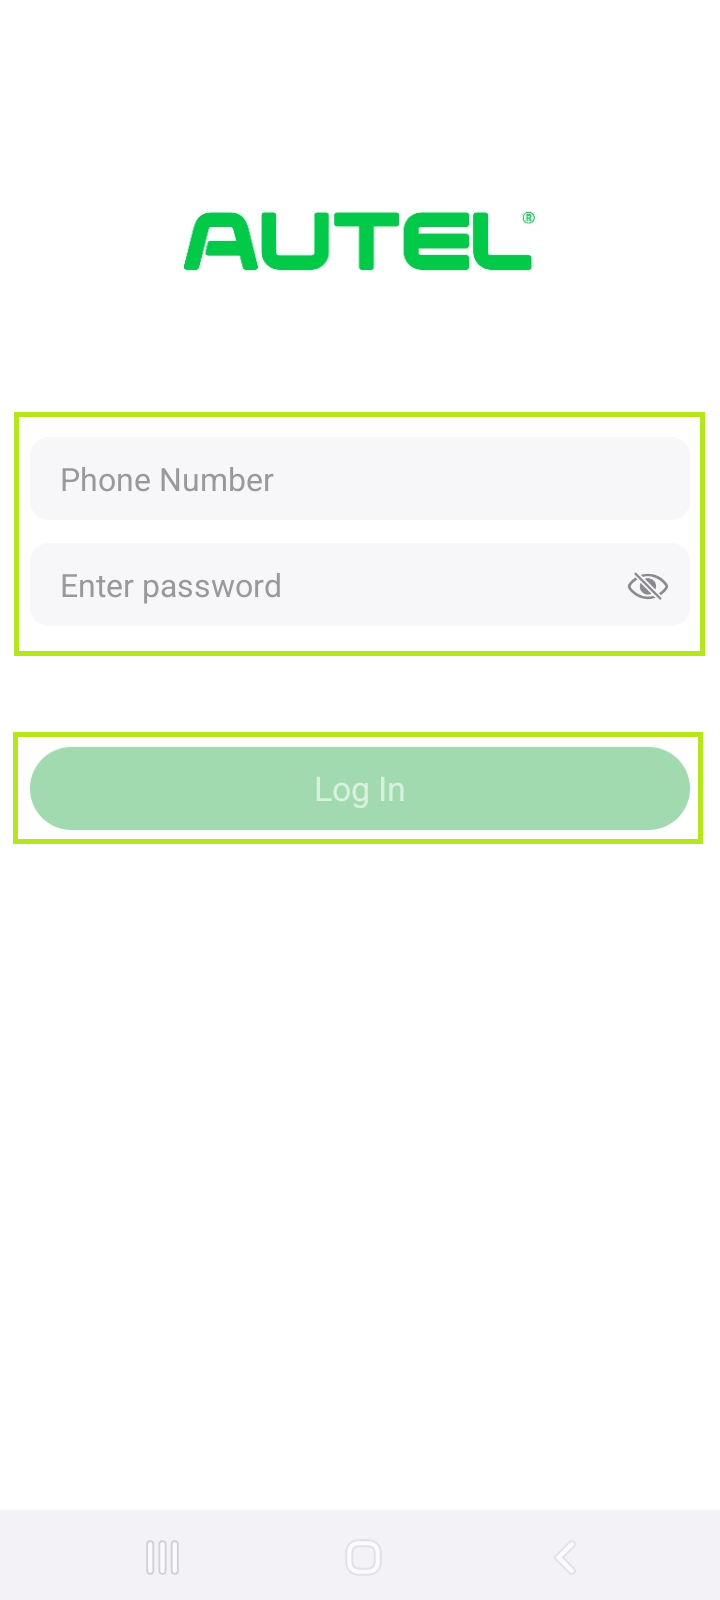
- Once downloaded and installed, open the Autel Config app and log in using the Autel-supplied credentials
-
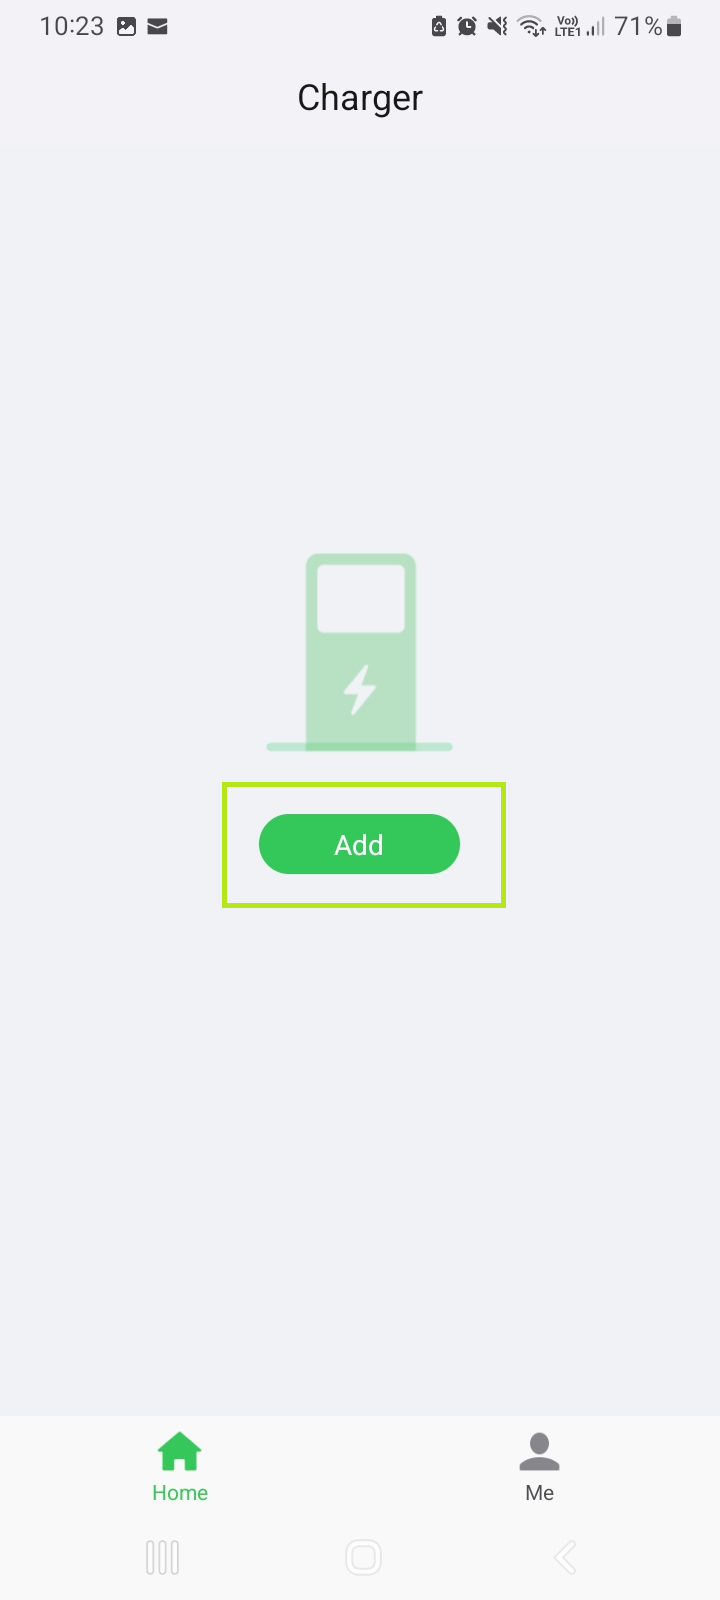
Select Add to proceed.
- Scan either the QR code provided with the chargers documents or the code located directly on the side of the charger. Once the details have loaded into the Serial Number and PIN fields, select Verify to proceed.
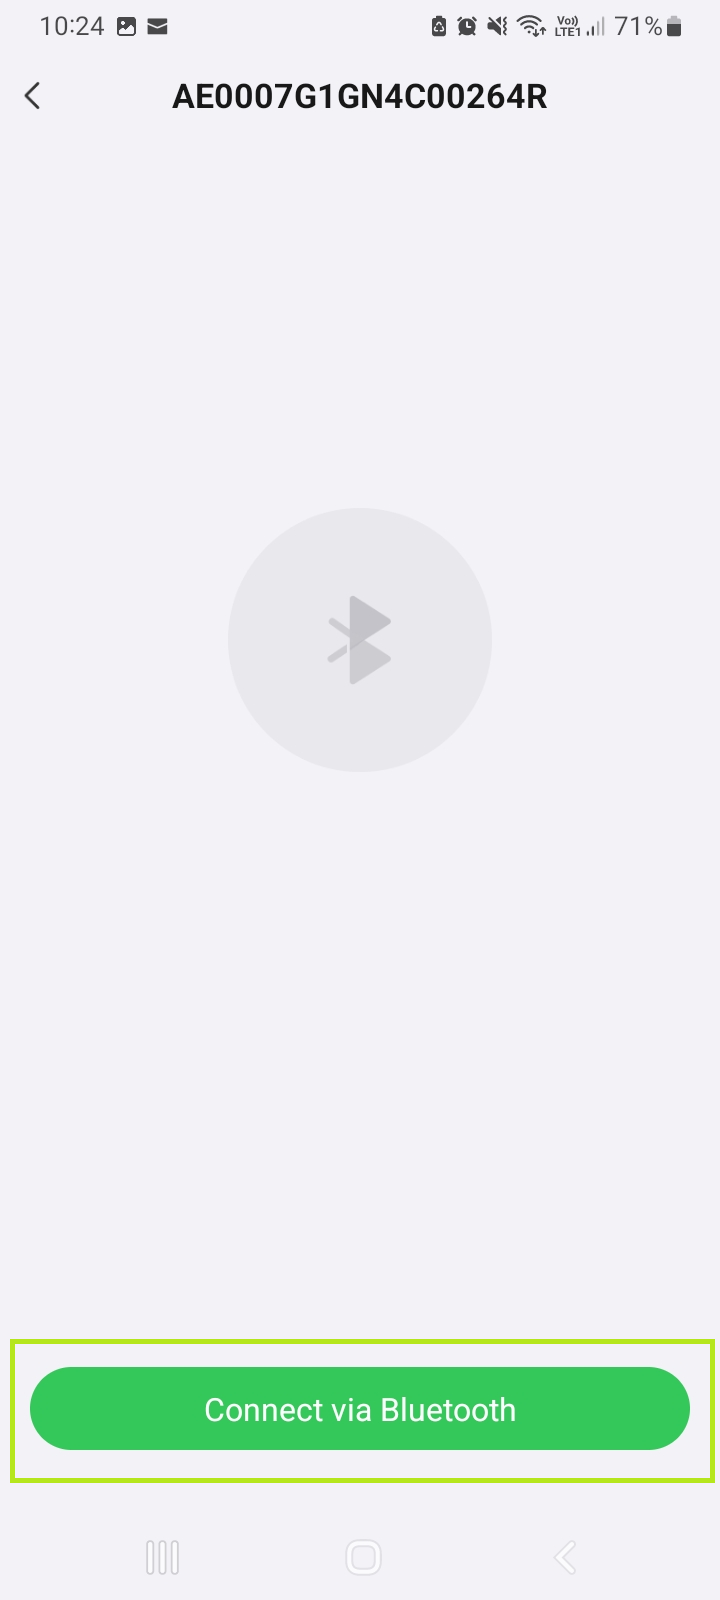
- Select your charger (identified by the serial number) and select Connect via Bluetooth.
- When prompted, select Pair to connect your device to the charger.
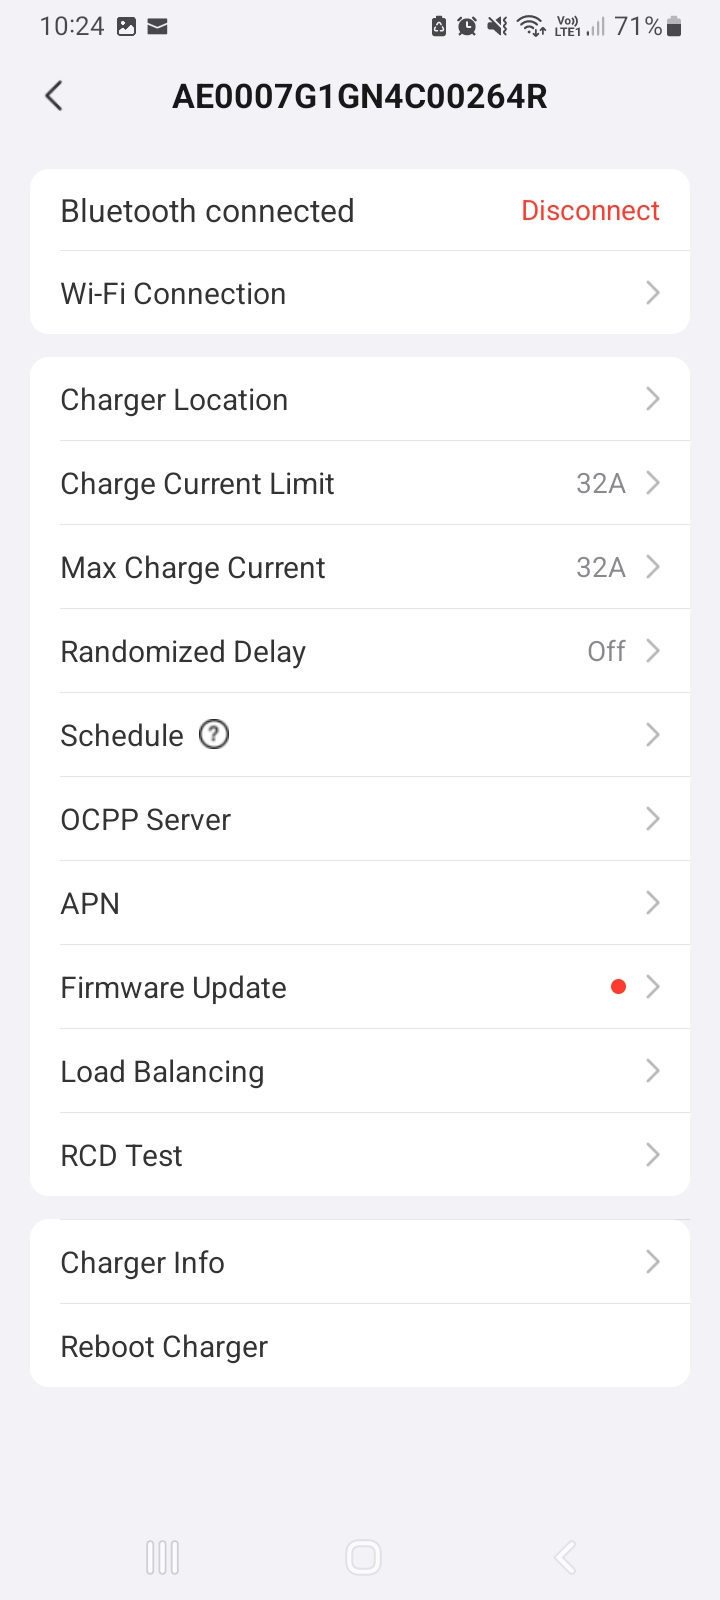
- On the chargepoint home screen, configure the network and electrical settings as determined by your installation by selecting the relevant options from the menu shown. Please note: Only one network connection type should be used at a time.
- If establishing a network connection to Clenergy EV via a Clenergy EV SIM card, select APN from the menu. If not please skip to page 13.
- Enter the relevant details into the APN, User Name and Password fields.
Please note: If using a Clenergy EV-supplied SIM card for the network connection please refer to the details below.
Conexa SIM APN: eapn1.net
KPN SIM APN: wlapn.com
Password/Username (for both suppliers): clenergy
In the event a 3rd party SIM card is being used, please refer to the supplier or manufacturer for the correct details.
Set the Protocol to IPv4/IPv6 and the Authentication Type to PAP/CHAP..jpg?width=367&height=795&name=Screenshot_20240729_135238_Autel%20Config%20(1).jpg)
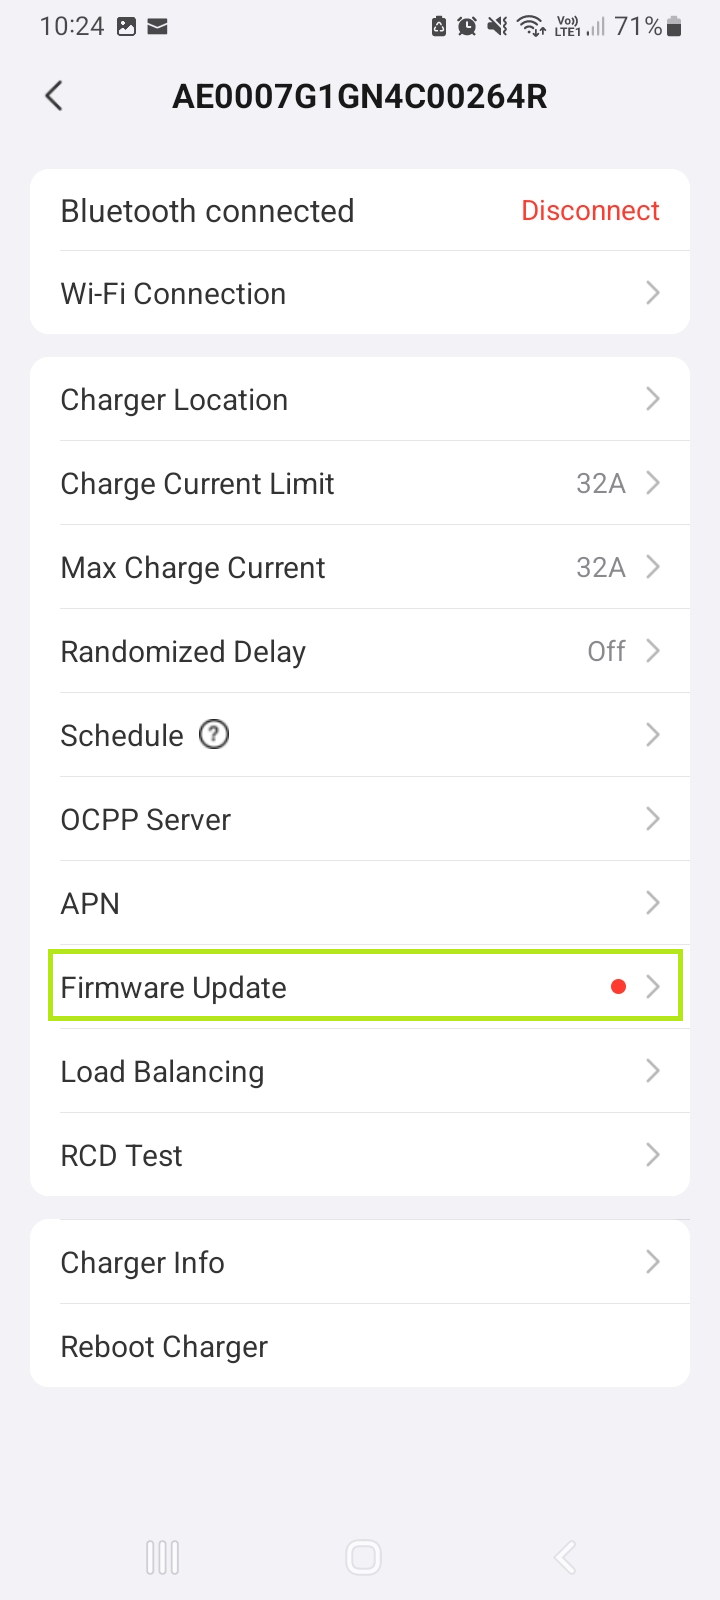
- On the chargepoint home screen, if the Firmware Update displays a red dot, then an update is required. Select Firmware Update and follow the onscreen instructions. Please note: It is recommended to use a Wifi/Hotspot connection to complete the firmware update.
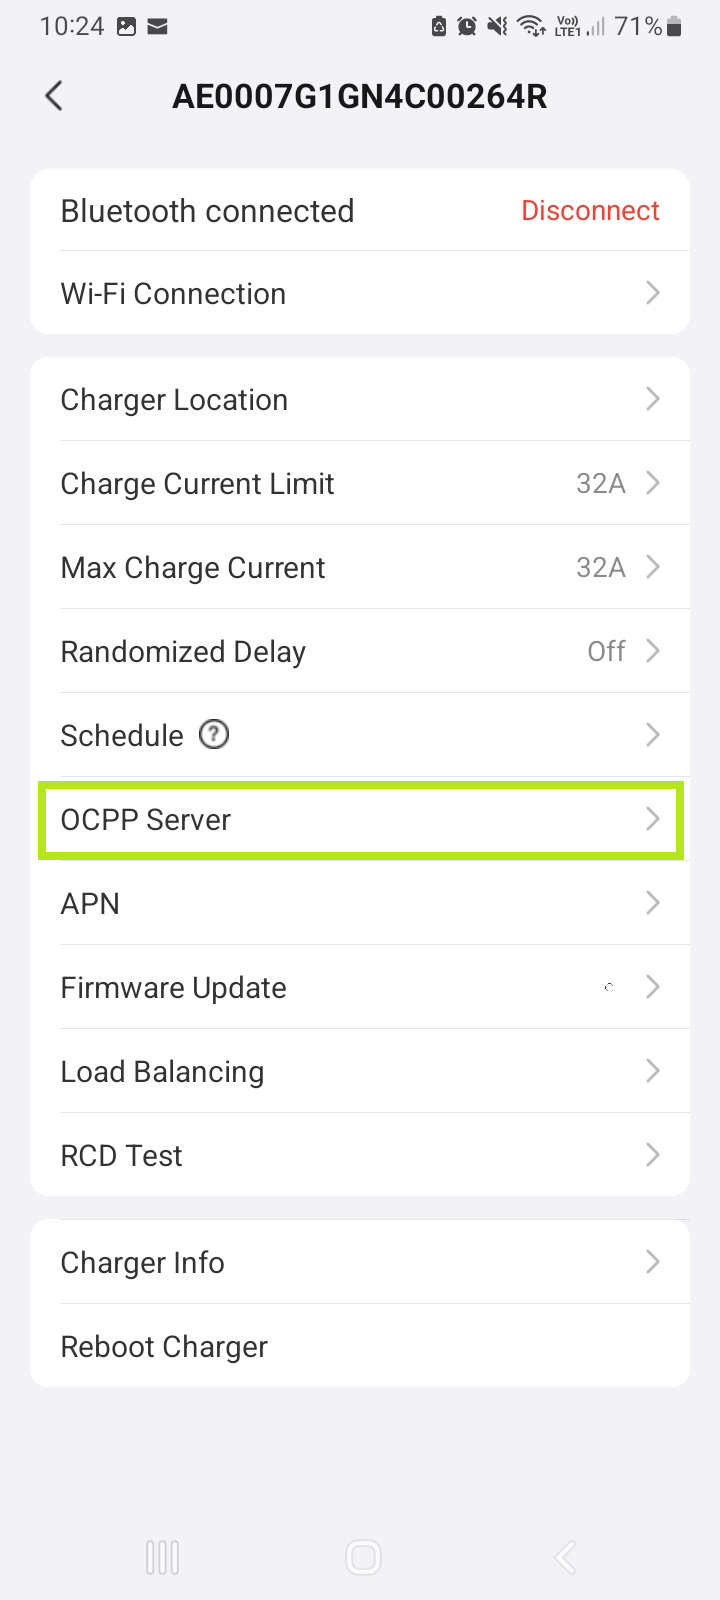
- On the chargepoint home screen, select OCPP Server.
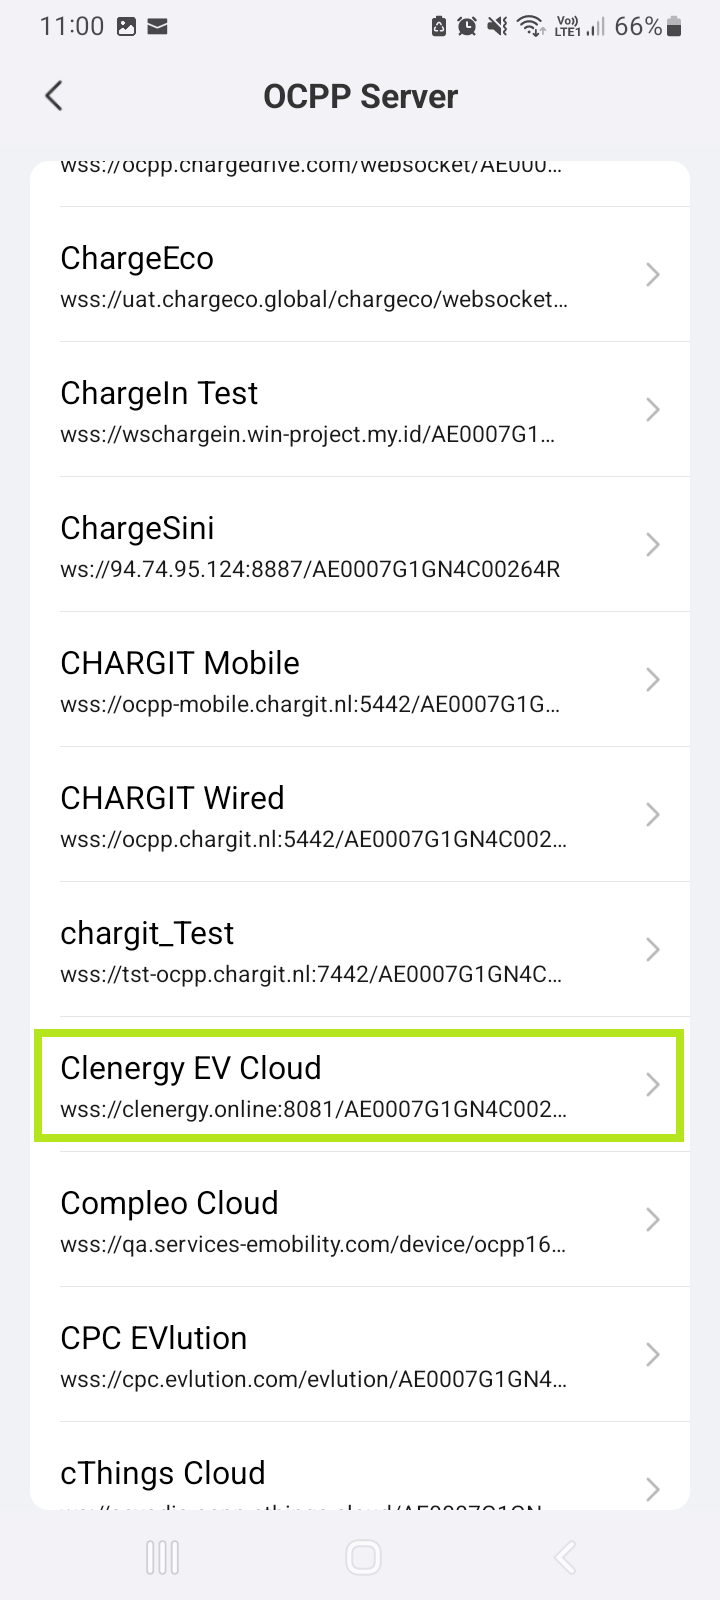
- Wait for the list to load, then scroll down to locate and select the Clenergy EV Cloud link.
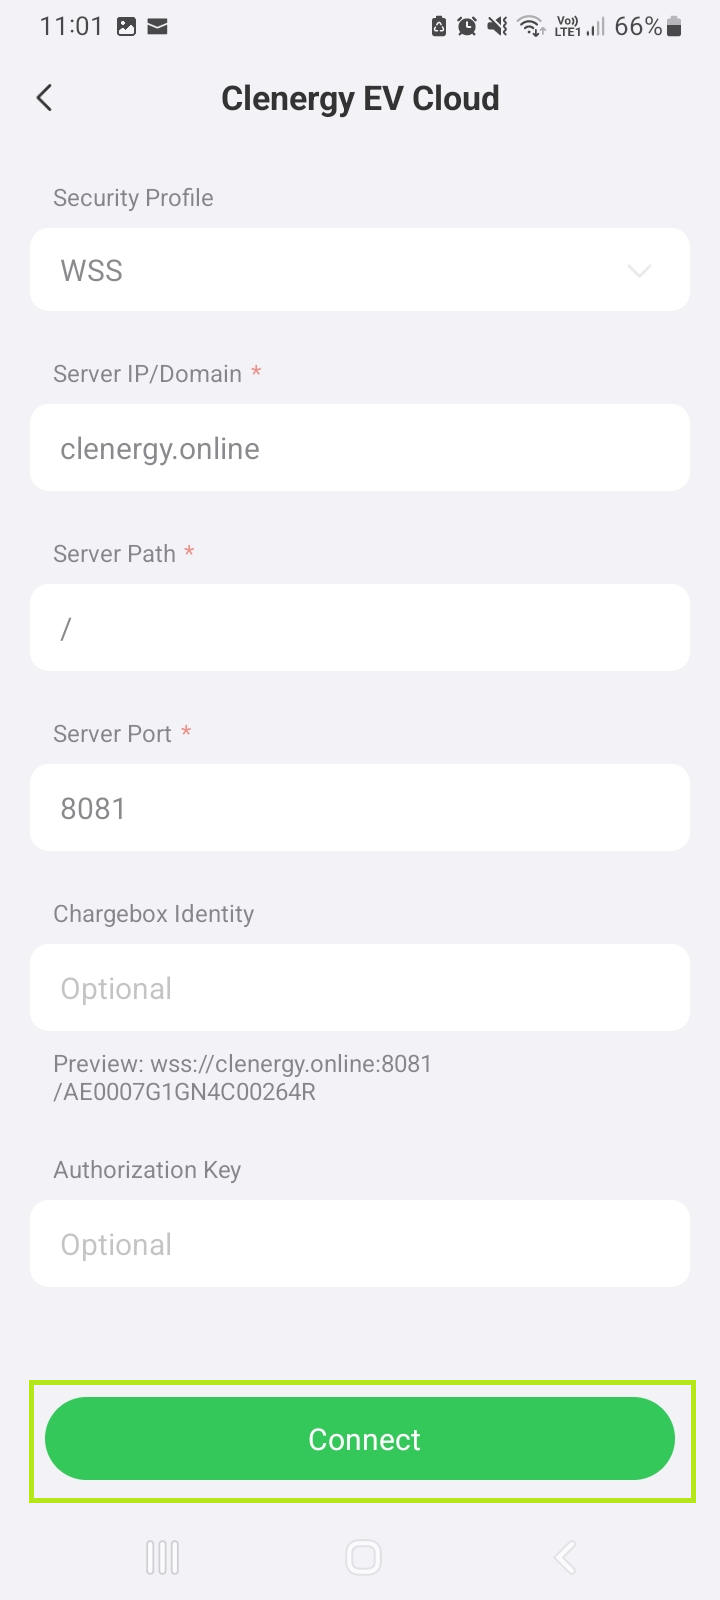
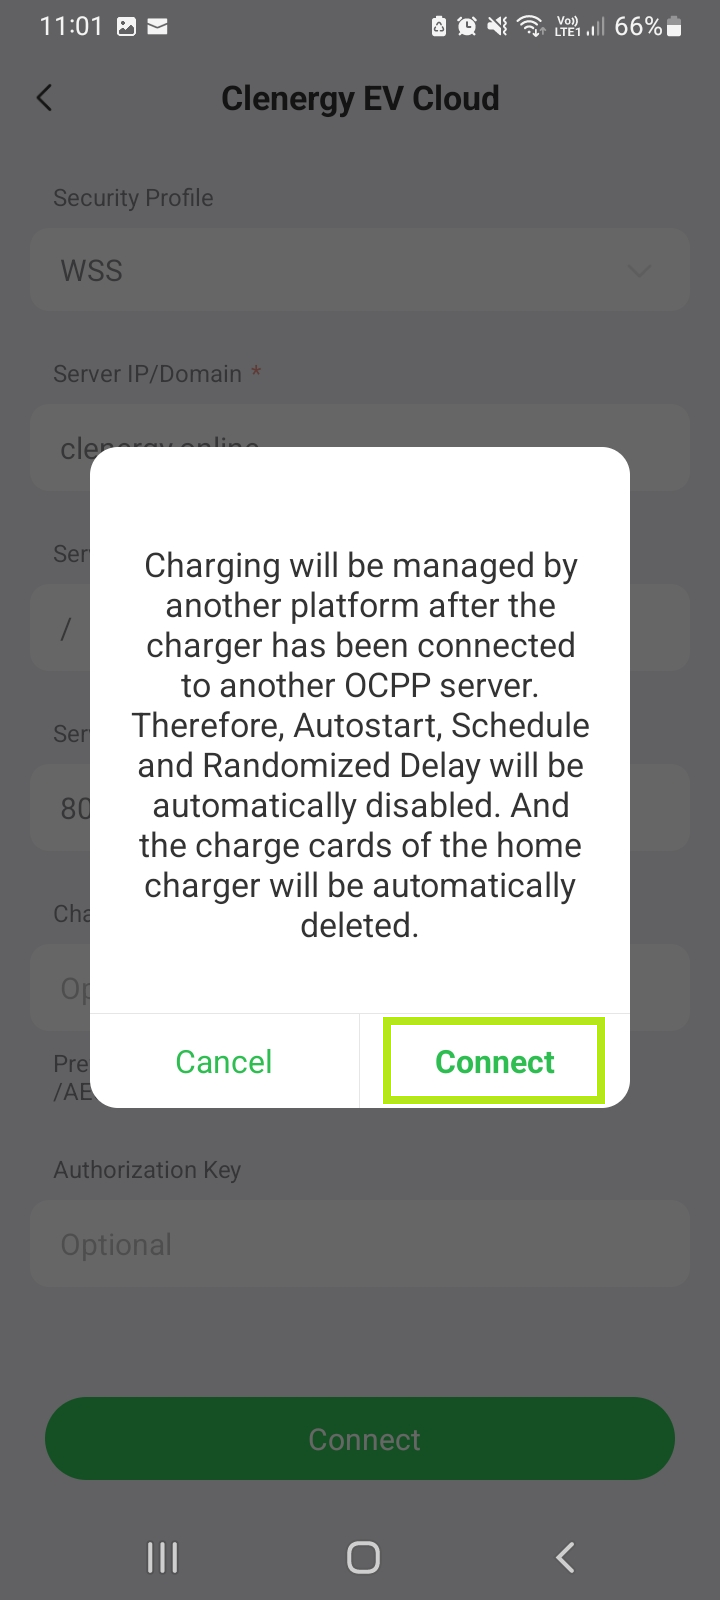
- The Clenergy EV URL details will auto-fill. Select Connect to proceed.
- Select Connect to proceed.
-
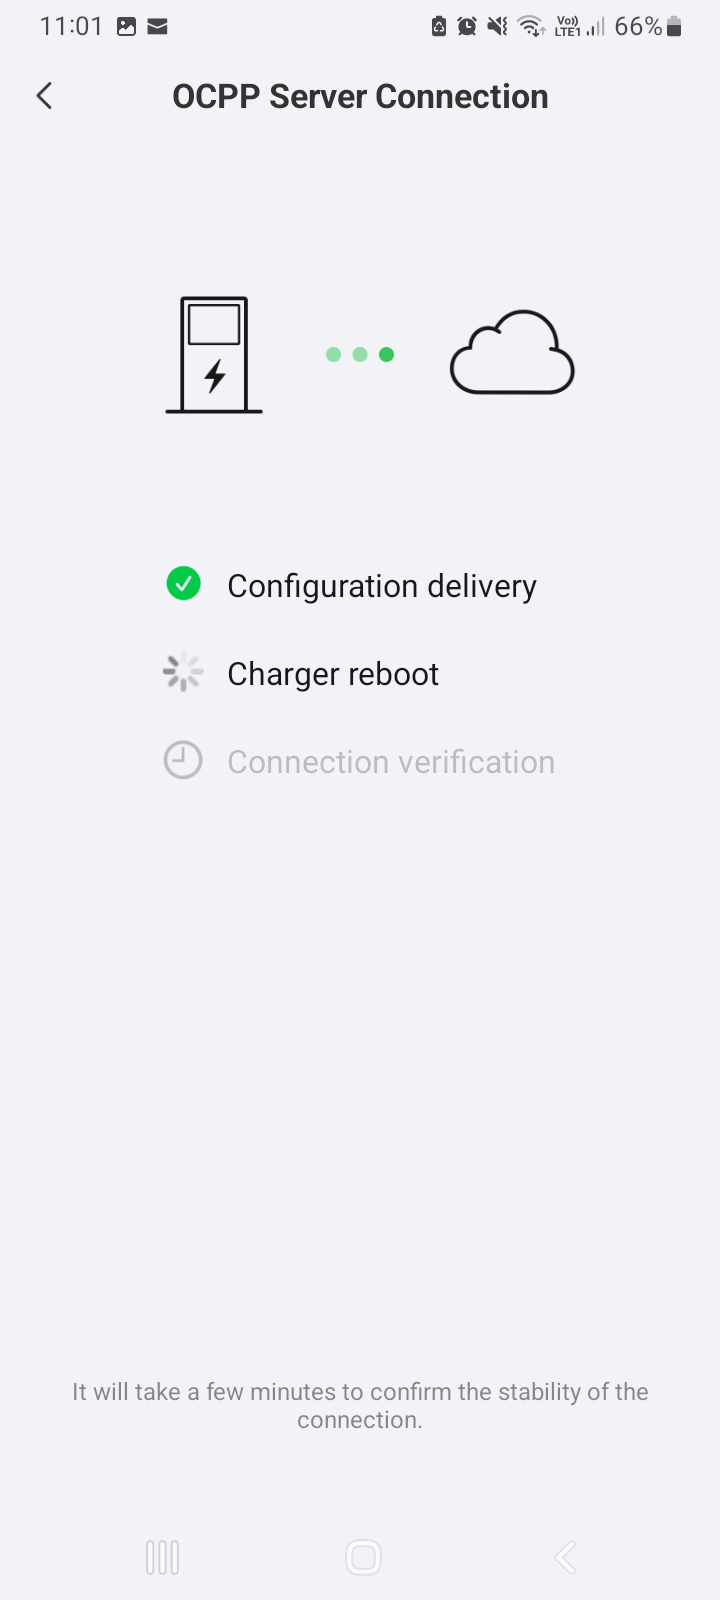
The chargepoint will now update the configuration and reboot.
Please note: If an error message is received, Clenergy EV is required to authorise the final connection remotely.