📱 To download a mobile friendly version of this charger's onboarding guide in a PDF format, please click here.
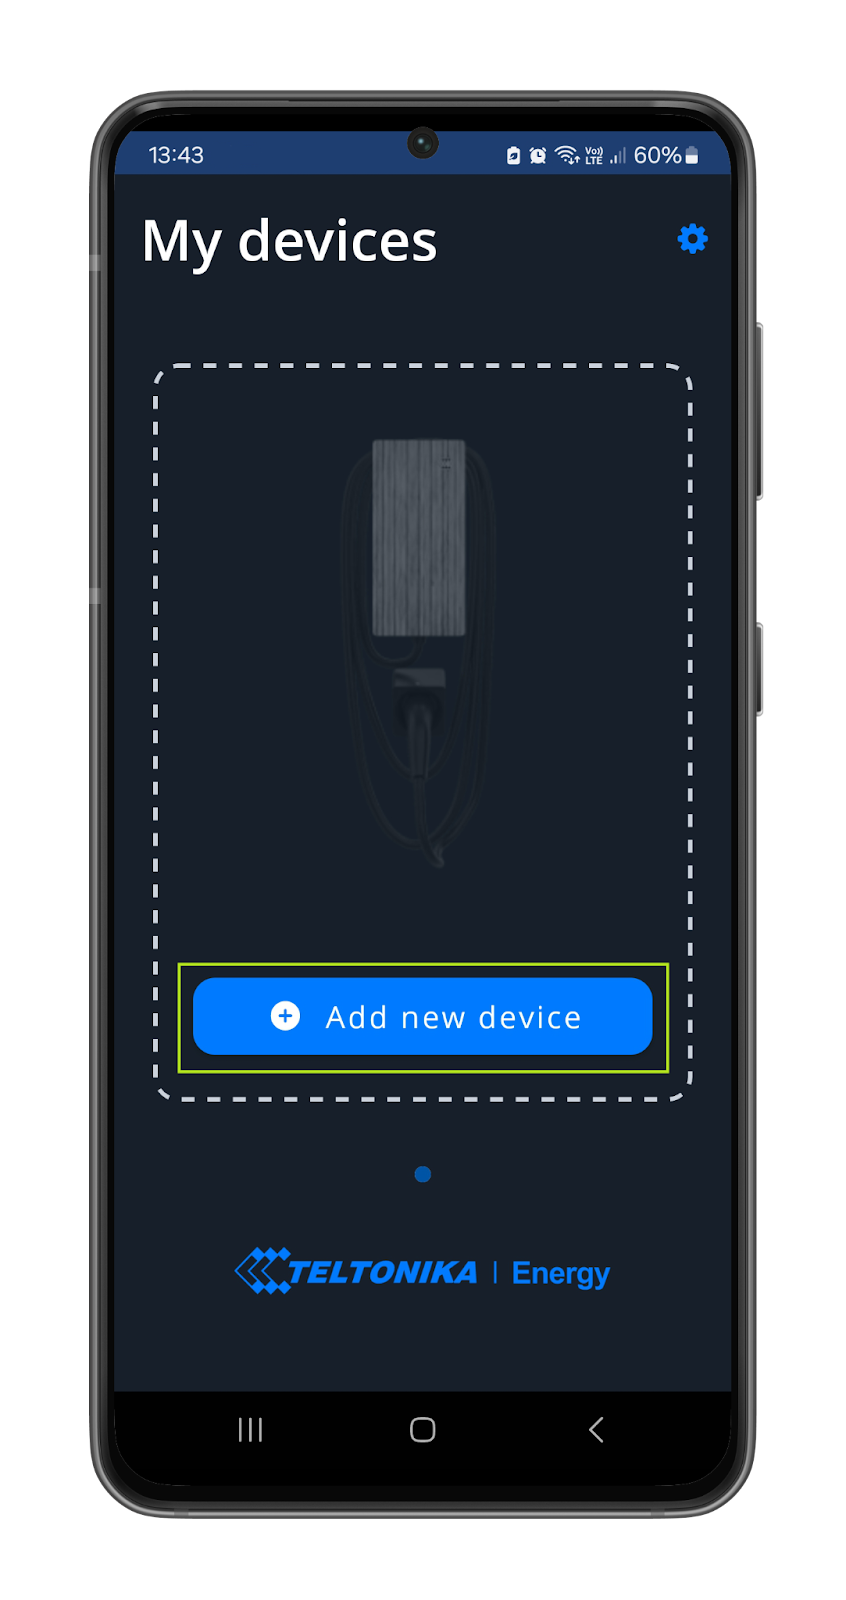
- Download and install the Teltonika Energy app for your device from the relevant app store.
- Once installed, open the Teltonika Energy app and select +Add new device.
- Select Continue to proceed.
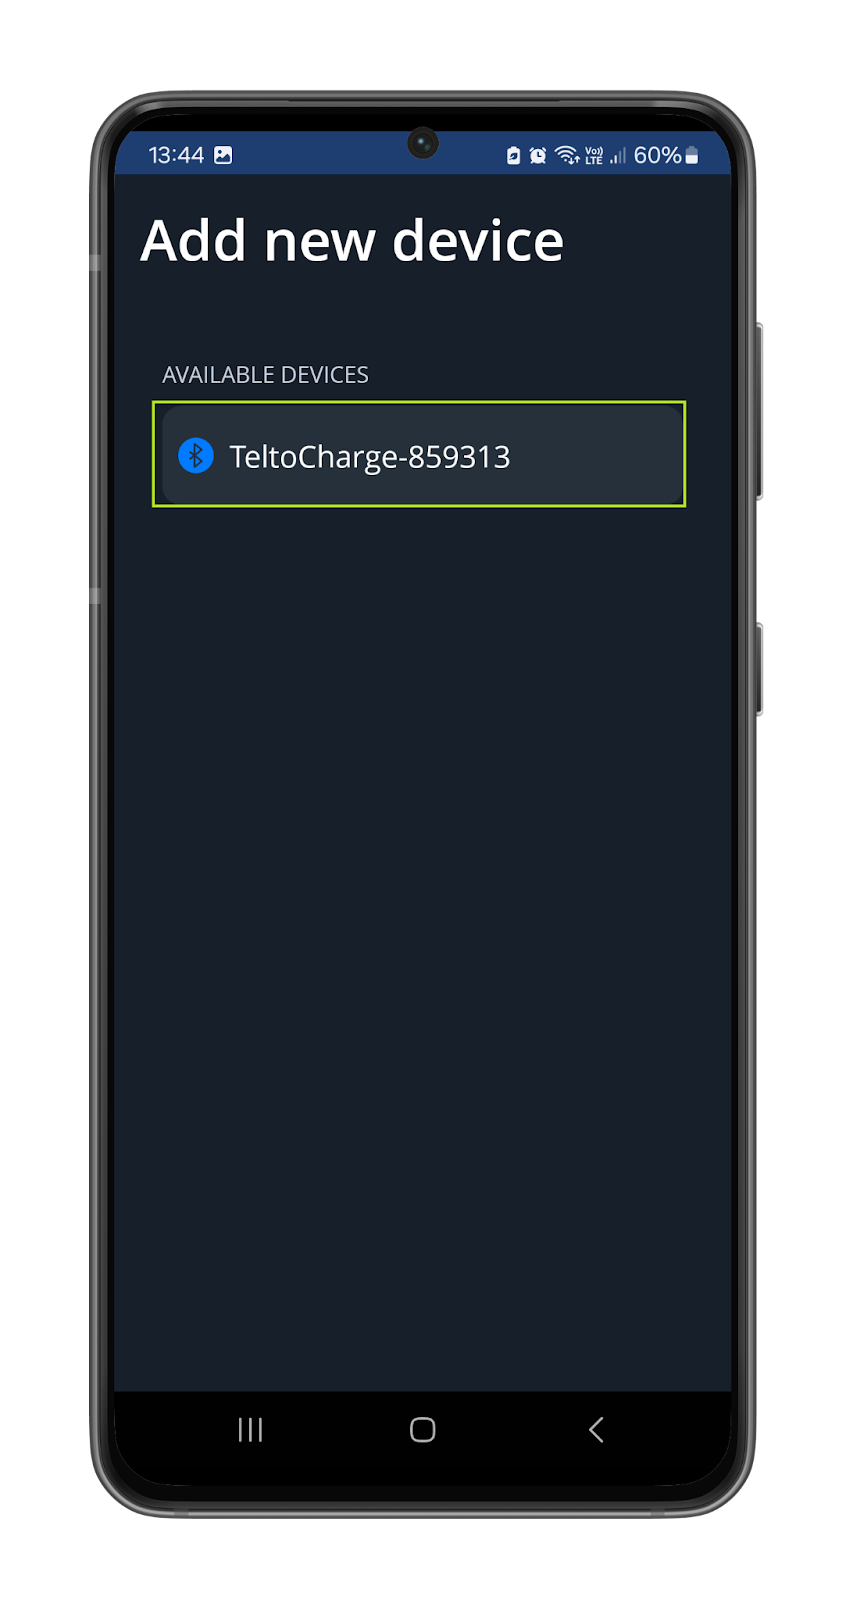
- Your device will now search for available chargepoints via the Bluetooth function.
- Select your charger from the list of available devices.
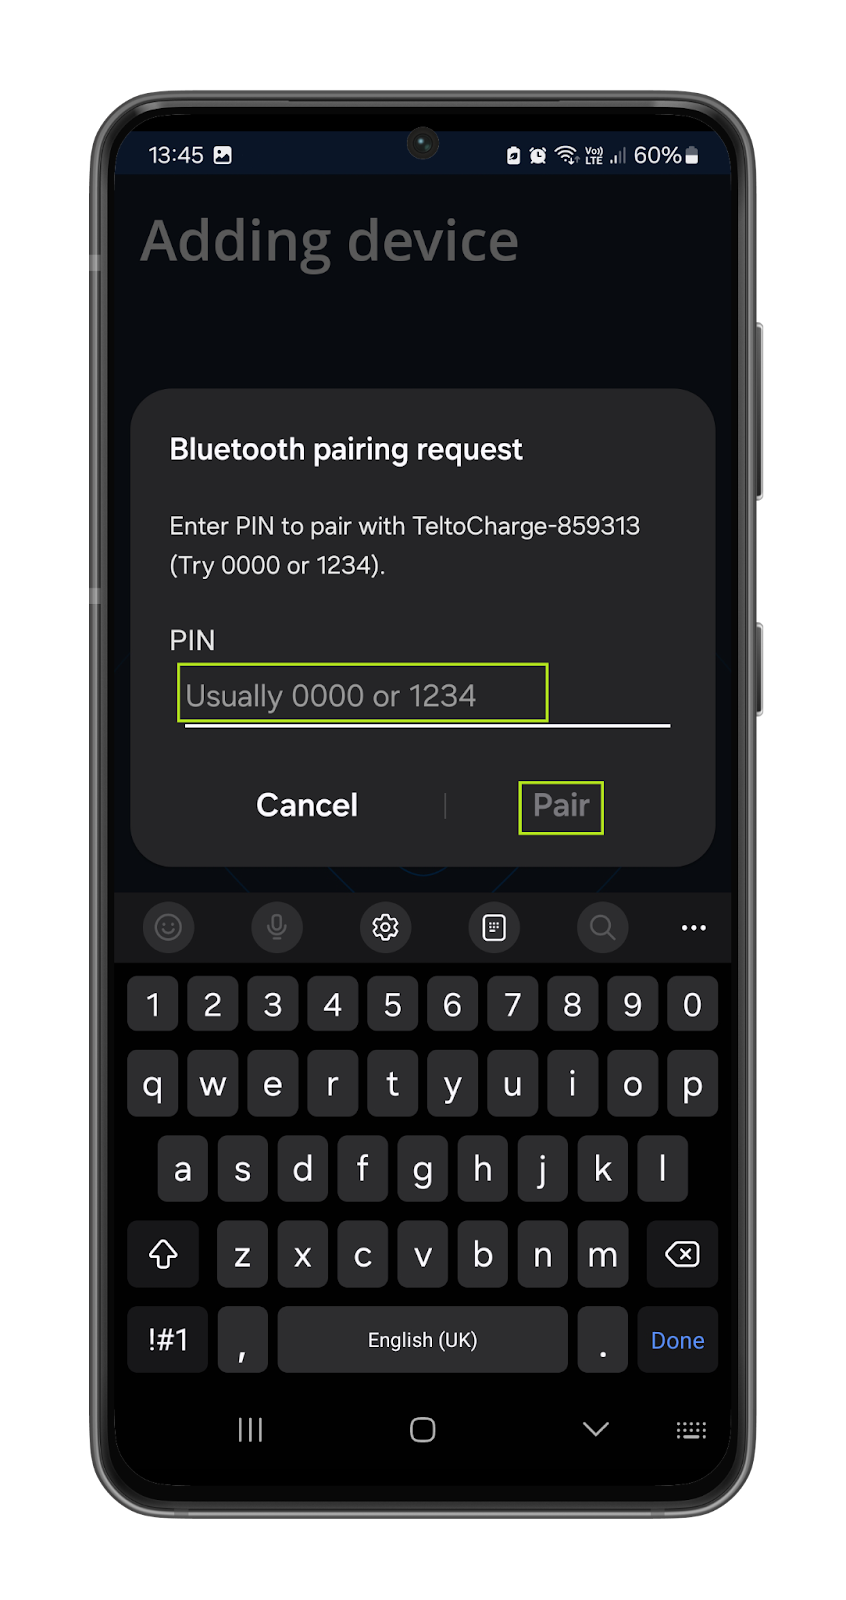
- When prompted, select Pair to connect your device to the charger.
- Enter the pairing code on the label located under the top cover and select pair. Please note: the code is the last 6 digits of the installer code and not 0000 or 1234.
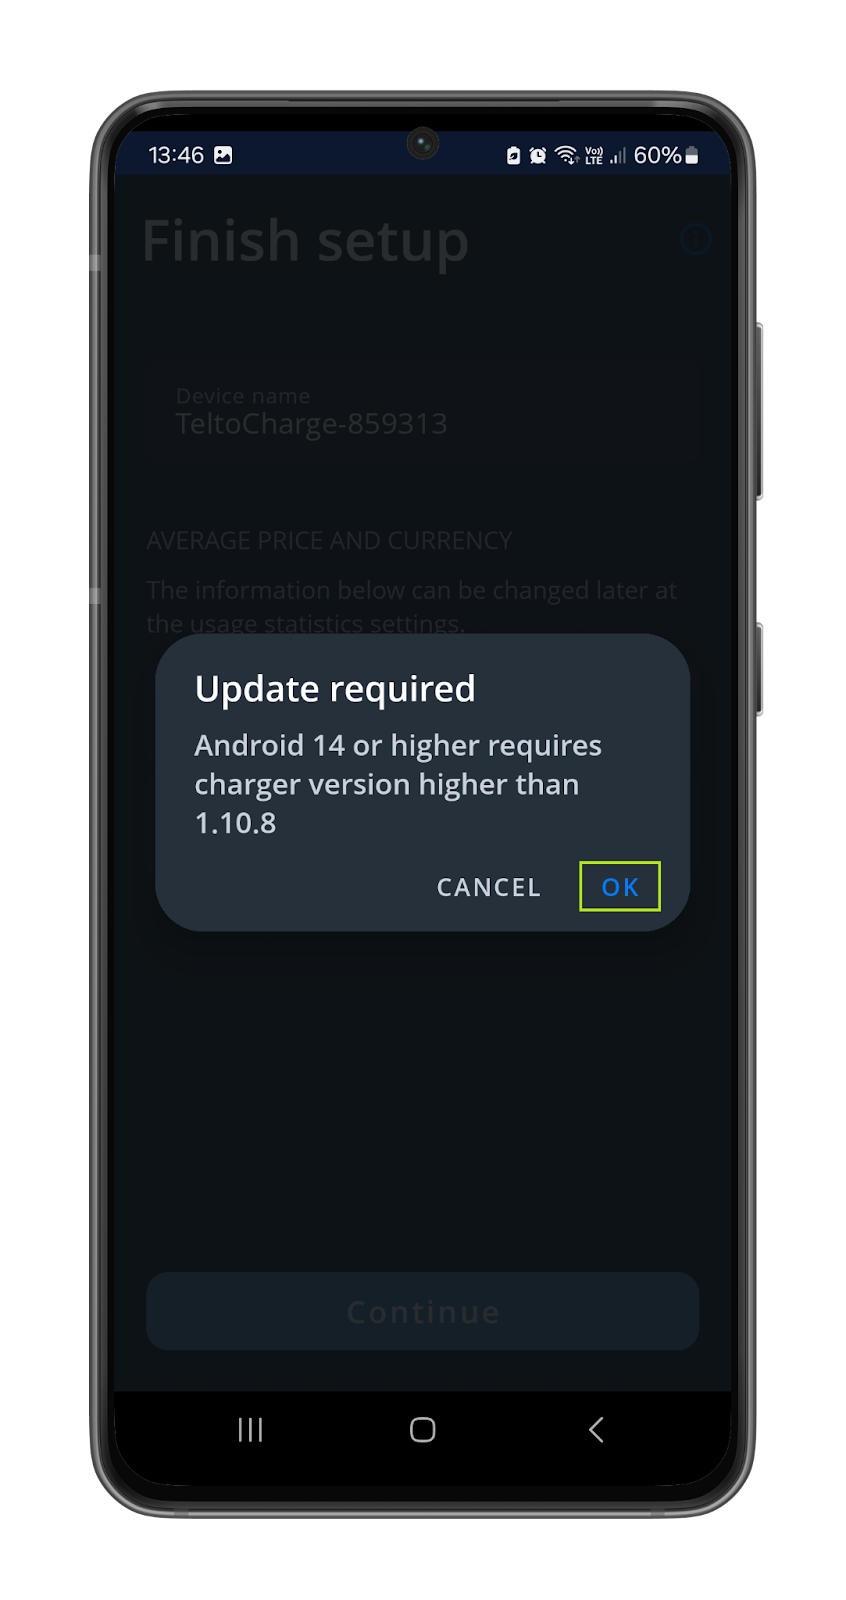
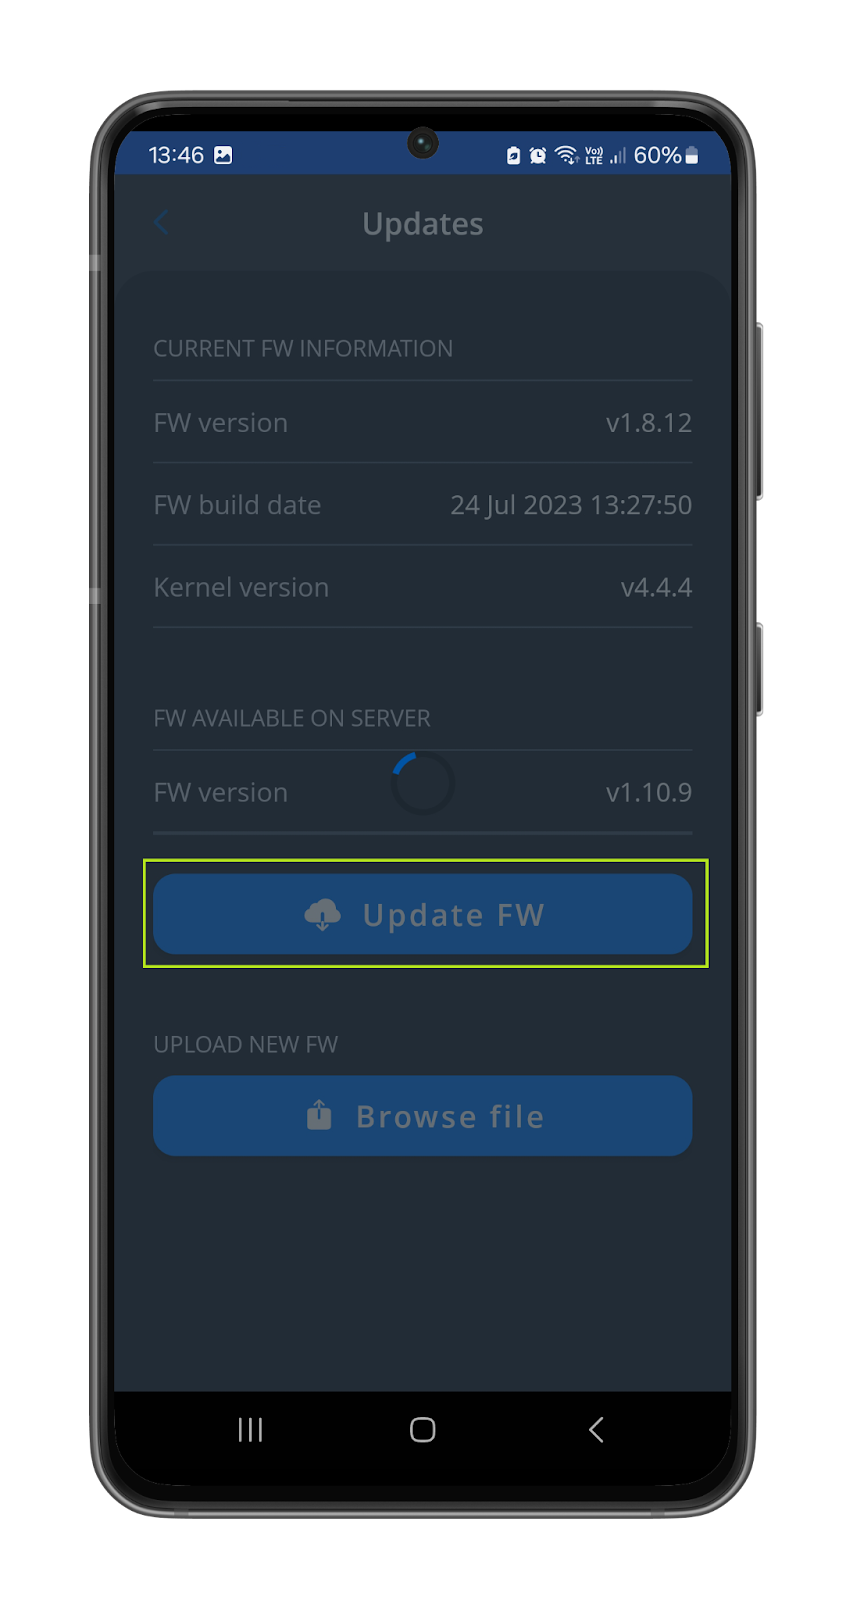
- If prompted, update the firmware on the chargepoint by selecting OK.
- The firmware update should begin automatically. If it does not and the following screen is displayed, select Update FW.
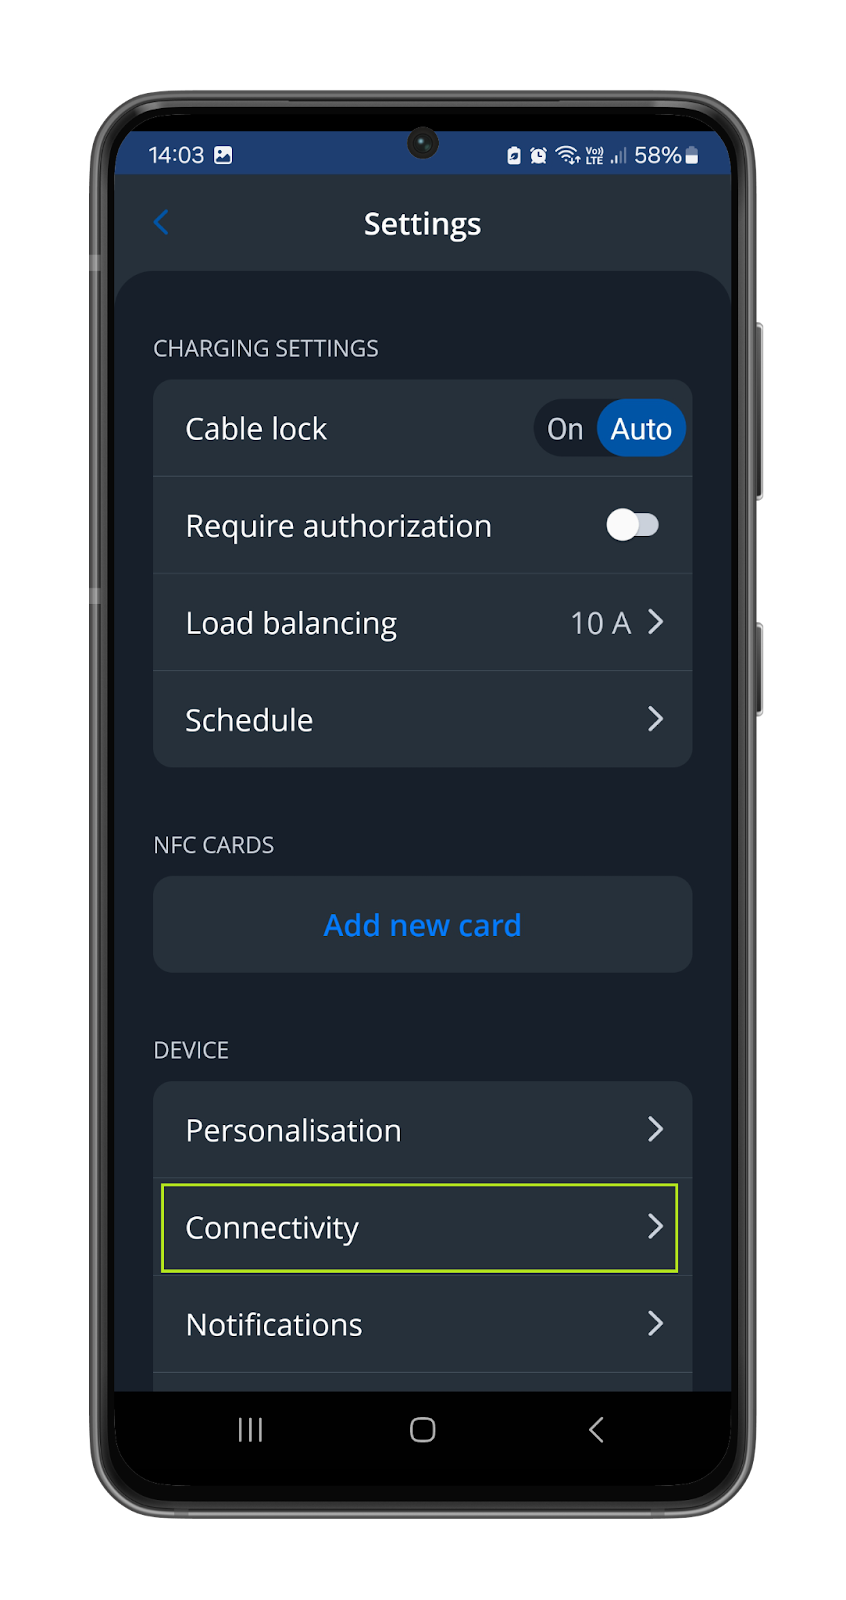
- Once the firmware update has completed, select the chargepoint icon as highlighted.
- Select Connectivity from the menu.
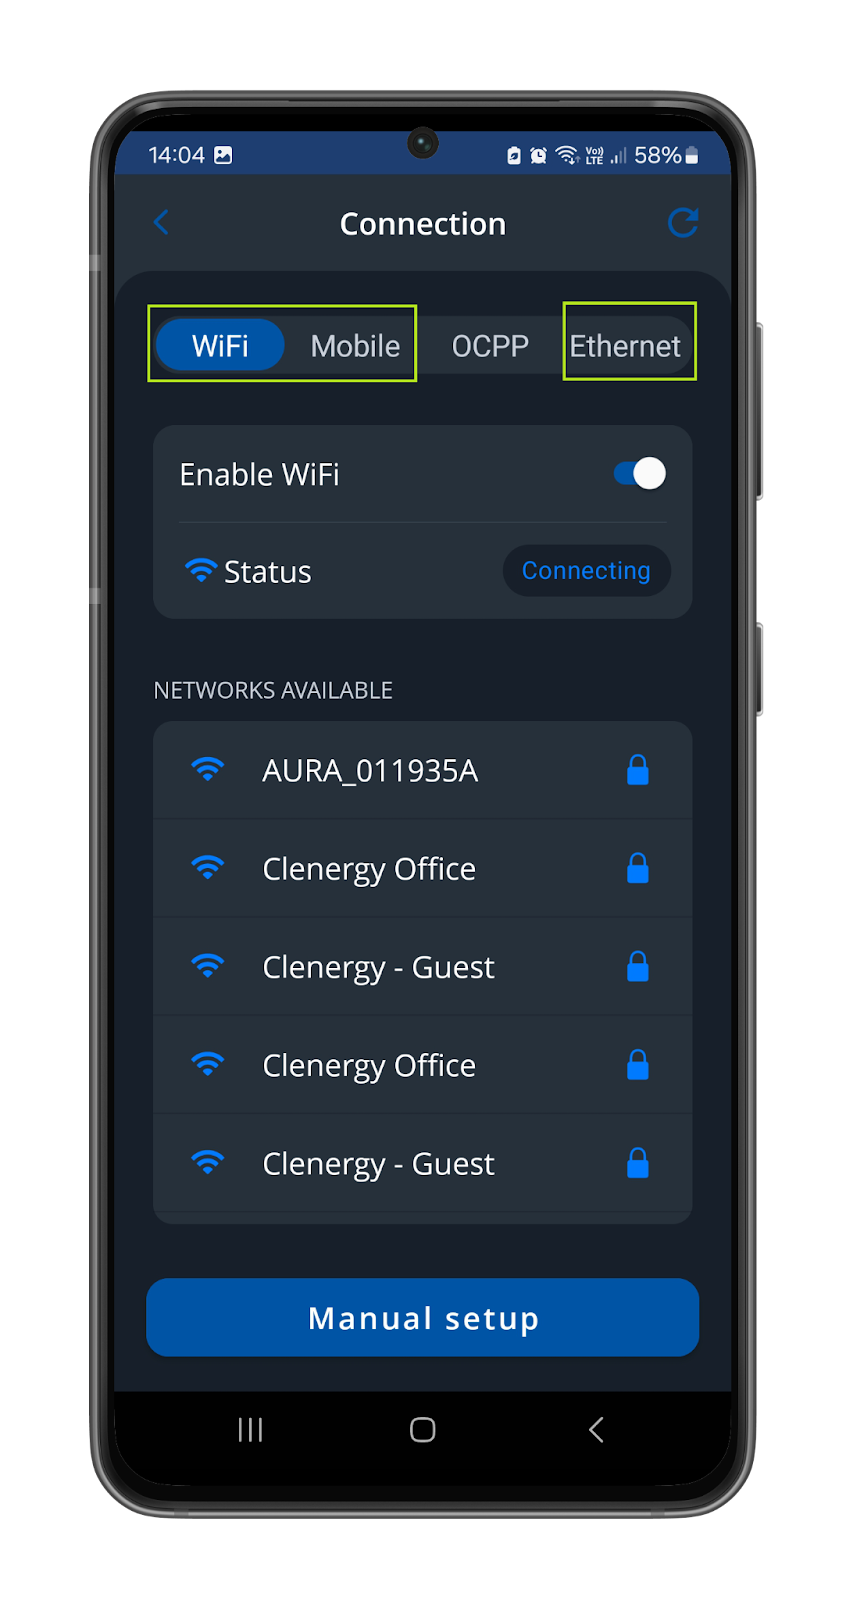
- Select the relevant network type for the installation and connect using the relevant credentials.
Please note: If using the Mobile/SIM method of connection. Enter the relevant details into the APN, User Name and Password fields.
Please note: If using a Clenergy EV-supplied SIM card for the network connection please refer to the details below.
Conexa SIM APN: eapn1.net
KPN SIM APN: wlapn.com
Password/Username (for both suppliers): clenergy
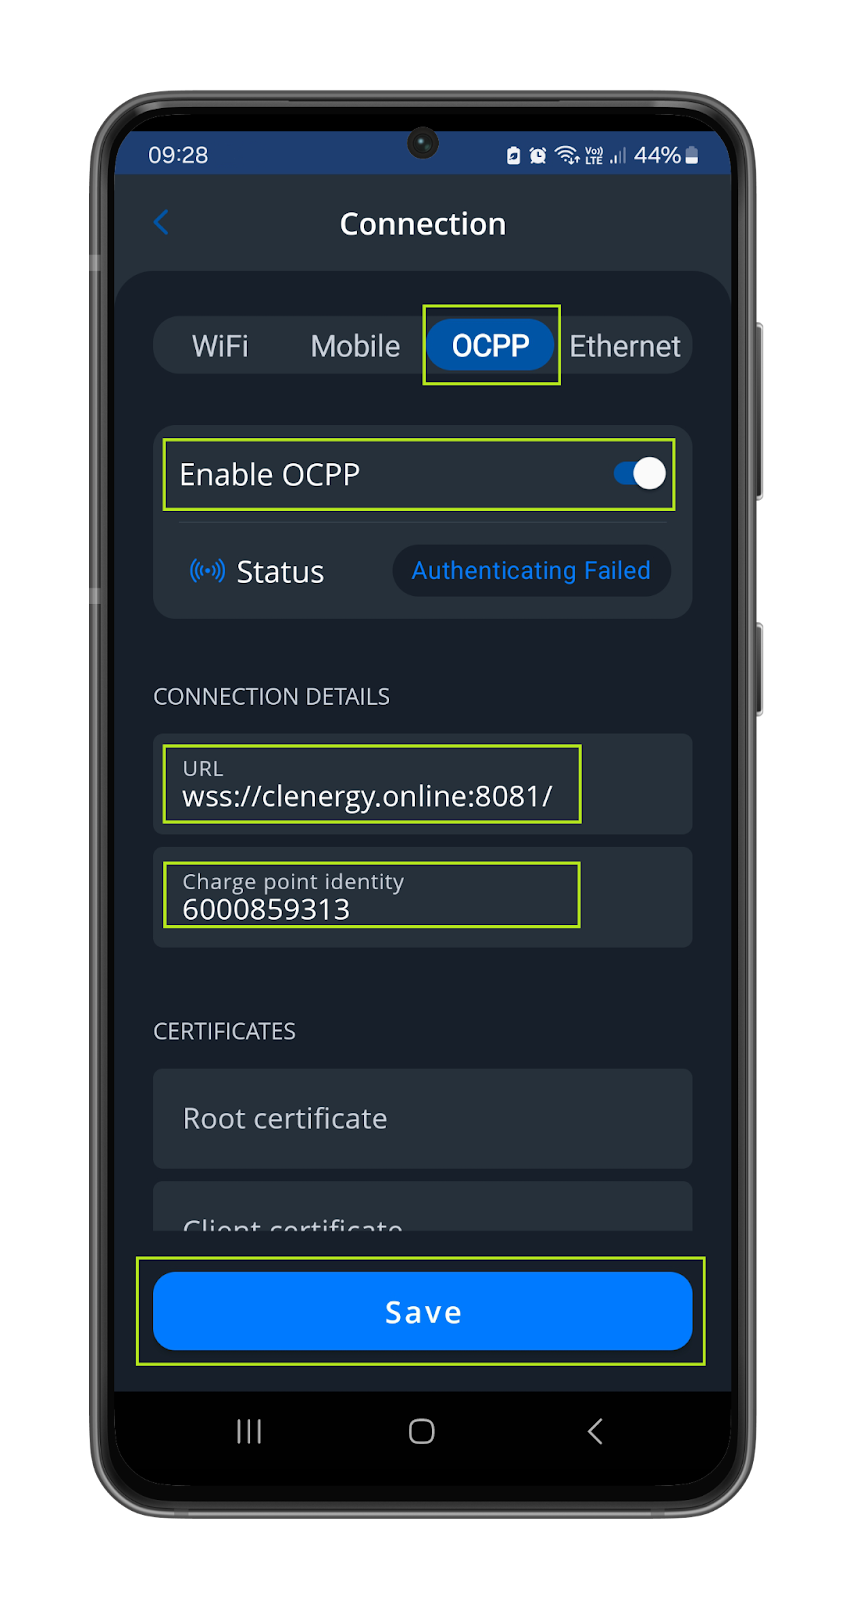
In the event a 3rd party SIM card is being used, please refer to the supplier or manufacturer for the correct details. - Once a network connection has been established, select OCPP from the menu and toggle Enable OCPP on. Enter the following address into the URL field: wss://clenergy.online:8081/. Enter the unique charge point serial number into the charge point identity field then Select Save.
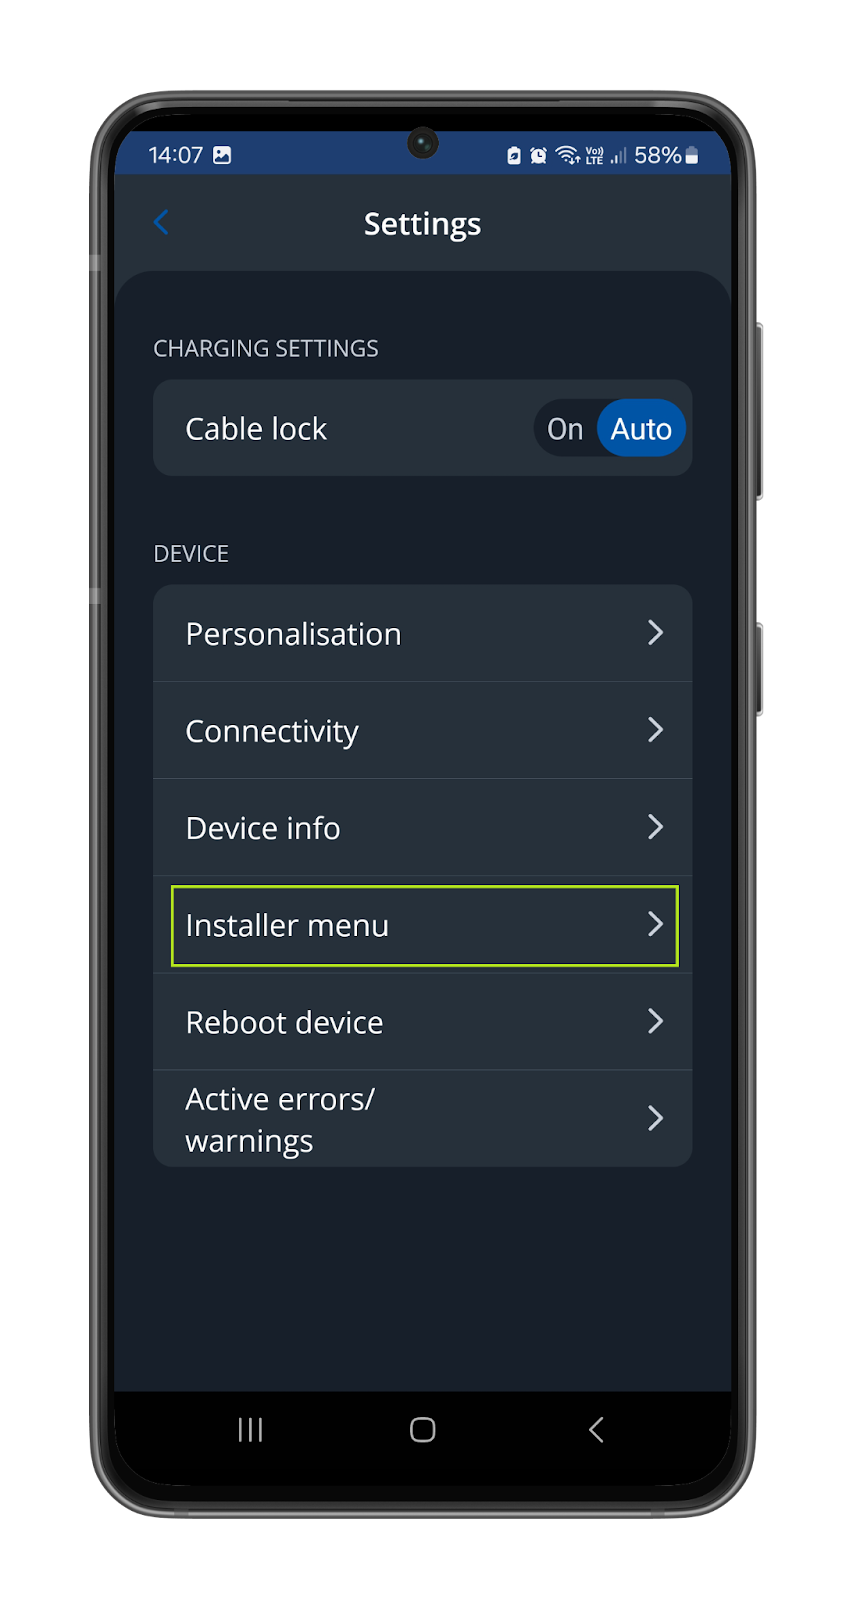
- Return to the settings menu and select Installer menu.
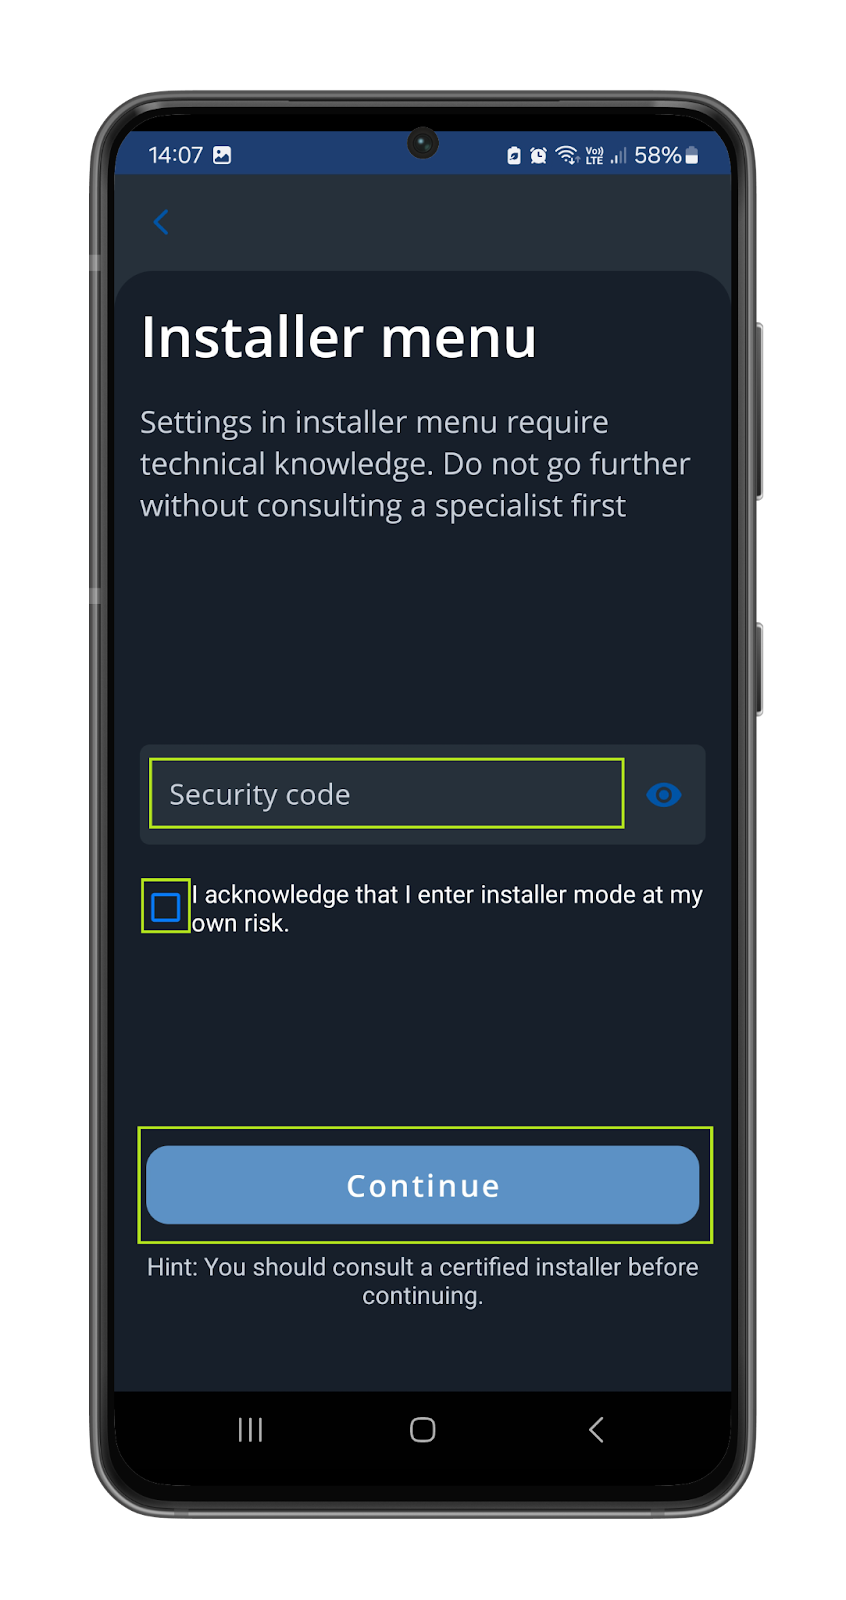
- Enter the installer security code (located on the chargepoint), acknowledge the disclaimer and select Continue.
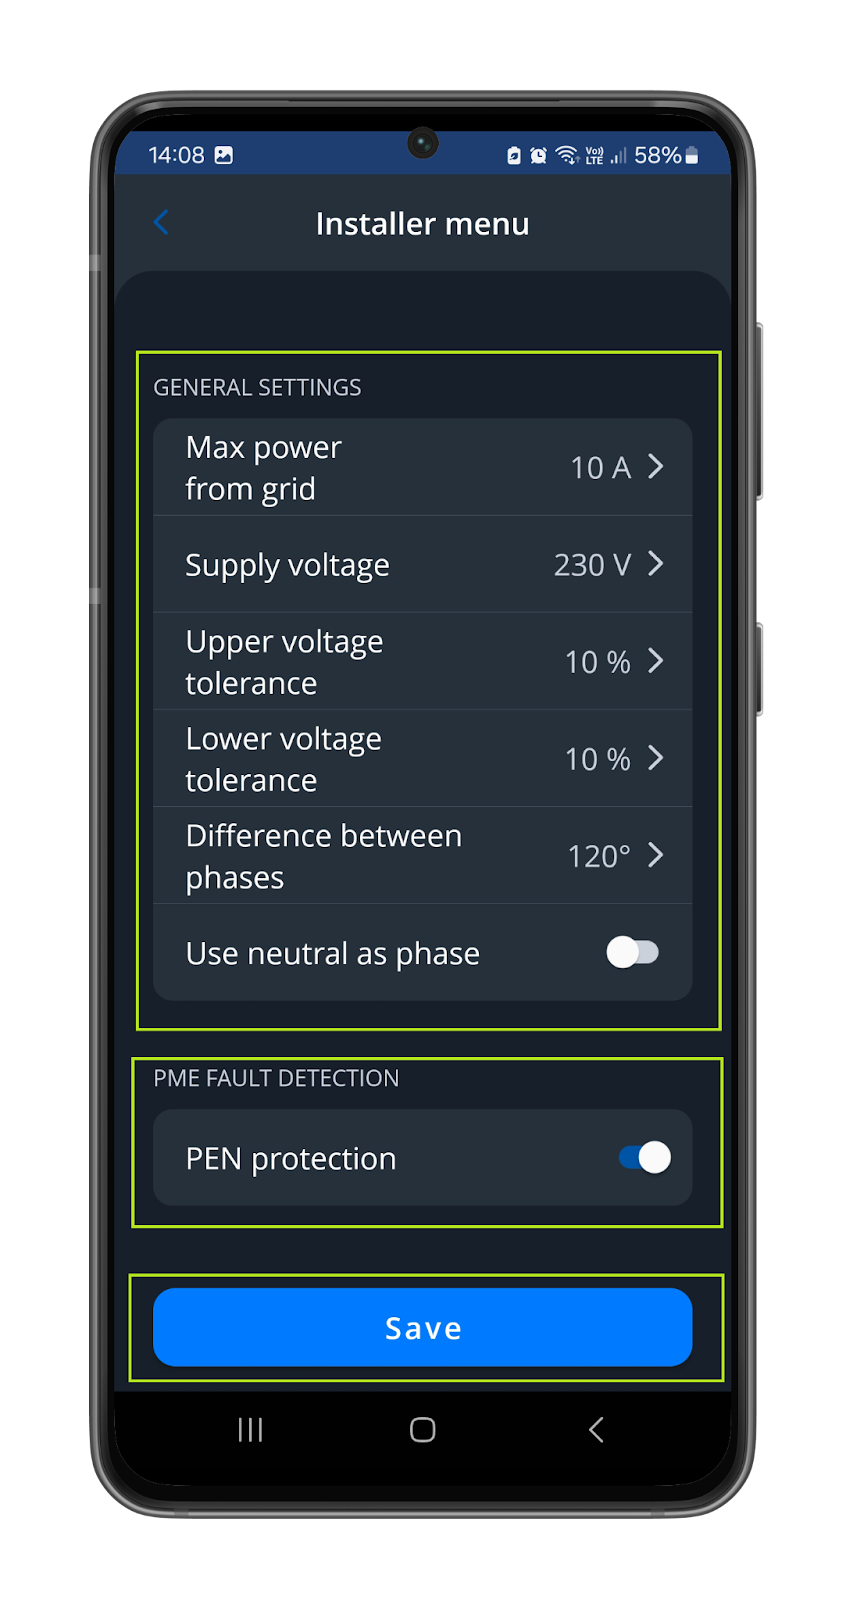
- Configure the settings as required for the installation, then select Save.
- Return to the settings menu, review the configuration and make any further changes as required for the installation using the Personalisation and Device info menus.