📱 To download a mobile friendly version of this charger's onboarding guide in a PDF format, please click here.
- Download the Schneider eSetup app for your Android/Apple device from the following link: eSetup for Wiser electricians | Schneider Electric Global
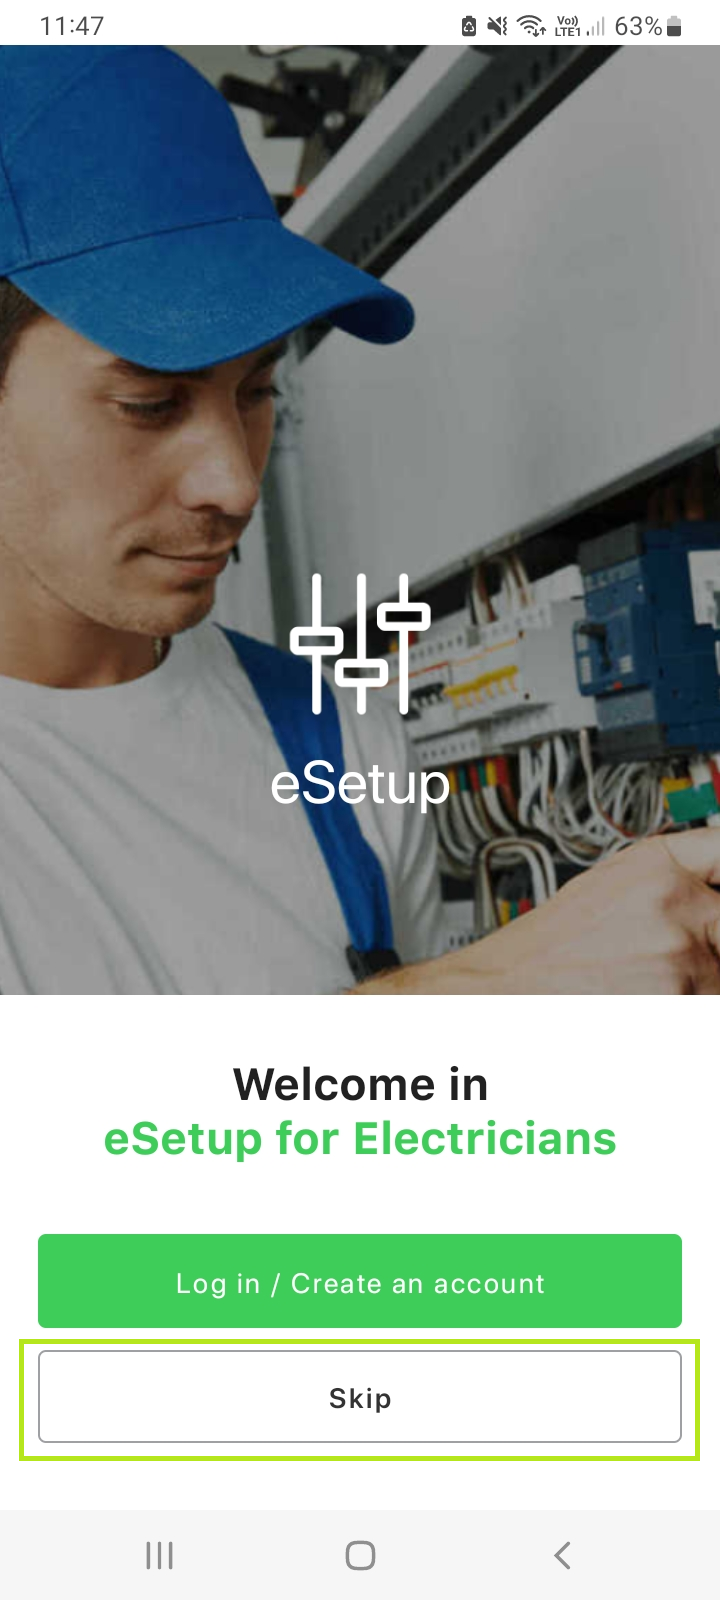
- Install and open the app on your device. Select skip to proceed.
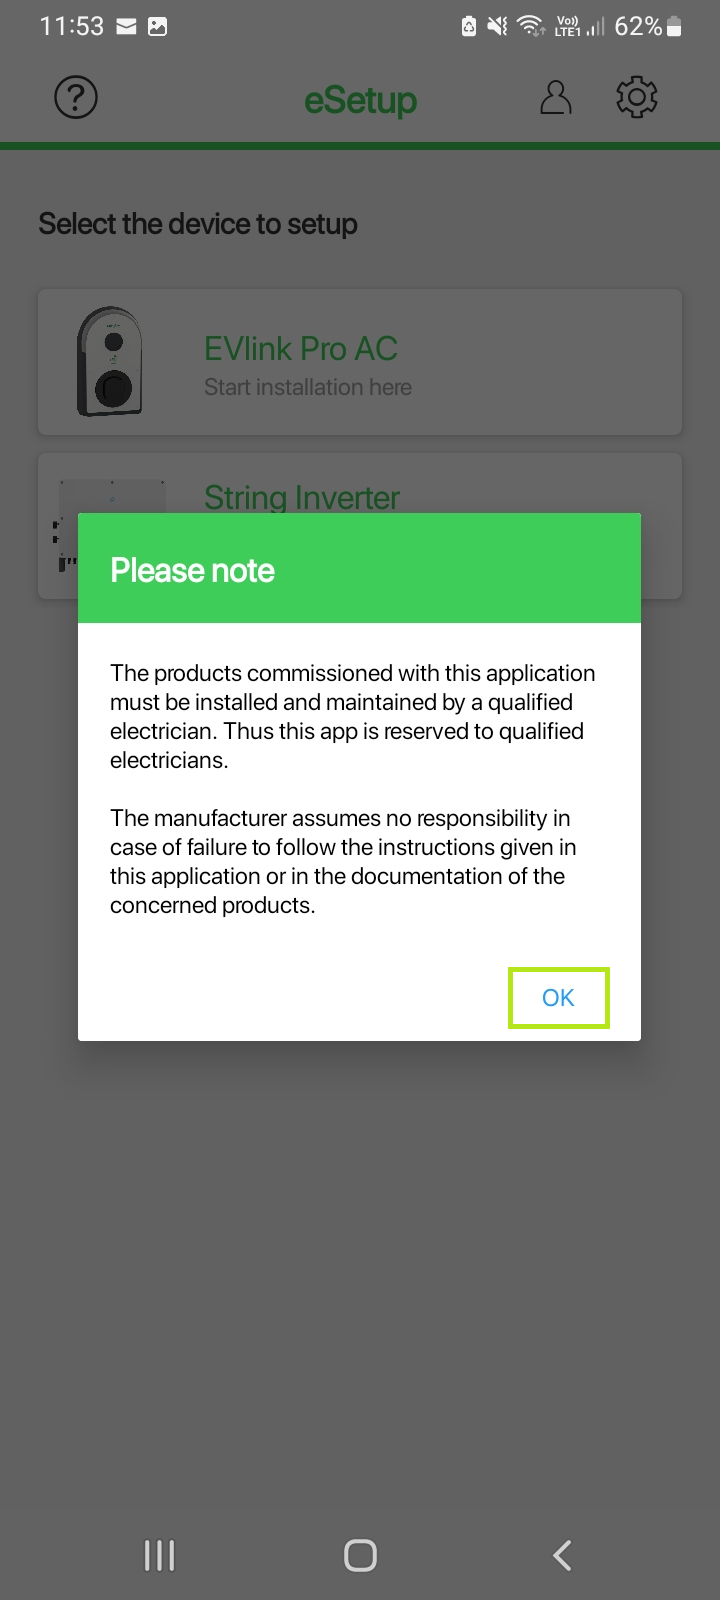
- Review the disclaimer and press OK when ready to proceed.
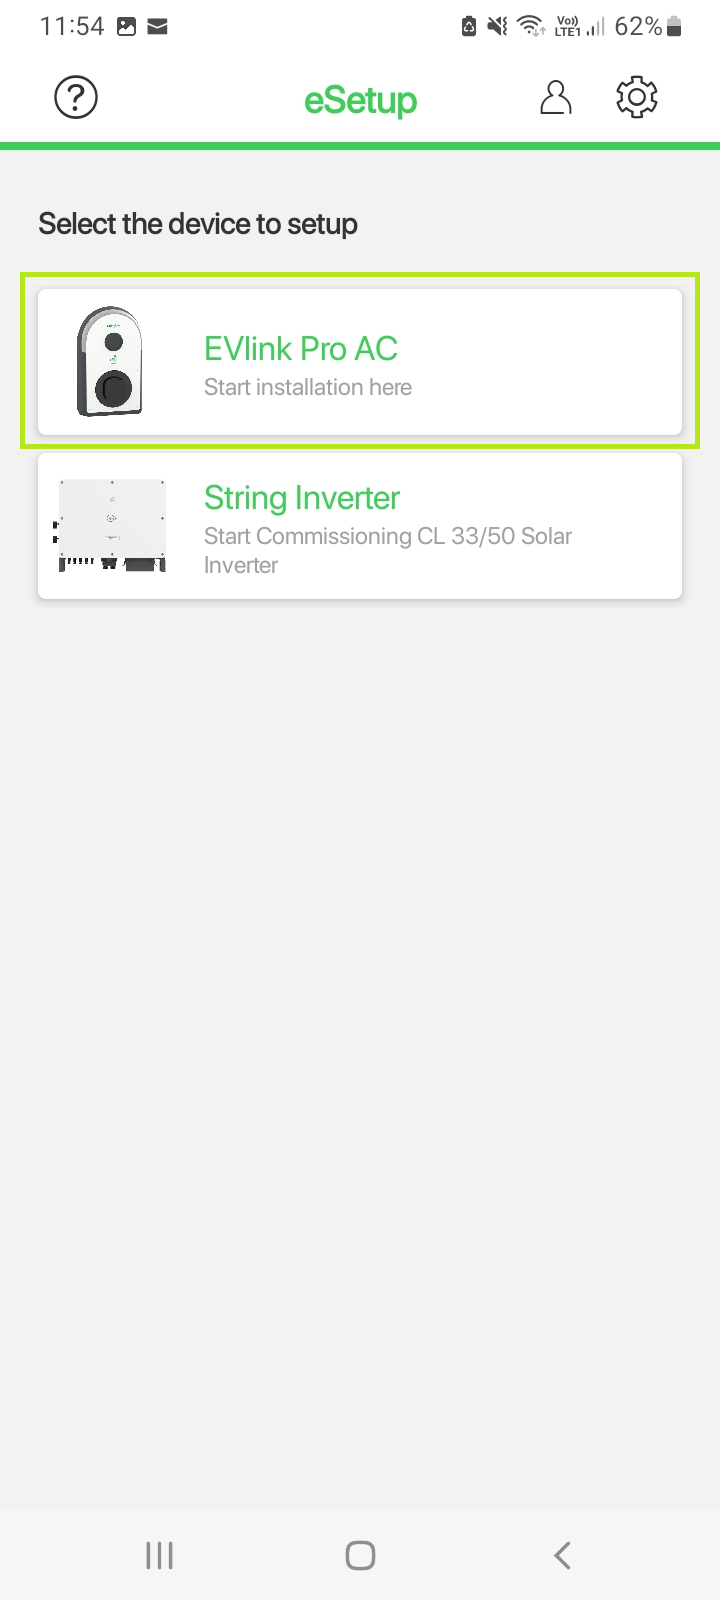
- Select EVLink Pro AC from the list of products on the screen shown.
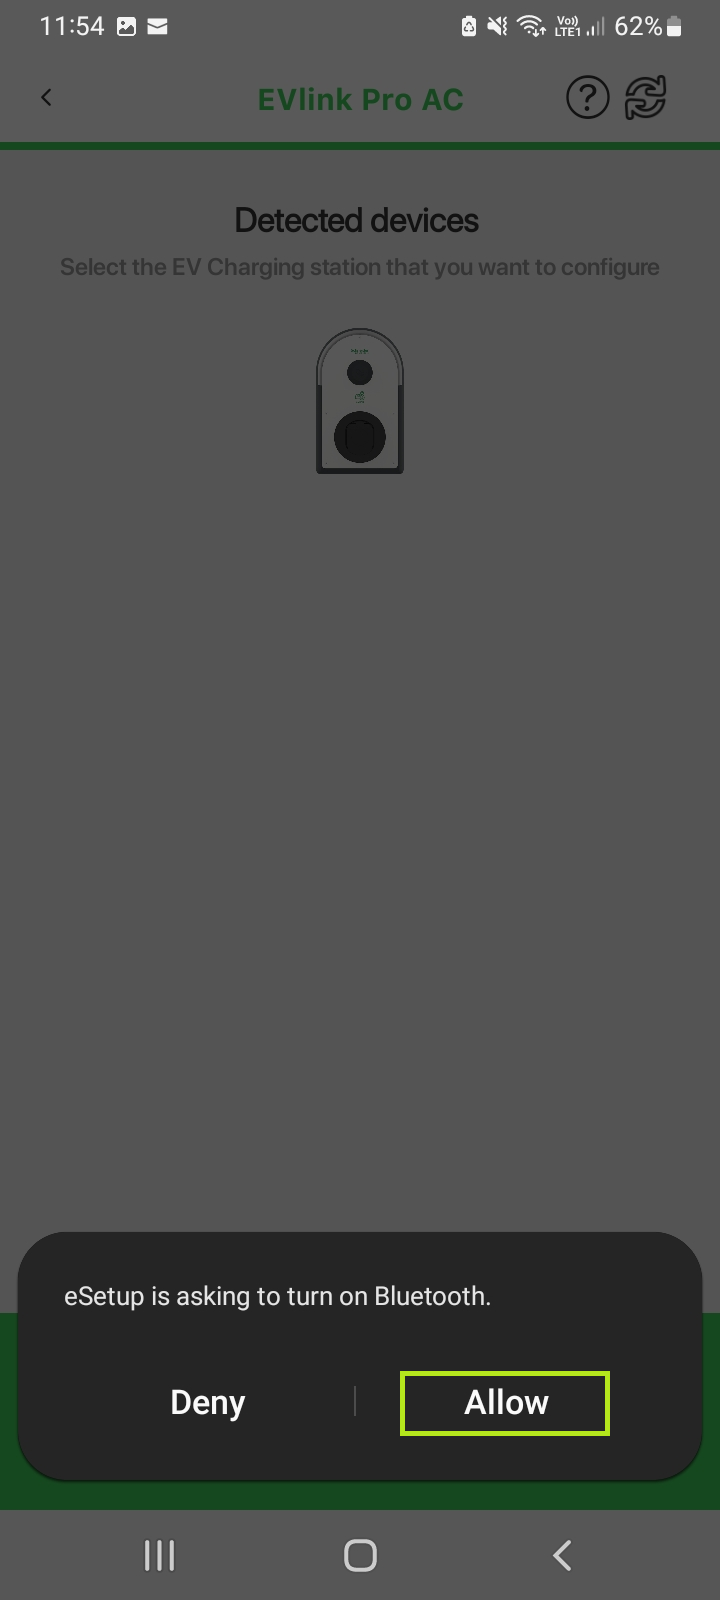
- If prompted to activate Bluetooth on your device, select Allow. The app will now scan for available charge points. Please note: Bluetooth communication is only active for 2 hours after the charge point is powered up.
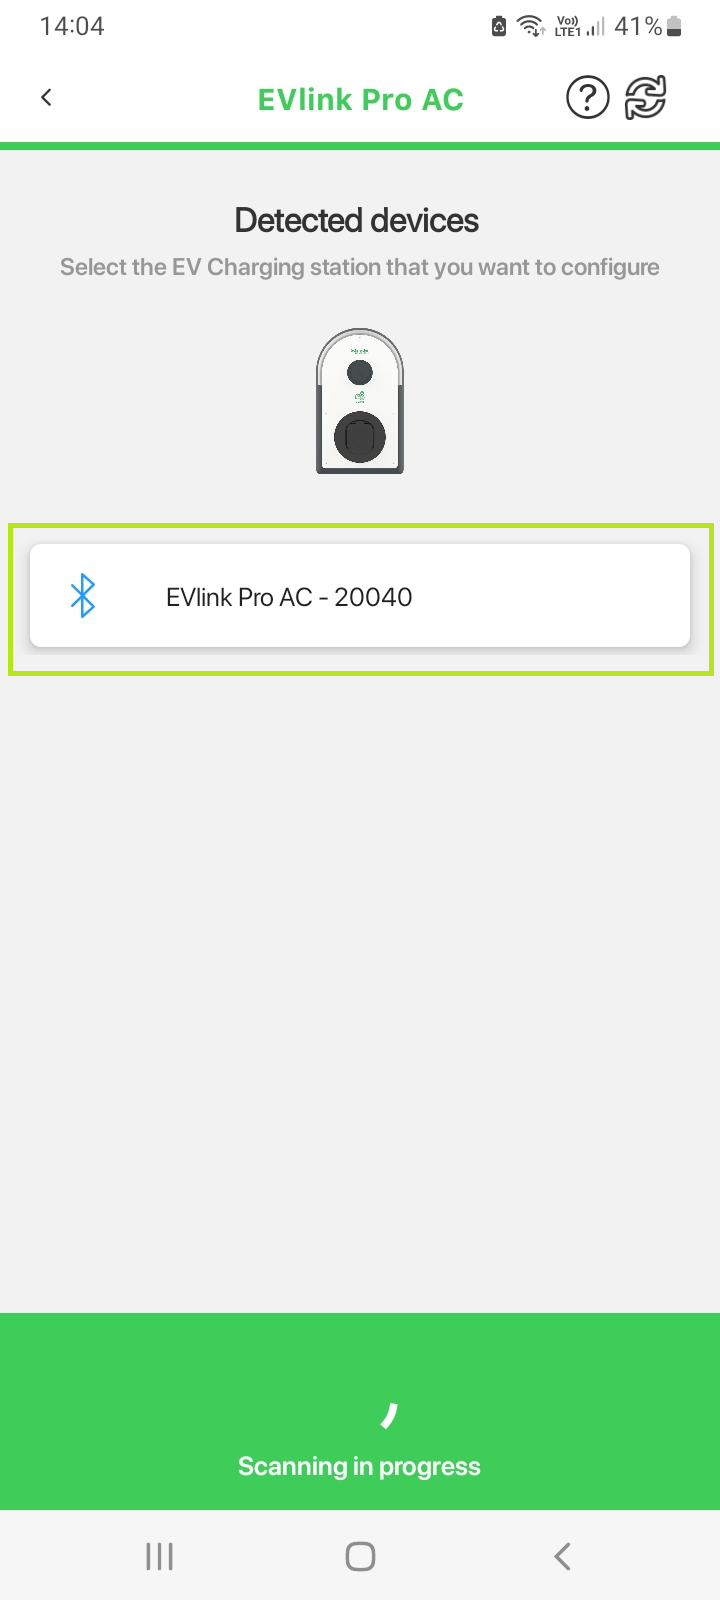
- eSetup will now display a list of available charging units. Select the relevant charger from the list.
- When prompted, select Pair on your device. The LED on the charger should blink several times over the course of a few seconds to indicate that a successful connection has been made.
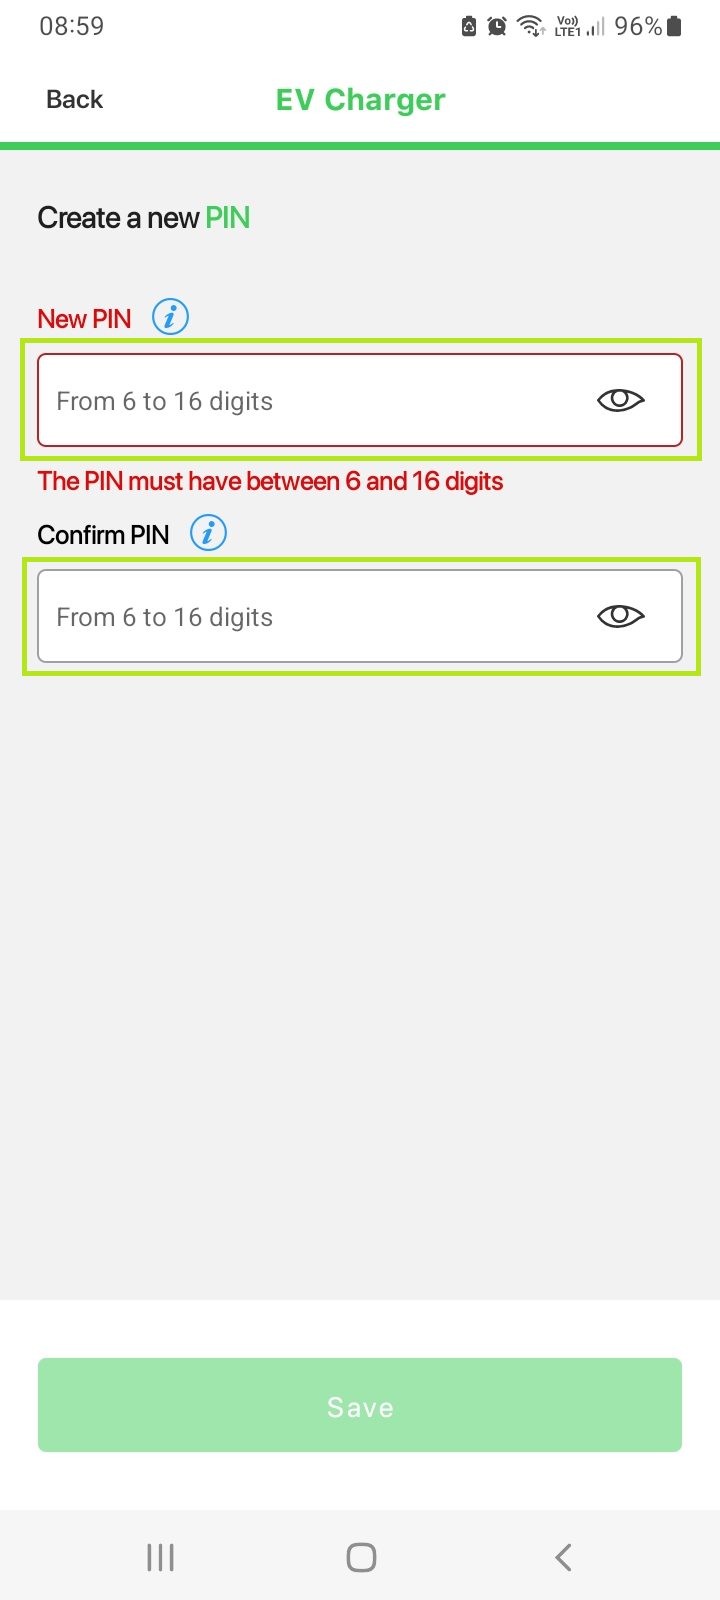
- Create and confirm a 6 digit security pin that will be used to access the unit going forward. This should match the 6 digit Clenergy CPID number that is used to identify the charge point. Click Save to proceed.
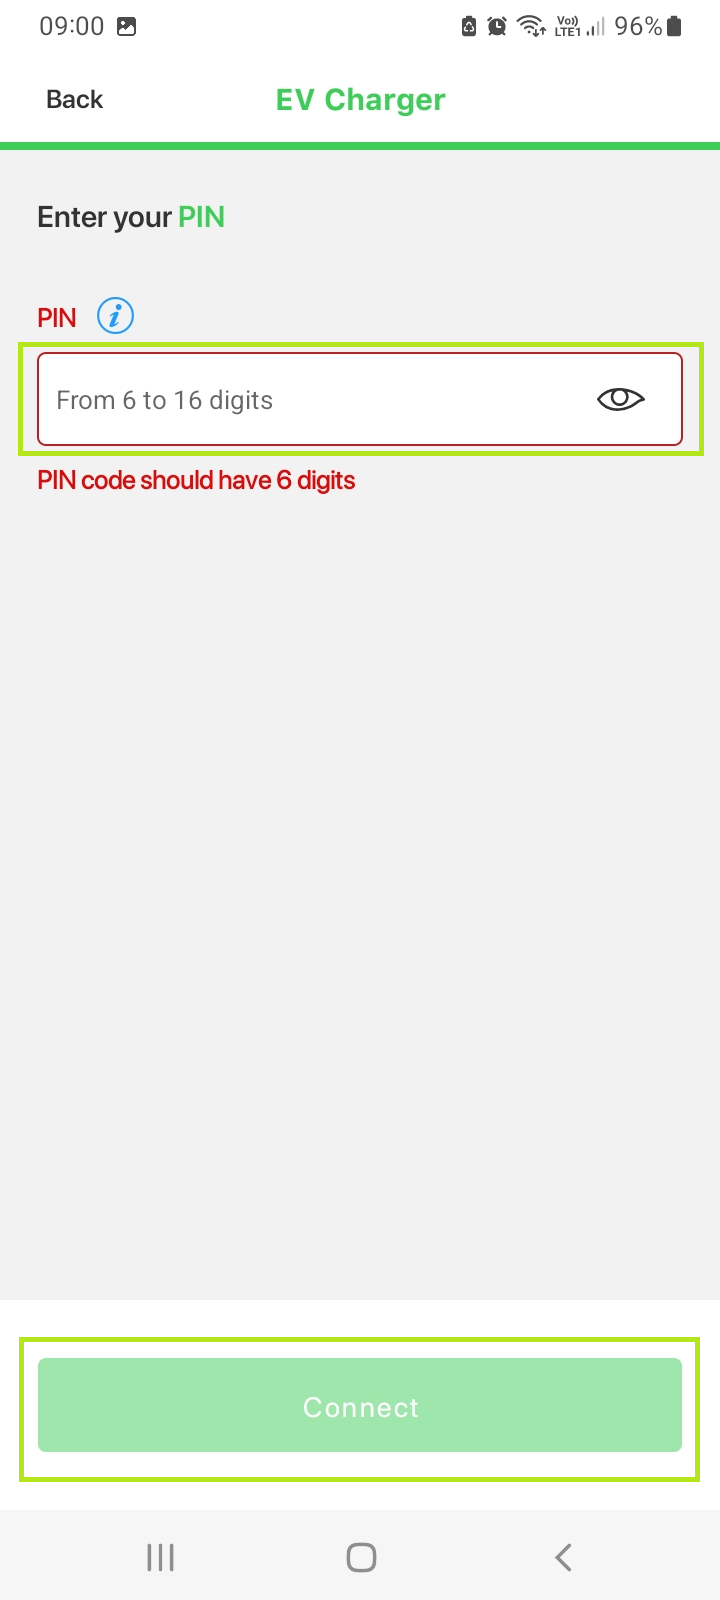
- Enter the newly created 6 digit pin and select Connect.
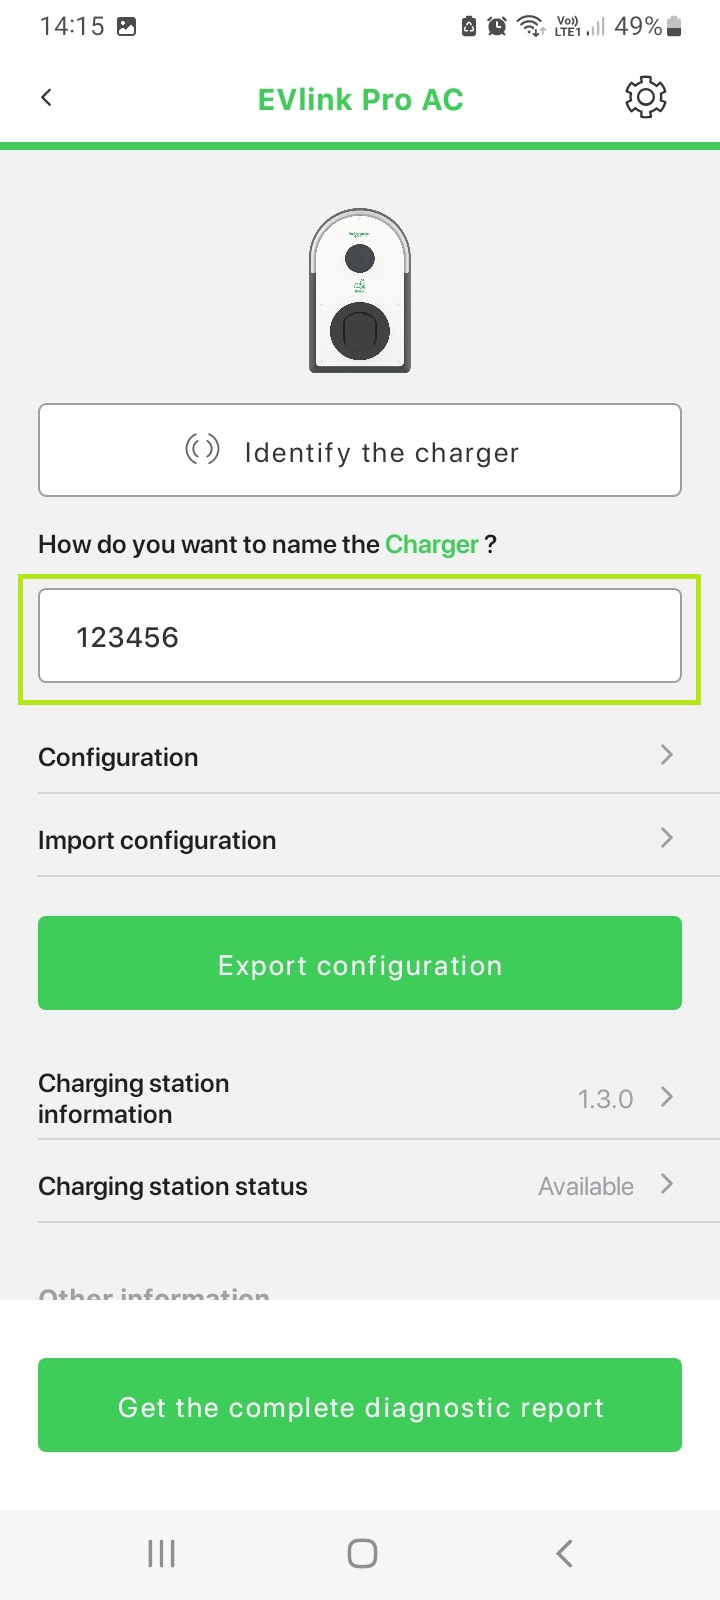
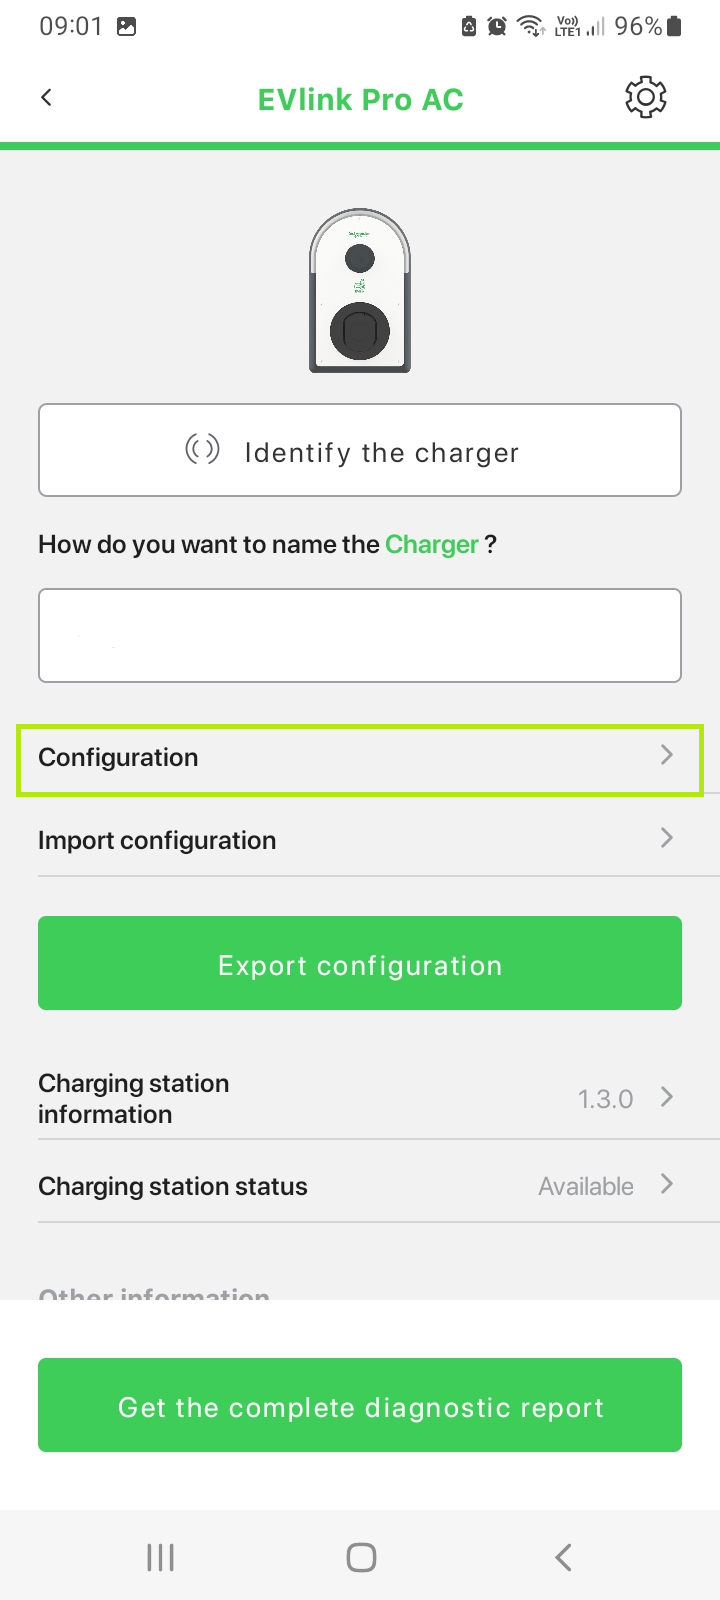
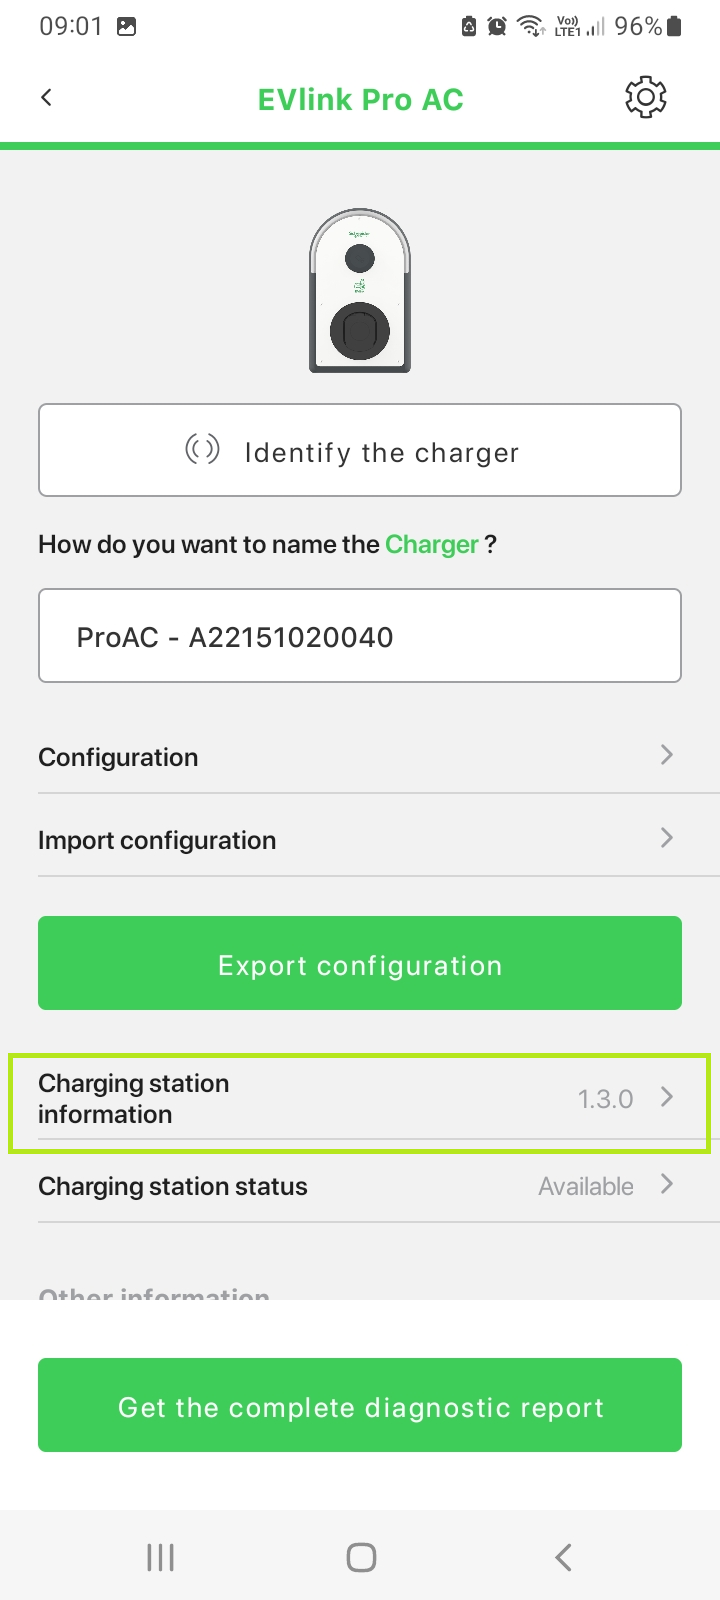
- Rename the charge point to the 6 digit Clenergy CPID number by selecting the box underneath How do you want to name the charger?
- On the home screen select Configuration to continue the onboarding process.
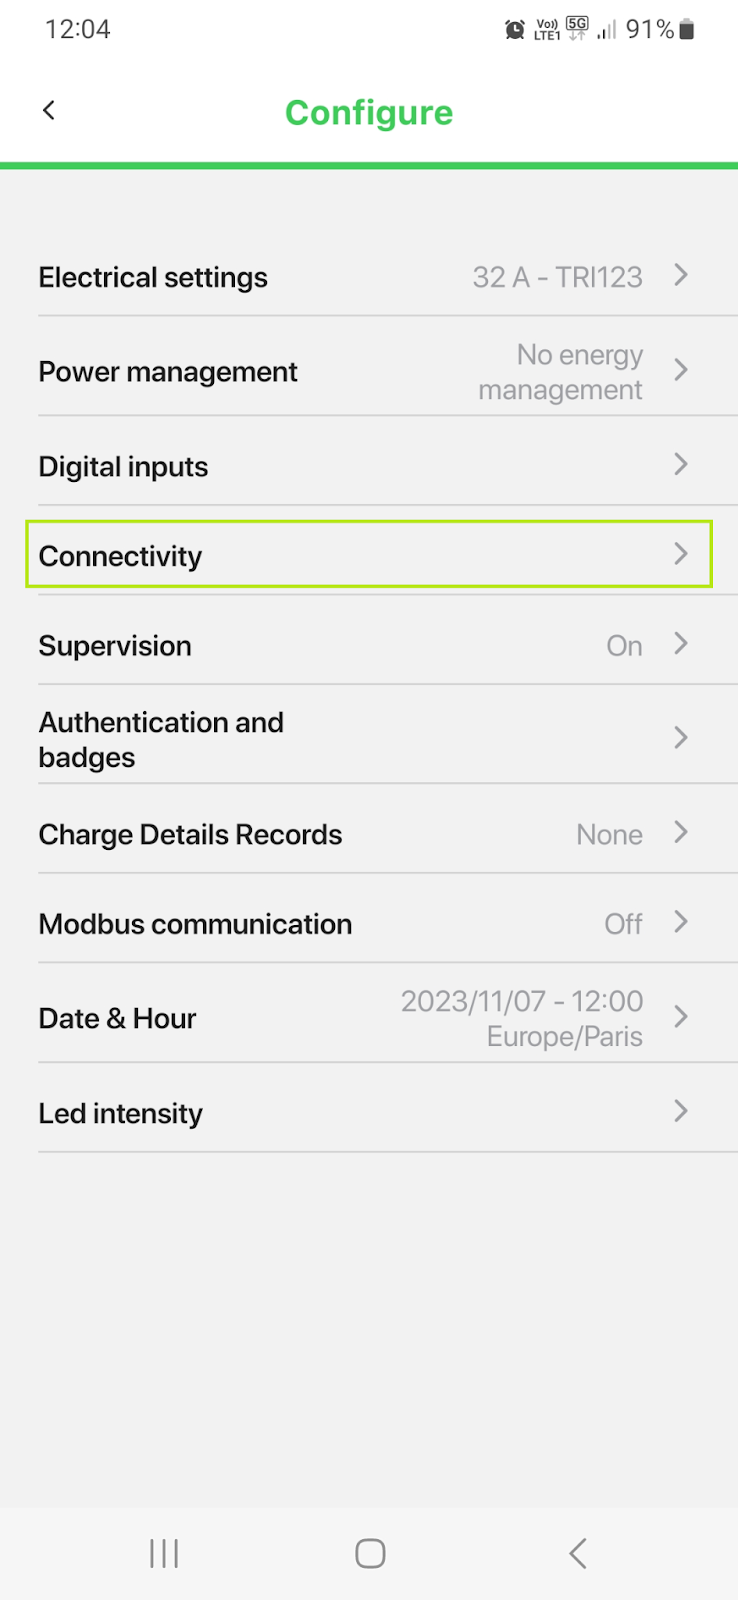
- Select Connectivity to establish a network connection relevant to your installation. If using the optional 3G/4G module, use the following credentials to allow a connection via SIM: APN - “eapn1.net”, User/Password - “clenergy”
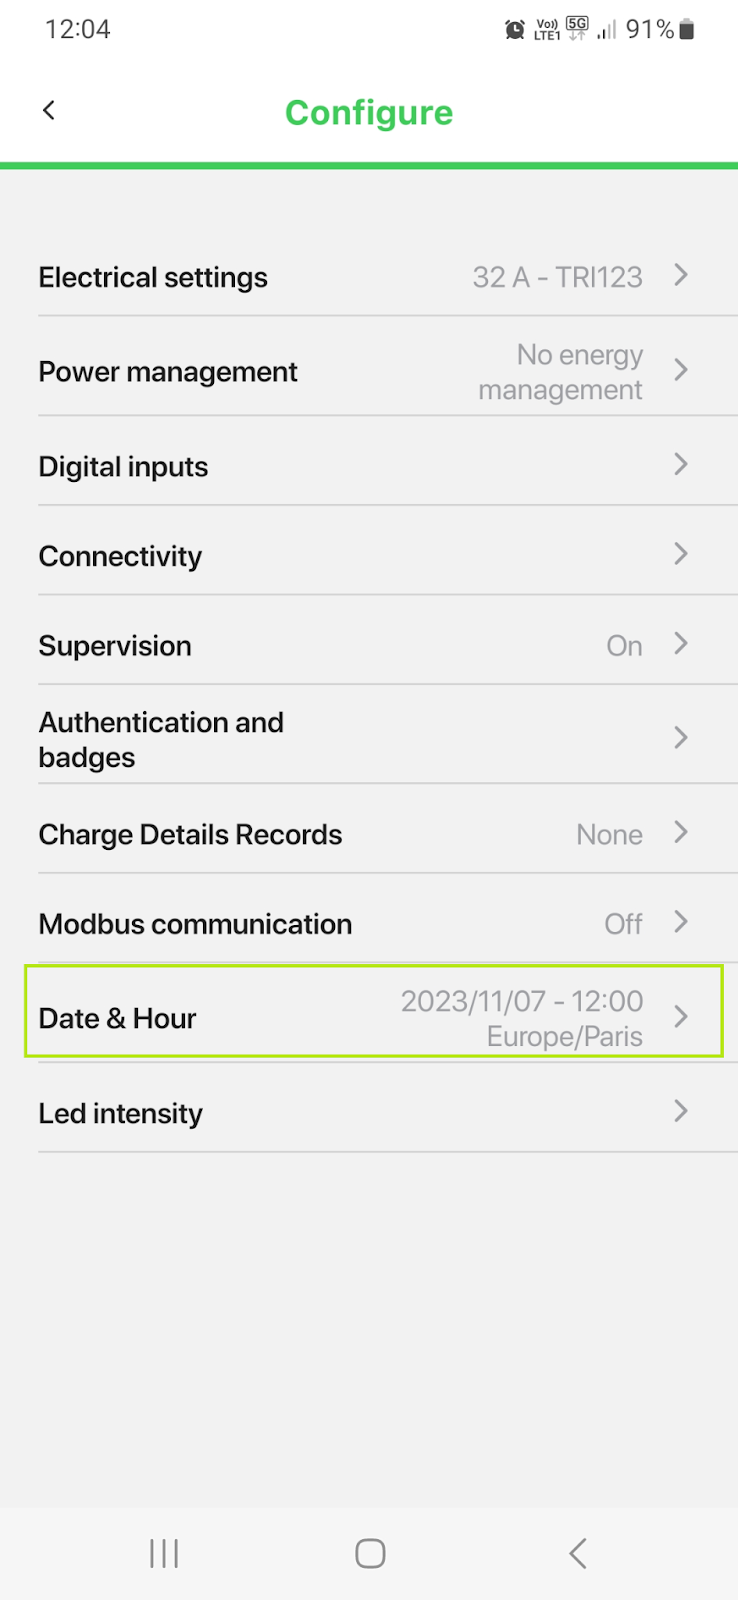
- Return to the Configure screen and select Date & Hour.
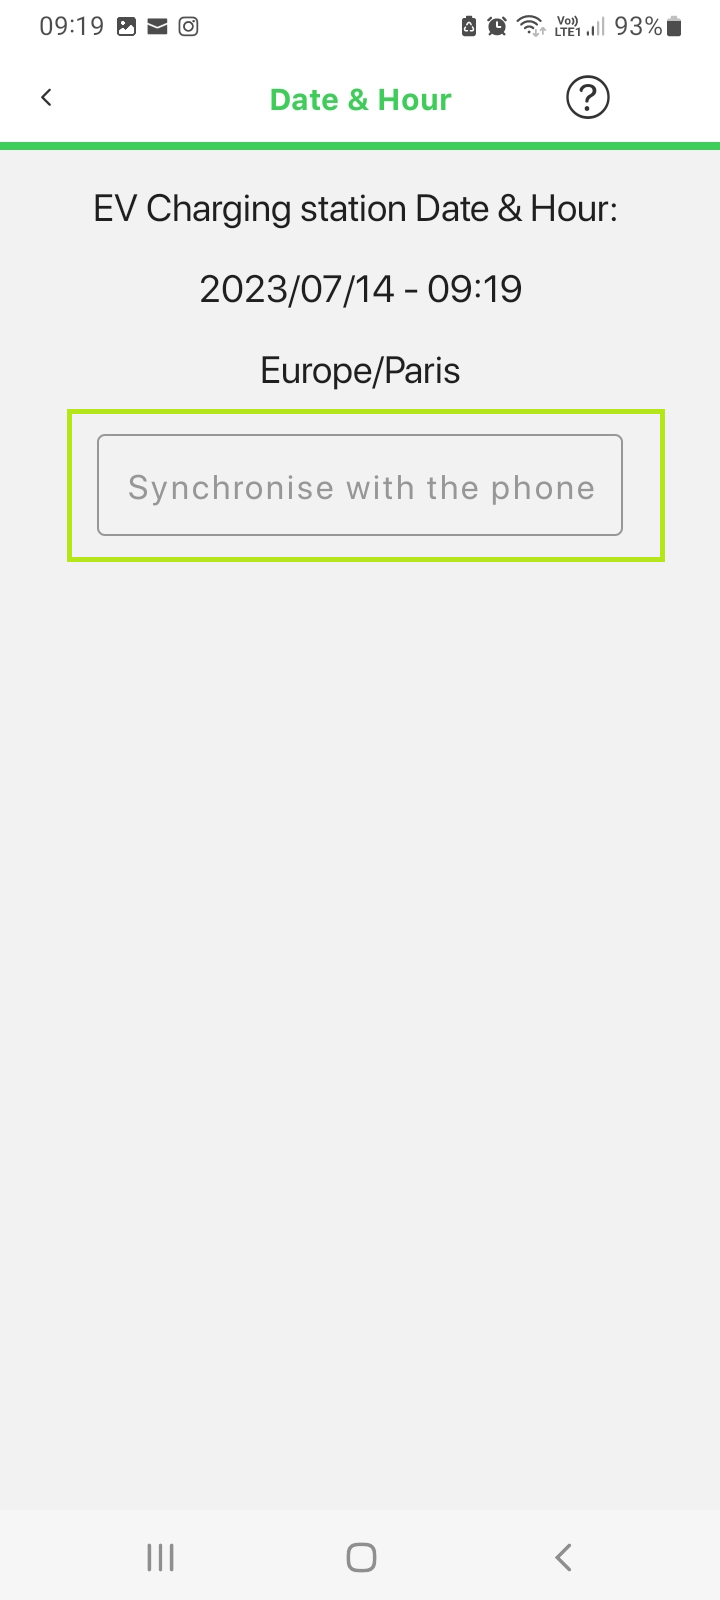
- Select Synchronise with the phone to set the correct date and time.
- Update the firmware if required. For detailed information regarding this process please refer to the following link: How to update EVlink Pro AC firmware with eSetup | Schneider Electric
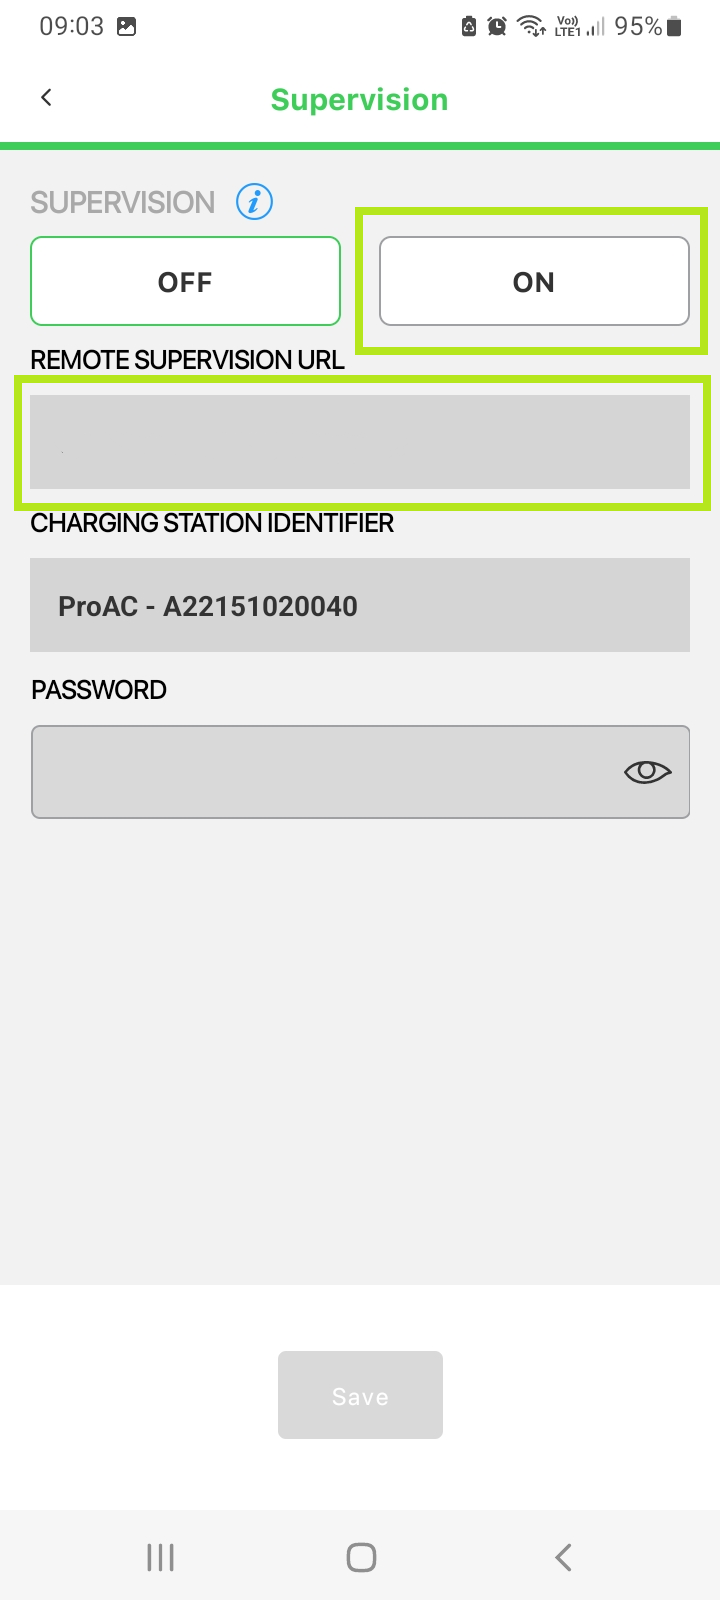
- Return to the Configure screen and select Supervision.
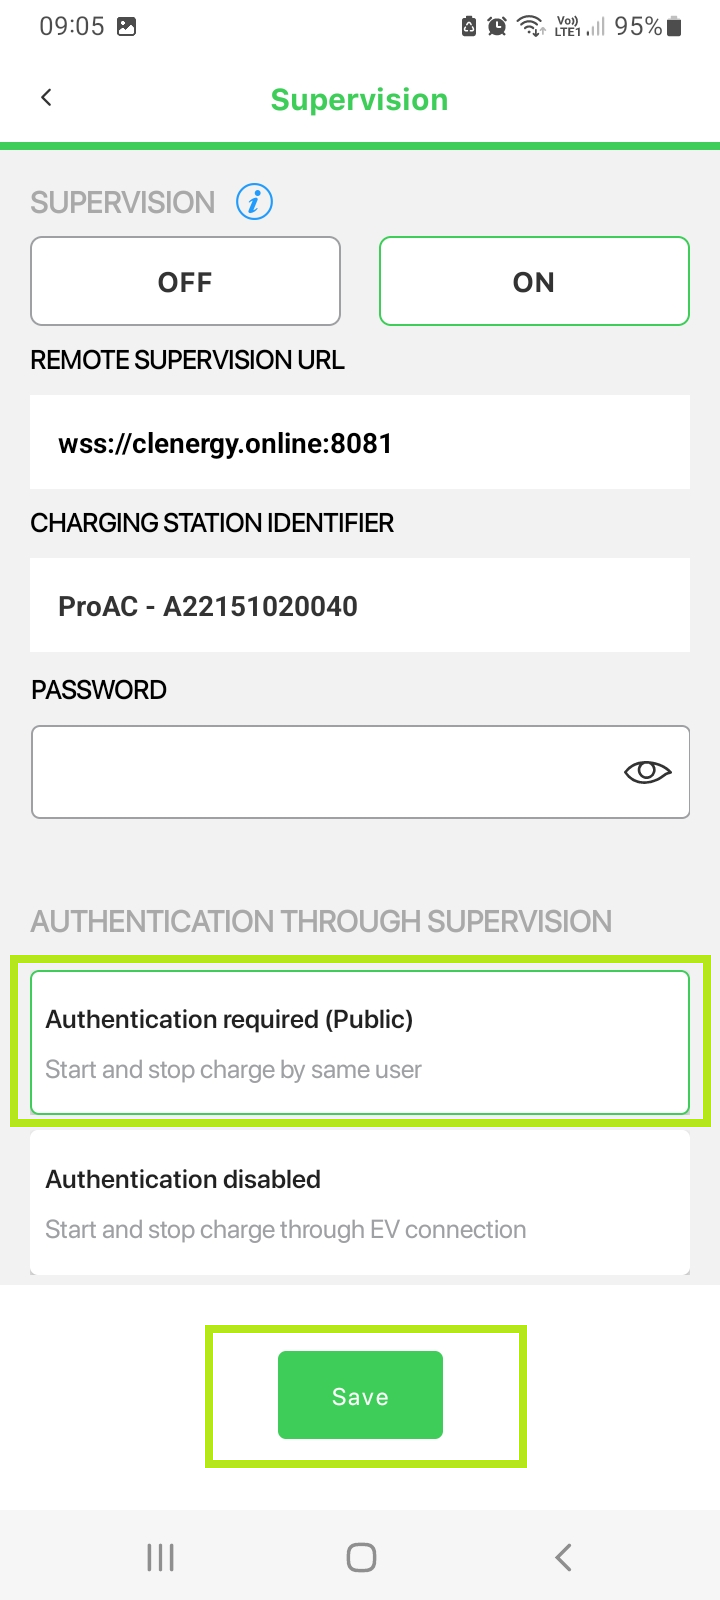
- Toggle Supervision on and enter the following into the Remote Supervision URL field: wss://clenergy.online:8081
- Select Authentication required (Public) and click Save.
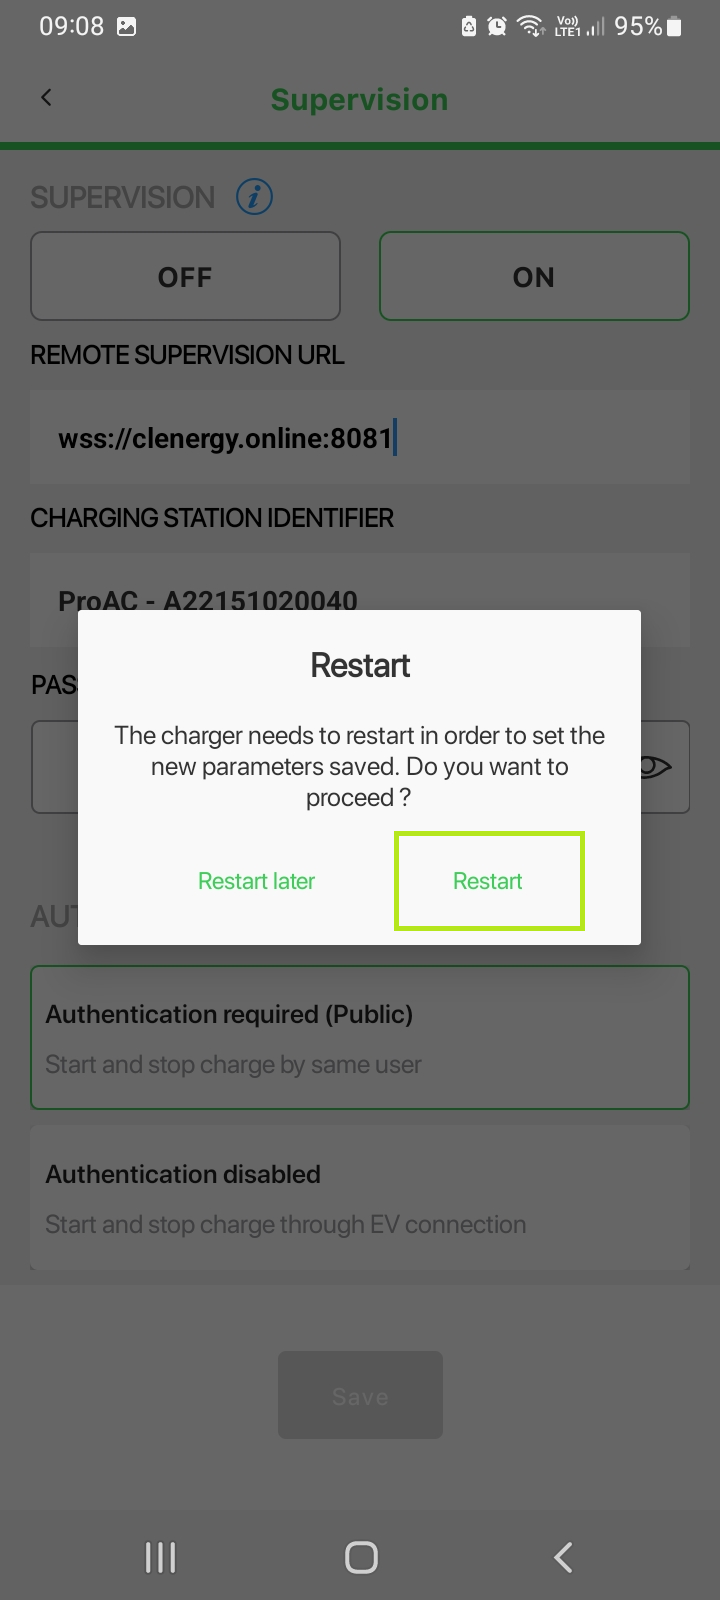
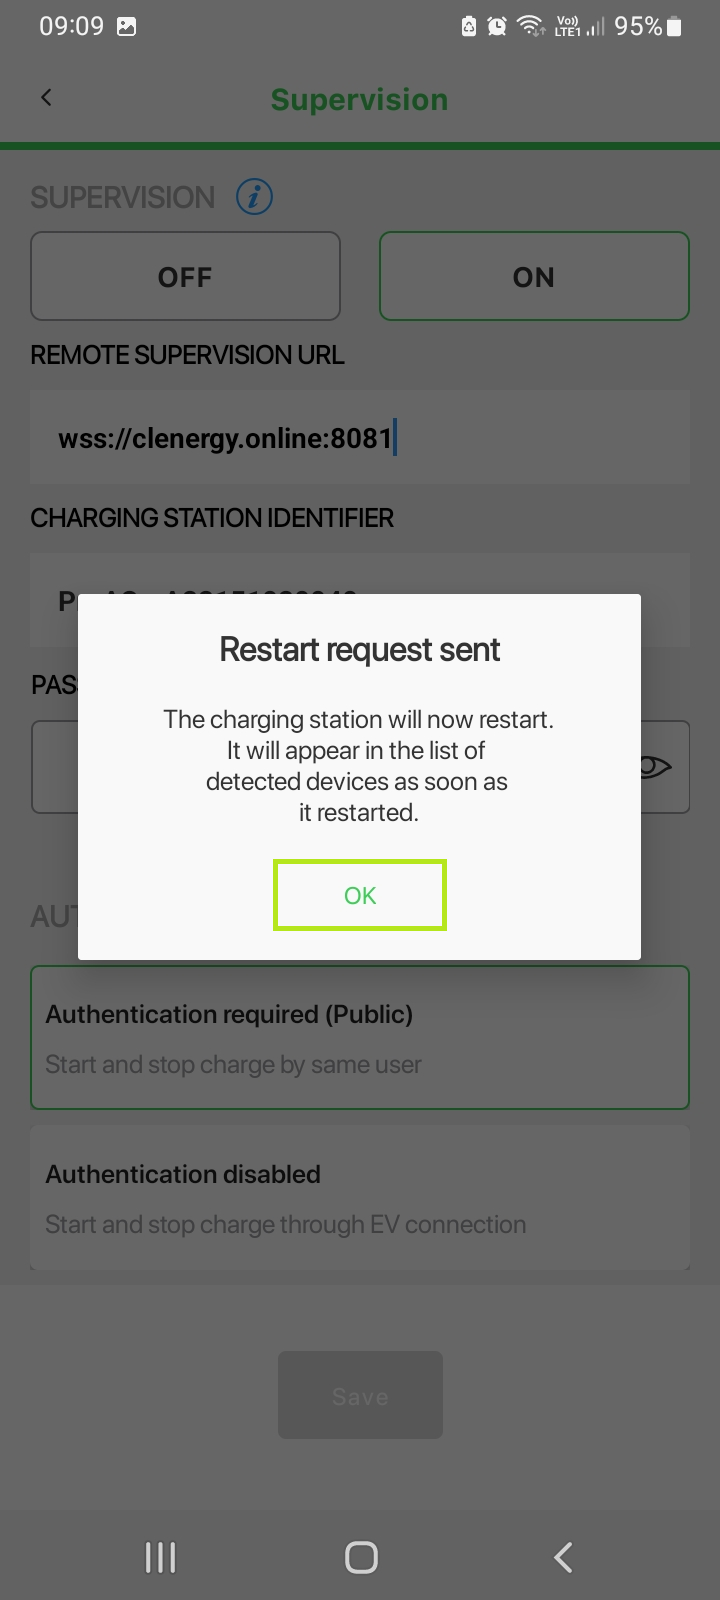
- When prompted, select Restart.
- When prompted, select OK to confirm the restart to complete the process.