📱 To download a mobile friendly version of this charger's onboarding guide in a PDF format, please click here.
- Download the Rolec EV Connect App for your device from the relevant app store.
-
Once downloaded and installed, open the Rolec EV Connect App and review and accept the privacy policy.
- When prompted, select the installer icon and then next to proceed.
- Please register as an installer if you haven’t already done so, and sign in to proceed.
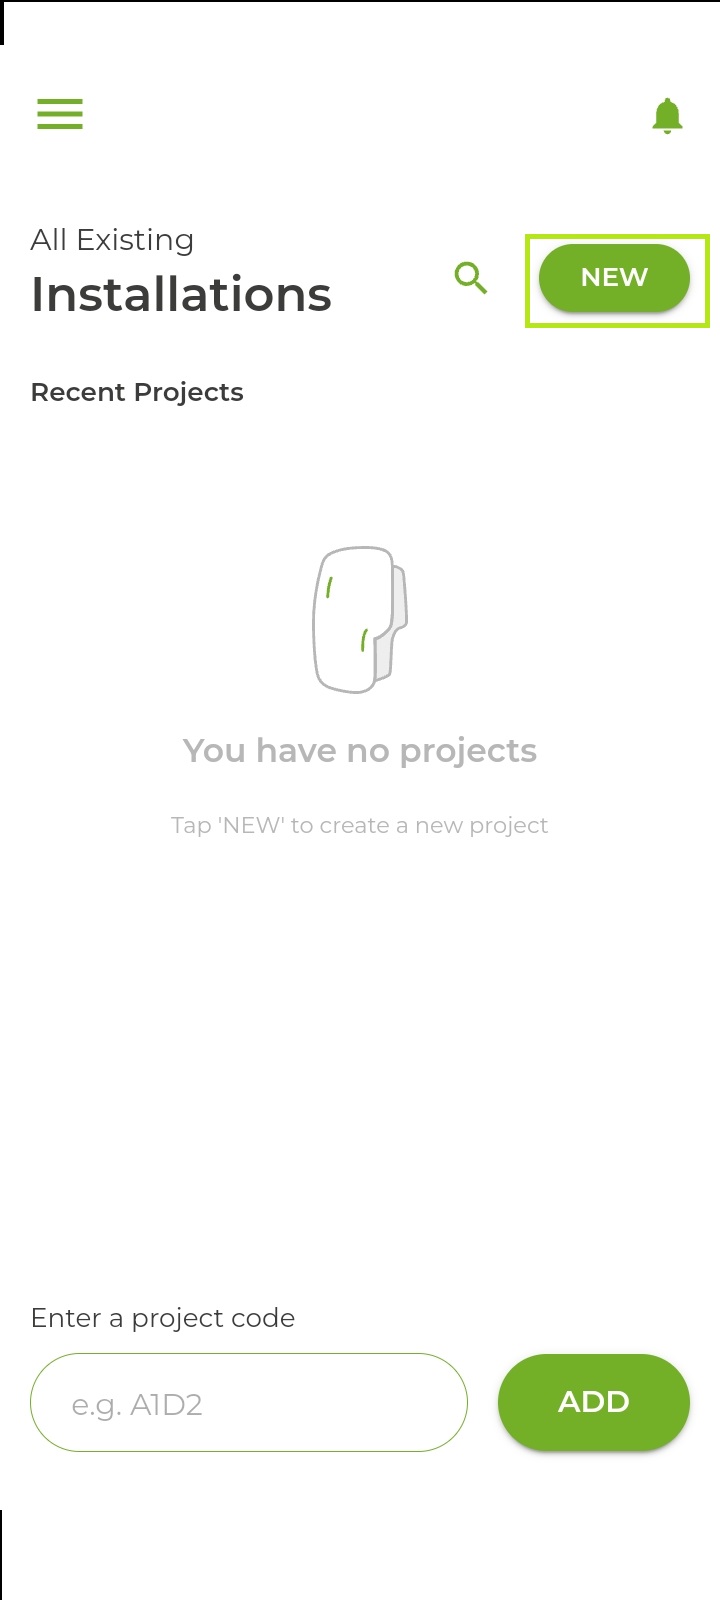
- Select New to add your installation to your projects.
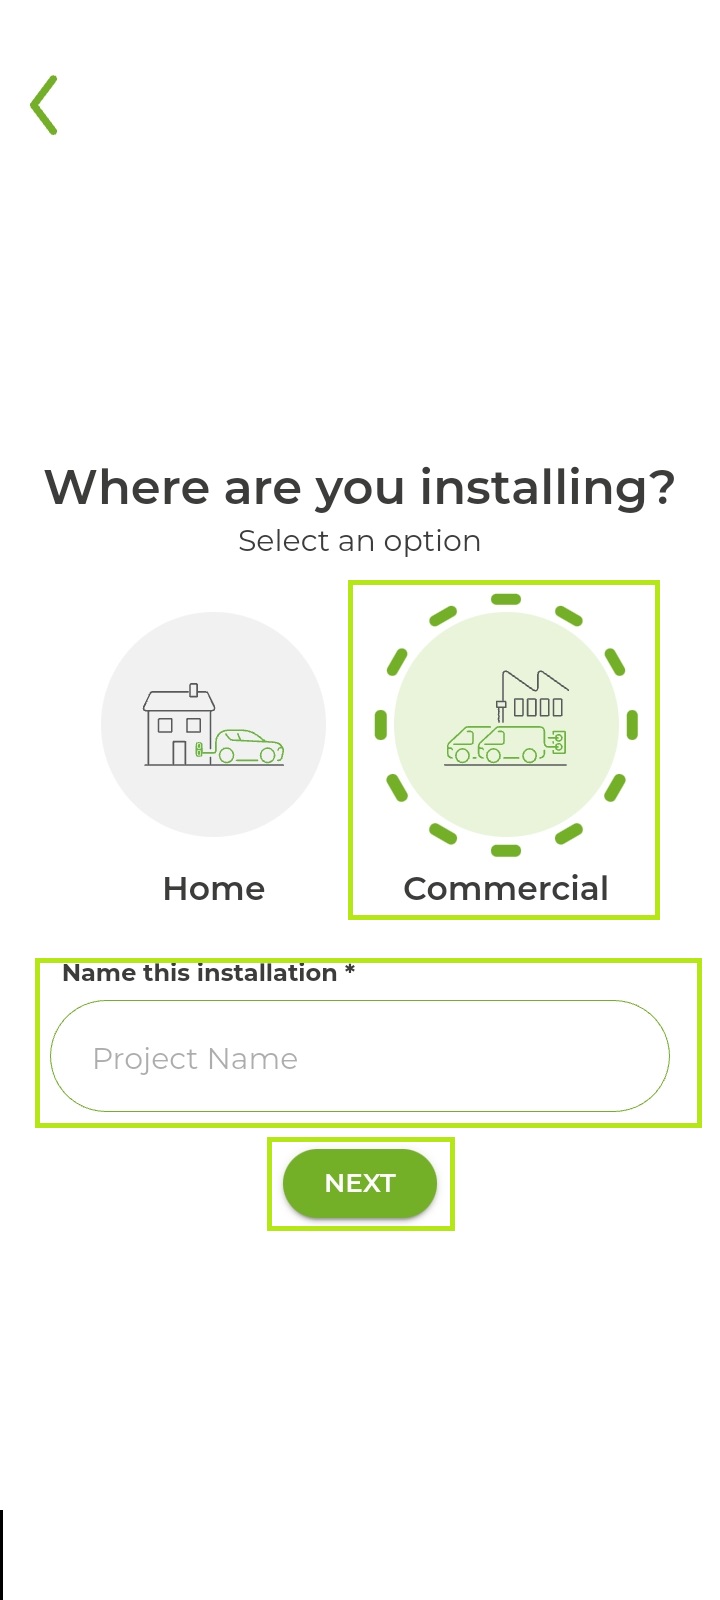
- Select and name the relevant installation option and then press Next to proceed.
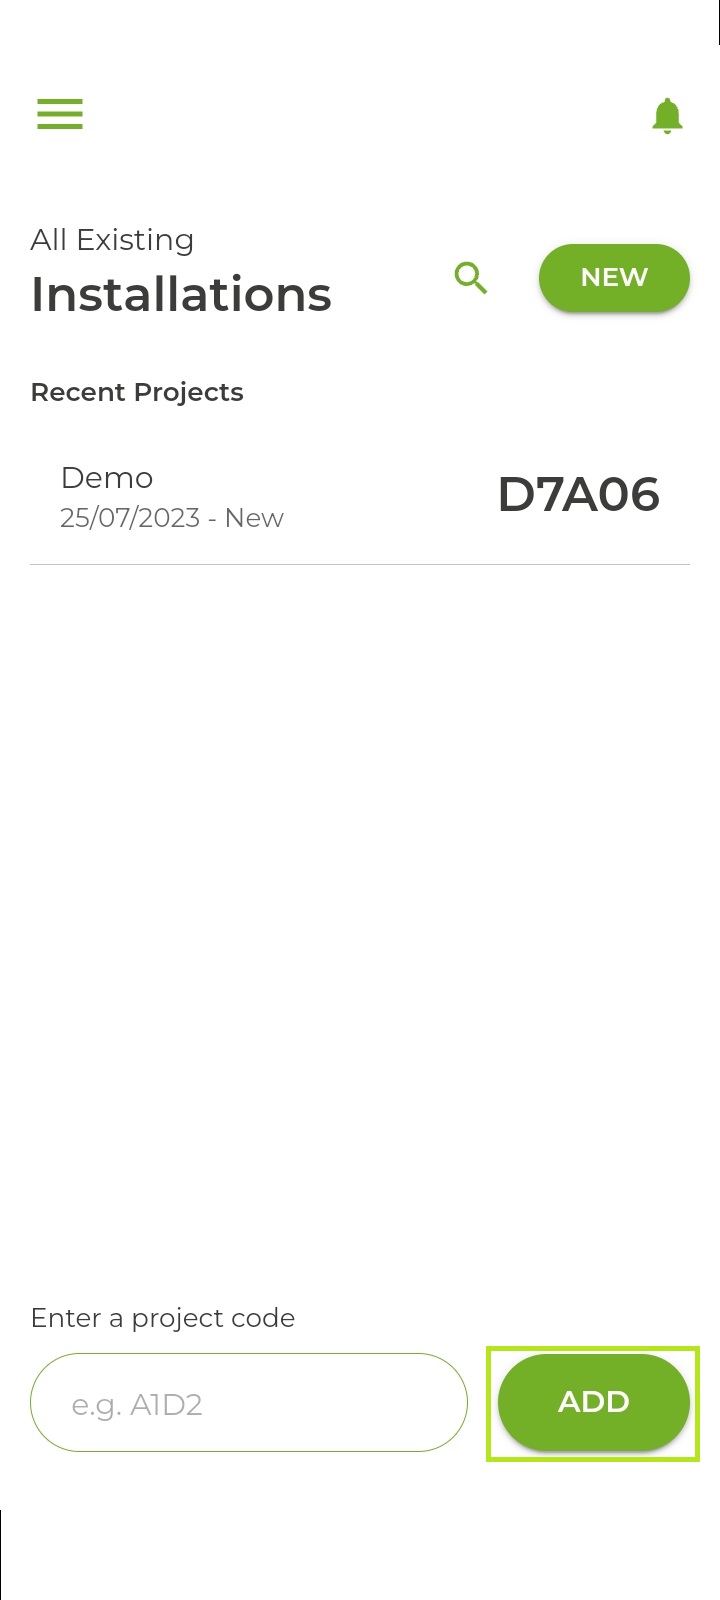
- Select Add to load your charger onto the installation.
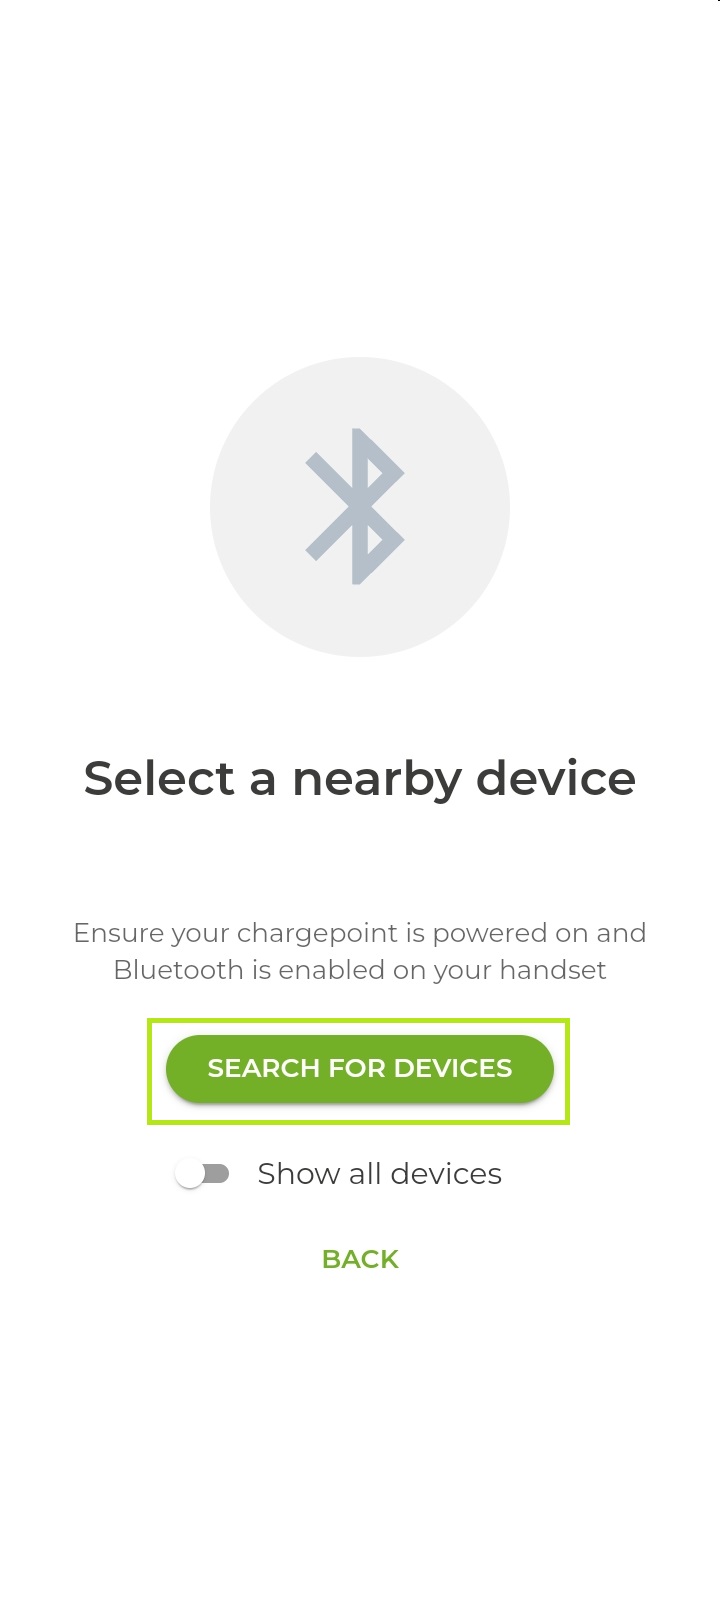
- Select Search for Devices to establish a Bluetooth connection to your device.
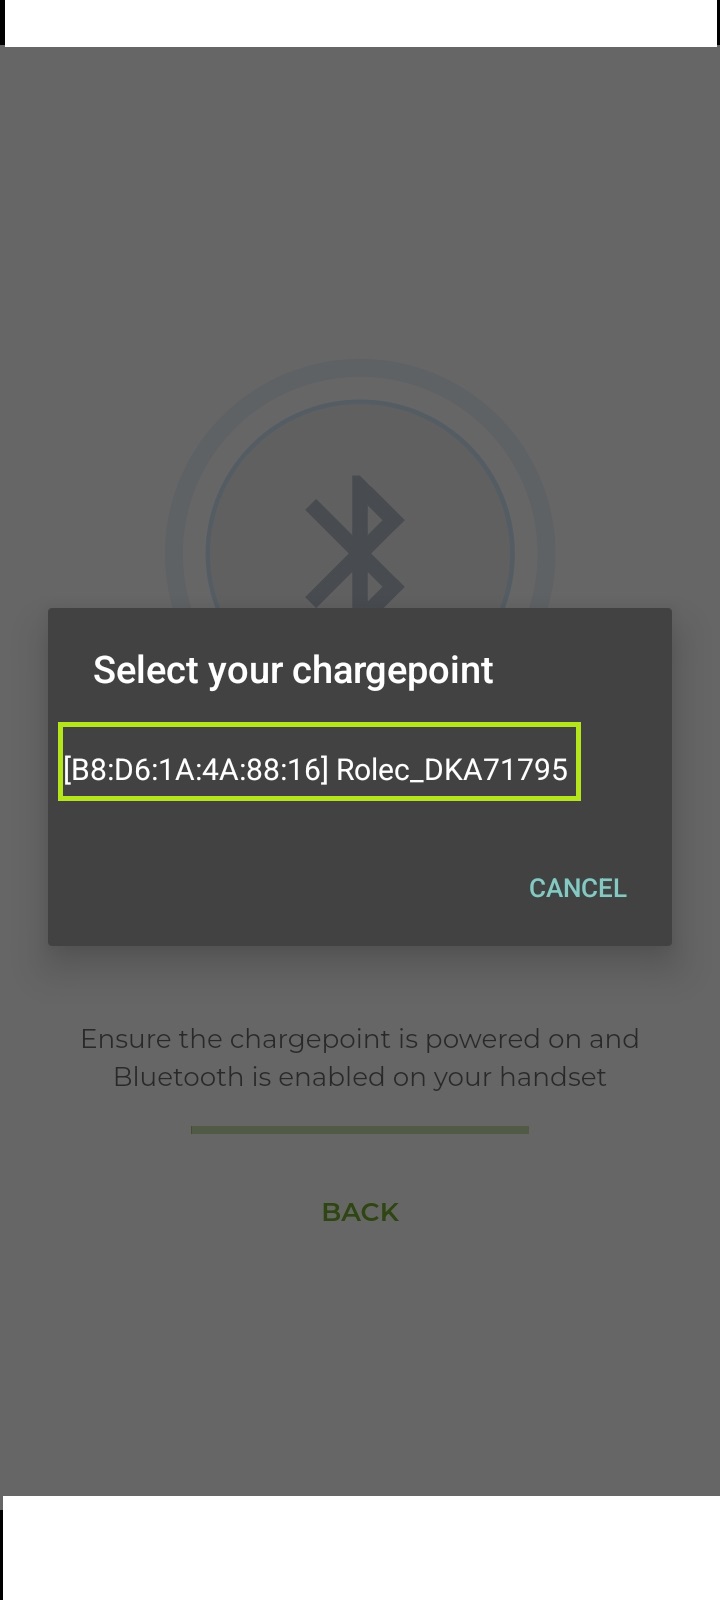
- Select the relevant charger to confirm connection with your device.
- Select your device to proceed with the onboarding process.
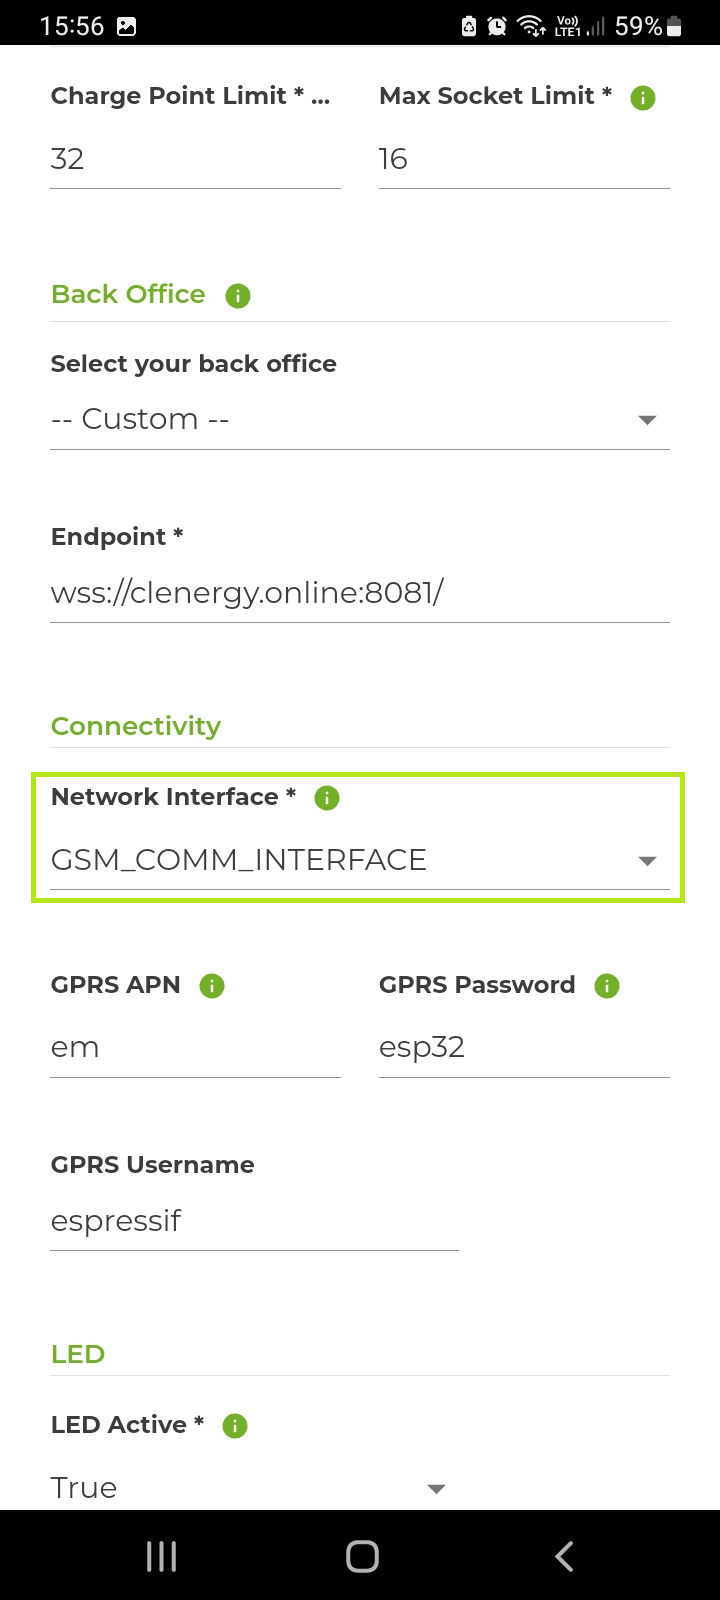
- Enter the charger serial number (located on the charger and/or the charger documentation) into the Charge Point ID field.
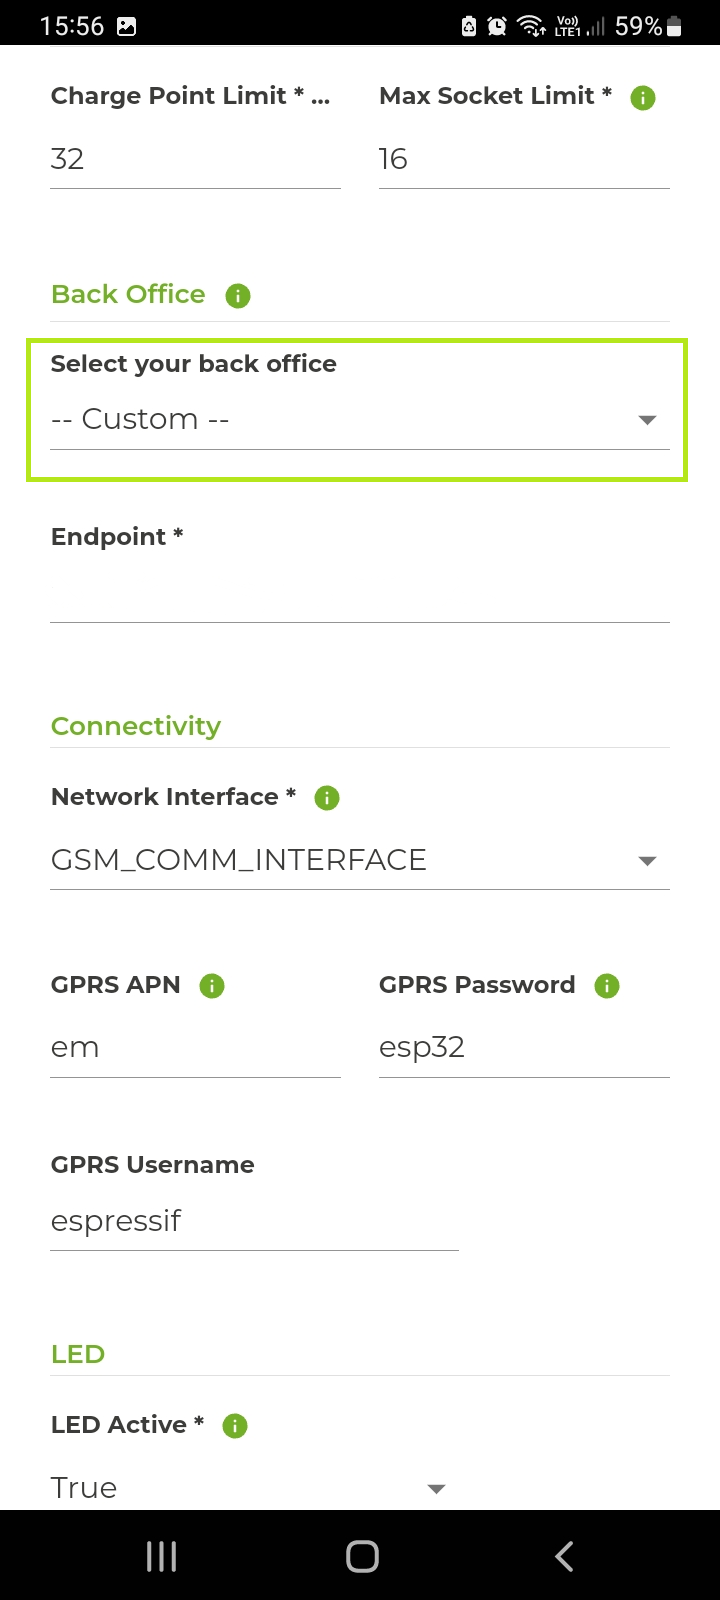
- Enter the Select your back office drop down menu.
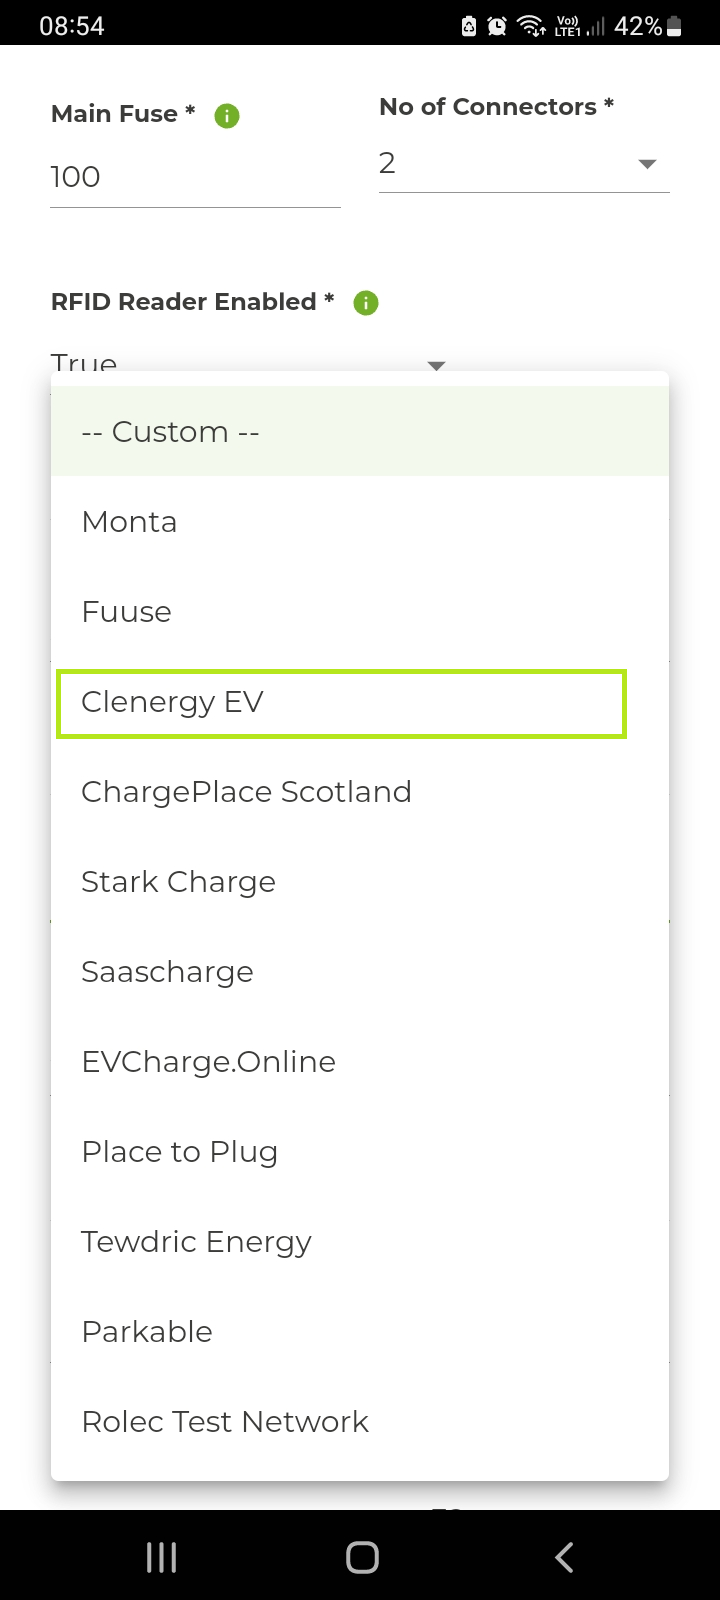
- Select Clenergy EV from the drop down menu.
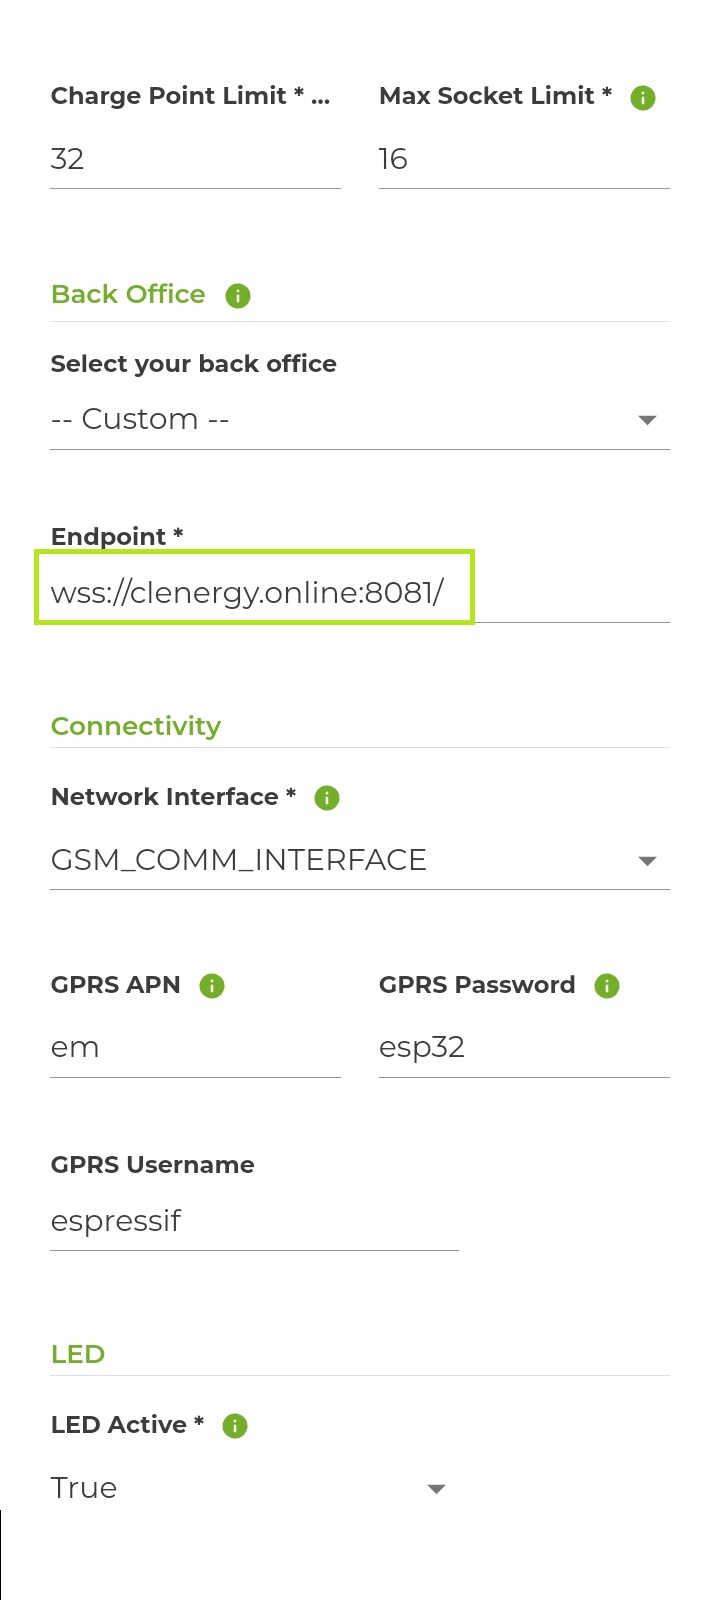
- The Endpoint field should now be pre-populated with the following URL: wss://clenergy.online:8081. If this is not the case, please enter the Clenergy URL manually.
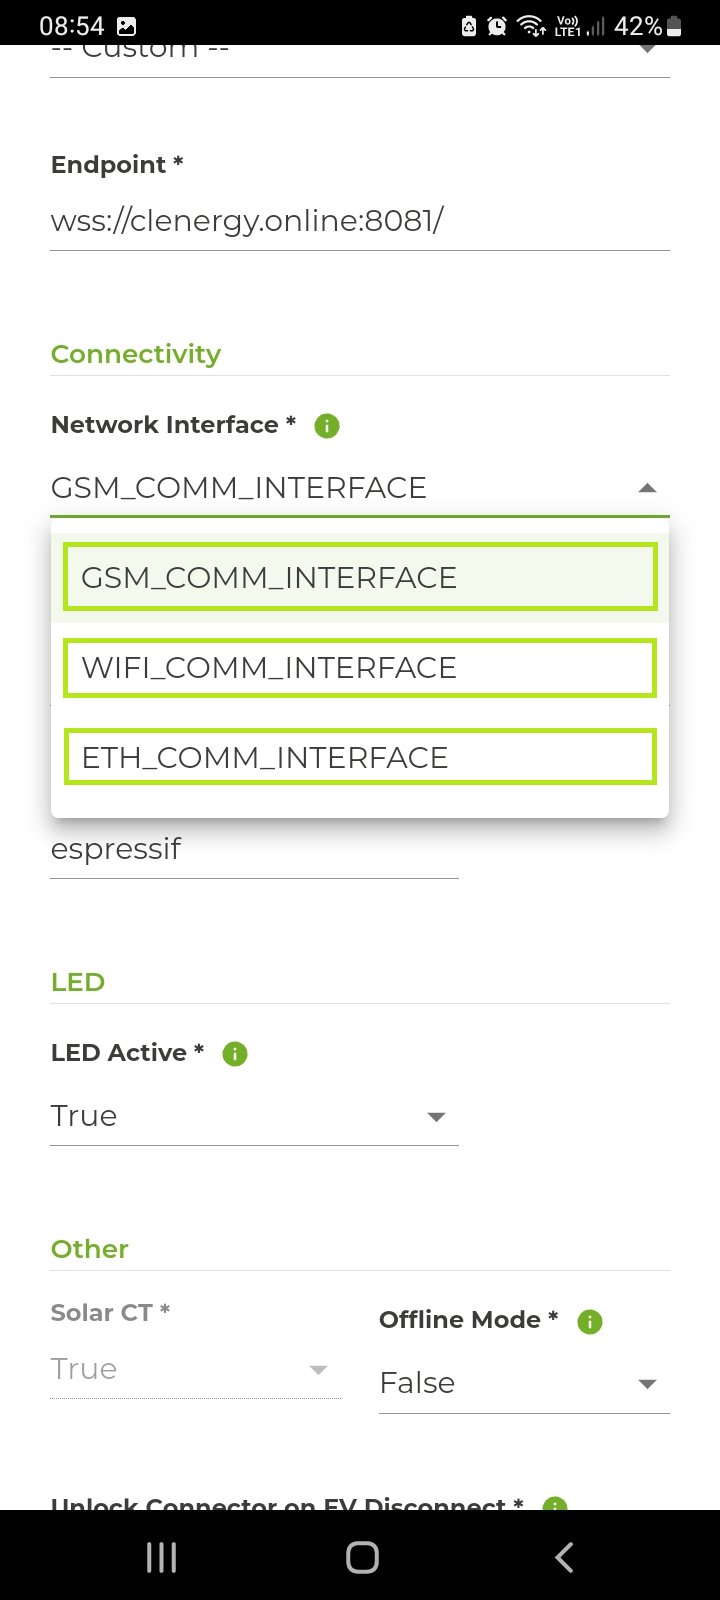
- Select the Network Interface drop down menu.
- Select the relevant option from the drop down menu for your installation. Please note: only one network connection type can be utilised at any one time.
Enter the relevant details into the GPRS and GPRS Password fields.
Please note: If using a Clenergy EV-supplied SIM card for the network connection please refer to the details below.
APN: eapn1.net
Password/Username: N/A
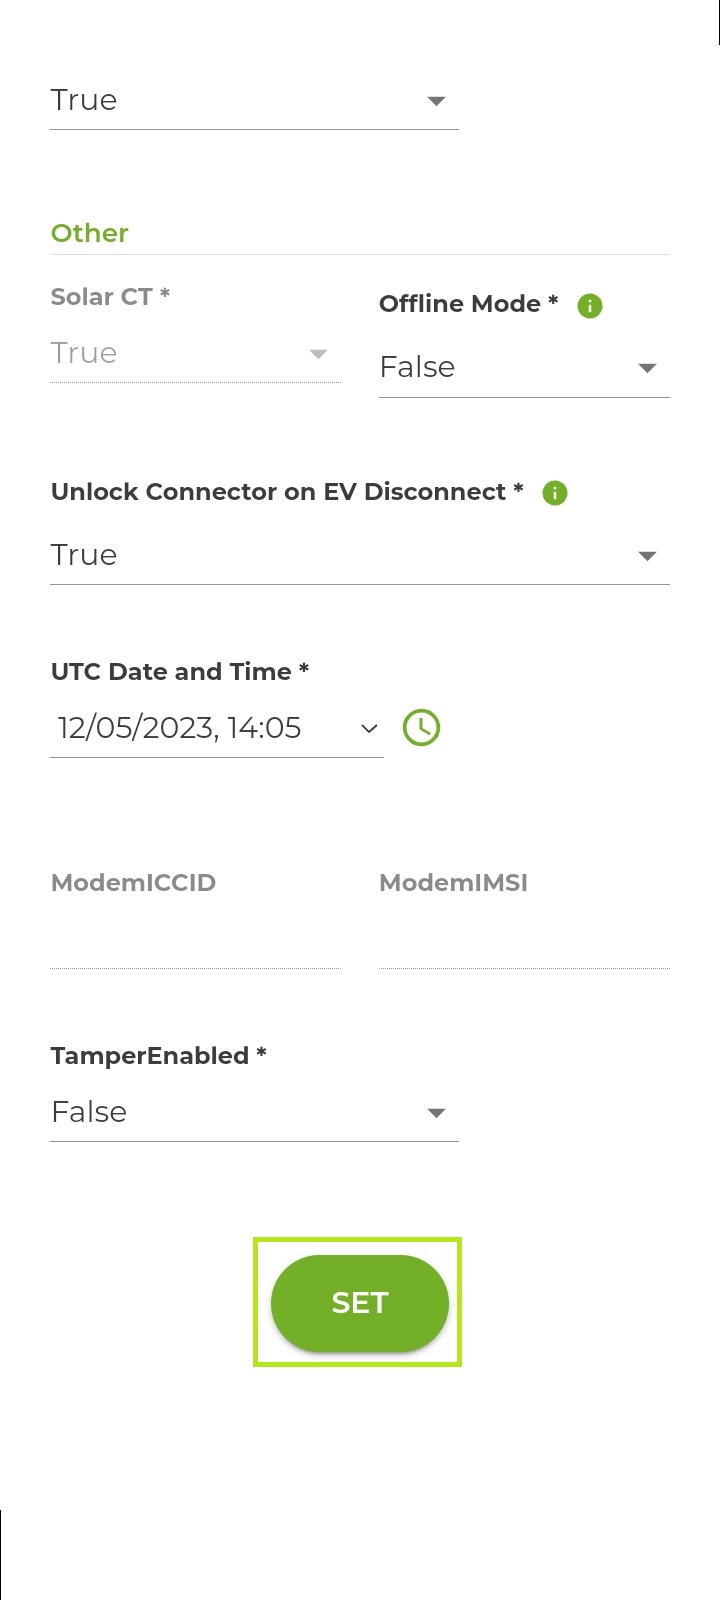
In the event a 3rd party SIM card is being used, please refer to the supplier or manufacturer for the correct details. - To complete the onboarding process, set the time and select Set at the bottom of the screen.